Build a waterproof shelter
Build a small waterproof shelter using a tarp, rope, and natural materials; test for leaks, practice knots, teamwork, and basic shelter design principles.


Step-by-step guide to build a waterproof shelter
How To Make A Waterproof Bushcraft Survival Shelter (with no tools)
Step 1
Pick a safe flat spot near two sturdy anchor points such as trees or posts.
Step 2
Decide who will do each job like holding rope collecting materials or checking for safety.
Step 3
Gather the tarp the rope and the branches leaves and moss and bring everything to your chosen spot.
Step 4
Clear the ground by removing sharp rocks and sticks and smooth a small area for your shelter.
Step 5
Practice two knots the clove hitch and the square knot until you can tie them steadily.
Step 6
Tie a strong ridge line between the two anchor points at about chest height using a clove hitch.
Step 7
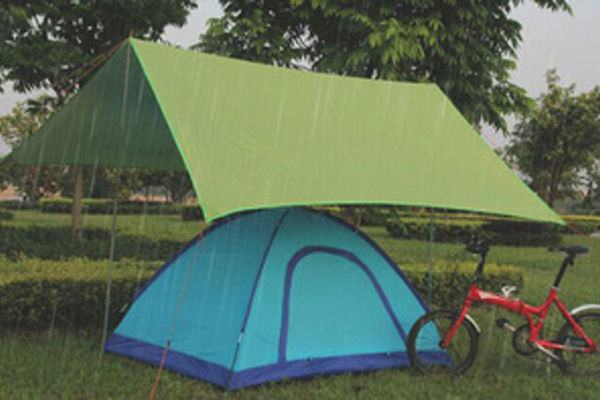
Drape the tarp over the ridge line to create an A-frame or lean-to shape.
Step 8
Anchor the tarp edges by placing rocks or heavy sticks along the bottom edges.
Step 9
Tie extra guy lines from the tarp corners to ground anchors to pull the tarp tight.
Step 10
Pile branches against the outside of the tarp to form wind-blocking walls.
Step 11
Stuff leaves and moss into gaps in the branch wall to help stop drafts and water.
Step 12
Spread a thick layer of leaves inside the shelter to make a dry insulating bed.
Step 13
Pour water over the top of the tarp and watch inside for any drips to test for leaks.
Step 14
Fix any leaks by repositioning tarp anchors or adding more branch and leaf coverage.
Step 15
Share a photo or description of your finished waterproof shelter on DIY.org
Help!?
What can we use instead of a tarp, rope, or certain natural materials if we don't have them?
If you don't have a tarp use a heavy-duty plastic sheet, garbage bags, or an emergency space blanket, and replace rope with paracord or twisted strips of fabric while sturdy sticks can stand in for branches and packed leaves or moss can substitute where needed.
What should we do if the ridge line sags or the tarp leaks during the water test?
If the ridge line sags or you see drips during the 'Pour water over the top' test, retighten or re-tie the clove hitch, add extra guy lines and ground anchors, and secure more rocks and branch-and-leaf coverage over the leaking edges.
How can we adapt this shelter activity for different ages?
Give preschoolers safe jobs like collecting leaves and stuffing moss into gaps, let 7–10 year-olds practice the clove hitch and square knot and anchor the tarp edges with rocks, and have 11+ kids build the full ridge line, drape the tarp and perform the leak test with supervision.
How can we extend or personalize the shelter after finishing the basic build?
After you 'Pile branches' and 'Stuff leaves and moss,' improve the shelter by adding a ground tarp or thick leaf bed, digging a small drainage trench, creating a tarp door flap with extra guy lines, and decorating the outside with natural materials before sharing a photo on DIY.org.
Watch videos on how to build a waterproof shelter
Bushcraft for kids: How to build a mini shelter AT HOME
4 Videos
Bushcraft for kids: How to build a mini shelter AT HOME
Secret to Successful Outdoor Survival: Unique and Simple Shelter Made from Ultralight Materials.
Building 5 Survival Shelters | Full Camp from Start to Finish
Tarp Tent Tutorial So easy, even kids can do it!
Facts about wilderness shelter building
🏕️ Tarpaulins (tarps) are waterproof sheets once made from canvas treated with tar — that's where the name comes from.
🪢 There are hundreds of knots, but three shelter superstars are the square knot, clove hitch, and taut-line hitch.
🌧️ You can test a tarp shelter for leaks at home with a spray bottle before trusting it in real rain.
🤝 Teamwork speeds things up: two people can often pitch a simple tarp shelter in under 10 minutes when they coordinate.
🌿 Natural materials like branches, leaves, and moss make great insulation and help keep a tarp shelter warmer and drier.
How do I build a small waterproof shelter using a tarp, rope, and natural materials?
What materials do I need to build a waterproof shelter with a tarp and rope?
What ages is building a tarp shelter suitable for?
What safety tips should I follow when building a tarp shelter with kids?
