Join a corner
Make a corner bookmark by folding and gluing paper corners, then decorate it to practice measuring, cutting, and simple geometry skills.


Step-by-step guide to make a corner bookmark
How to Sew: The Blanket Stitch | Hand Sewing Tutorial for Beginners | Corner Stitching
Step 1
Use the ruler and pencil to draw a 10 cm square (or about 4 inches) on your paper.
Step 2
Cut out the square along the pencil lines with your scissors.
Step 3
Fold the square diagonally corner to corner to make a triangle and press the crease flat.
Step 4
With the triangle point facing up fold the top single-layer tip down about one-third of the way toward the base and crease.
Step 5
Fold the right corner of the triangle up so its tip lines up with the top of the folded flap and crease.
Step 6
Tuck the right corner tip under the folded flap so it stays in place.
Step 7
Fold the left corner of the triangle up so its tip matches the right corner near the top flap and crease.
Step 8
Tuck the left corner under the folded flap so both flaps form a little pocket.
Step 9
Apply a small dot of glue inside the pocket where the flaps meet to hold everything securely.
Step 10
Decorate the front of your corner bookmark with colouring materials and stickers however you like.
Step 11
Take a picture of your finished corner bookmark and share it on DIY.org.
Help!?
What can we use if we don't have a ruler or scissors for drawing and cutting the 10 cm square?
If you don't have a ruler, print a 10 cm square template from the internet and if you don't have scissors ask an adult to cut along the pencil lines or use child-safe scissors for step 2.
My corner tips won't stay tucked under the flap — how can I fix the pocket so it holds before gluing?
If the tips won't tuck in during steps 5–8, reopen the triangle, sharpen and re-crease the top flap about one-third down so the tips sit shorter, tuck both corners under the flap again, and then secure with the small dot of glue inside the pocket in step 9.
How should we change the activity for younger or older kids?
For younger children, pre-cut the 10 cm square and pre-crease the diagonal so they can practice folding and tucking with help applying the glue in step 9, while older kids can measure and cut themselves, use patterned paper, and add more detailed decorations in step 10.
What are simple ways to personalize or make the corner bookmark more durable and special?
To personalize and strengthen the bookmark, use patterned origami paper or cardstock for the 10 cm square, add stickers or a small button on the front in step 10, and laminate or cover it with clear tape before taking a photo to share on DIY.org in step 11.
Watch videos on how to make a corner bookmark
How To: Sew Corners (Sewing for Beginners)
4 Videos

How To: Sew Corners (Sewing for Beginners)
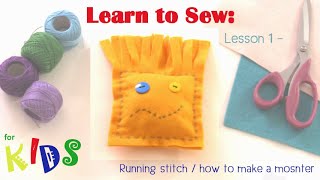
Learn to Sew with Debbie Shore, Kids! Lesson 1
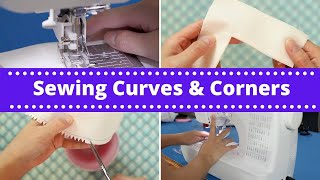
How to Sew Curves + Corners on a Sewing Machine | Beginner Lesson

Learn How to Sew a Quick and Easy Homemade Corner Fabric Bookmark
Facts about paper crafts and basic geometry
📐 A corner bookmark is a right triangle — a sneaky way to practice angles and triangle shapes!
✂️ You can fold a classic corner bookmark from a single square of paper without glue — that's origami magic!
📏 Measuring and cutting for bookmarks teaches real ruler skills: straight lines, mm vs cm, and steady hands.
🎨 A tiny bookmark is a mini art project — stickers, markers, and washi tape turn function into fun.
📚 Librarians prefer bookmarks: folding page corners (dog-earing) can weaken paper and damage books over time.
How do I make a corner bookmark with my child?
What materials do I need to make a corner bookmark?
What ages is making corner bookmarks suitable for?
What are the benefits and fun variations of making corner bookmarks?
