Sand a wood project
Sand a small wooden project using sandpaper and a sanding block. Learn safe techniques, smooth surfaces, and prepare wood for painting.


Step-by-step guide to sand a small wooden project
100+ Easy Pallet Wood Projects For You To Try At Home
Step 1
Put on your dust mask and safety goggles to protect your nose and eyes.
Step 2
Ask an adult to help secure the wooden project on a stable table or in a clamp so it won't move.
Step 3
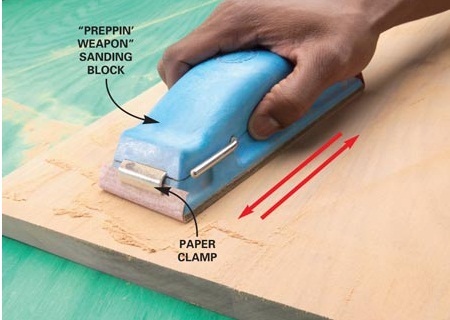
Wrap a sheet of coarse sandpaper around the sanding block so it is snug and ready to use.
Step 4
Sand the flat surfaces with the coarse grit using long even strokes that follow the wood grain.
Step 5
Sand the edges and corners gently by hand with the coarse sandpaper to remove splinters.
Step 6
Take off the coarse sandpaper and put medium grit sandpaper on the sanding block.
Step 7
Sand the whole piece with the medium grit using the sanding block and strokes along the grain to smooth scratches left by the coarse grit.
Step 8
Replace the medium grit with fine grit sandpaper on the sanding block.
Step 9
Sand the entire surface with the fine grit to create a smooth finish ready for paint.
Step 10
Gently run your fingertips over the wood to feel for any remaining rough spots.
Step 11
Sand any rough spots you found using the fine grit until they feel smooth.
Step 12
Wipe all dust off the wood with the cloth or small brush so the surface is clean for painting.
Step 13
Take a photo and share your finished sanded wood project on DIY.org.
Help!?
What can we use if we don't have a sanding block, dust mask, or a specific grit of sandpaper?
Wrap sandpaper snugly around a flat scrap of wood or a thick book as a homemade sanding block, wear a tightly woven cloth mask and safety glasses if a dust mask or goggles are unavailable, and if you lack a specific grit follow the instructions by starting with the coarsest grit you have then move to the medium and fine grits.
My wood still feels rough after the fine grit—what might have gone wrong and how do I fix it?
Make sure the piece was secured with an adult's help in a clamp or on a stable table, resand the rough spot with long even strokes along the grain using the fine grit, check with your fingertips, and wipe dust away with the cloth or small brush before repeating if needed.
How can we adapt the sanding steps for younger children or older kids?
For younger children have an adult clamp the wood and let them sand edges gently by hand with coarse then fine sandpaper while supervising, and for older kids allow independent clamping, full progression through coarse–medium–fine grits, or introduction of a power sander under supervision.
What are simple ways to extend or personalize the sanded wood project after finishing the sanding steps?
After feeling the surface smooth and wiping away dust with the cloth or brush, personalize the piece by painting, staining, adding stickers or woodburned designs, then take a photo and share the finished project on DIY.org as instructed.
Watch videos on how to sand a small wooden project
67 AMAZING Wood DIY Crafts You Will LOVE
4 Videos

67 AMAZING Wood DIY Crafts You Will LOVE

How to Build a Wooden Kid's Play Table | YellaWood
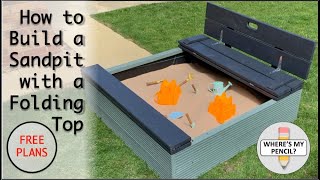
How to Build a Sandpit With a Folding Top - Free Plans
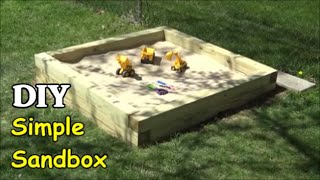
How to Build a Simple Sandbox - DIY
Facts about woodworking for kids
🪵 Sanding removes tiny layers of wood—use different grits to shape, smooth, or prep for paint.
🪚 A sanding block helps keep pressure even so you don't accidentally carve grooves or rounded edges.
🎨 Sanding before painting or between coats makes finishes stick better and look much smoother.
😷 Wood dust can irritate lungs and eyes—wear a dust mask and goggles while sanding.
🔢 Sandpaper grit numbers tell the story: low numbers (40–80) are coarse, ~120 is medium, and 220+ gives a fine finish.
How do you sand a small wooden project using sandpaper and a sanding block?
What materials do I need to sand a wooden craft?
What ages is this sanding activity suitable for?
What are the safety tips and benefits of sanding wood with kids?
