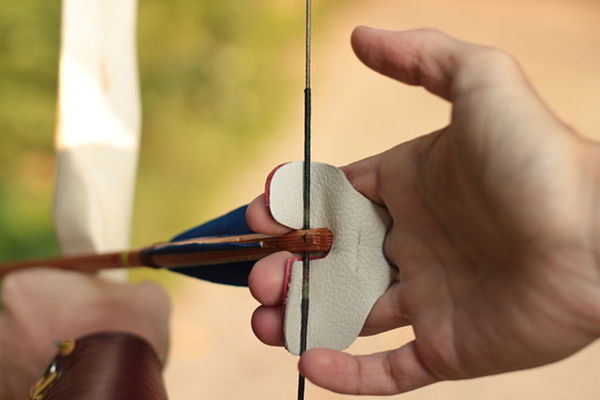
Make a finger tab
Make a leather or fabric finger tab to protect your fingers while learning archery, practicing safe cutting, measuring, and sewing or gluing steps.


Step-by-step guide to make a finger tab
Starter Guitar Lessons Song For CHILDREN AND PARENTS
Step 1
Gather all your materials on a clear table so everything is ready to use.
Step 2
Measure from the tip of the finger to the first knuckle and write down that length.
Step 3
Wrap the ruler or tape around the finger where the tab will sit and write down the circumference.
Step 4
Use the ruler and pencil to draw a rectangle on the material that is the finger length plus 1 cm and half the finger circumference plus 1 cm.
Step 5
Cut out the rectangle carefully with scissors along the pencil lines.
Step 6
Fold the rectangle in half over your finger to check how it fits and open it back up.
Step 7
Mark two small spots on the back edge of the tab where the strap will attach, about 1–2 cm in from each end.
Step 8
Cut a strip of elastic or ribbon long enough to go across the back of your finger with 1–2 cm overlap at each end.
Step 9
Use the hole punch or awl to make two small holes at the marked spots for the strap ends.
Step 10
Thread the needle with strong thread and tie a knot at the end.
Step 11
Sew one end of the elastic or ribbon through a hole to the tab with several tight stitches and tie a secure knot.
Step 12
Sew the other end of the elastic or ribbon through the other hole to the tab with several tight stitches and tie a secure knot.
Step 13
Trim any extra thread and smooth rough edges with sandpaper or a nail file.
Step 14
Try the finger tab on and make small adjustments if needed so it fits snugly and comfortably.
Step 15
Share a photo or video of your finished finger tab on DIY.org.
Help!?
What can I use if I don't have elastic or ribbon for the strap in step 'Cut a strip of elastic or ribbon'?
Use a cut hair tie, a strip from an old T‑shirt, thin Velcro, or a narrow piece of fabric folded and glued together as a substitute for the elastic or ribbon called for in that step.
My tab is tearing at the holes when I sew (step 'Use the hole punch or awl to make two small holes'), what should I do?
Reinforce the punched holes by adding a small fabric patch or a dab of clear glue around each hole before sewing and use shorter, tighter stitches when attaching the elastic or ribbon to prevent tearing.
How can I adapt this finger tab activity for different age groups?
For preschoolers have an adult measure the finger and pre-cut the rectangle and holes, for elementary kids let them measure, cut, and punch with supervision, and for teens challenge them to hand-sew with stronger materials like leather and waxed thread for a more durable tab.
How can we personalize or improve the finished finger tab after step 'Trim any extra thread and smooth rough edges'?
Add a thin foam or felt lining before folding (step 5) for extra comfort, sew or glue decorative trim or beads along the edges after stitching, or replace the sewn strap ends with small rivets for a stronger, customized finish.
Watch videos on how to make a finger tab
Learn How To Read TAB in 5 Minutes
4 Videos
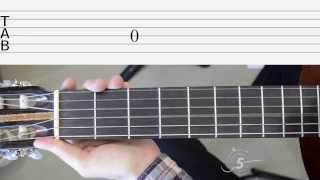
Learn How To Read TAB in 5 Minutes
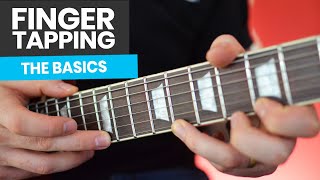
Finger Tapping Guitar Lesson - The Basics You Need To Finger Tap

It's Easy to Play Fingerstyle Guitar: 10 Essential Patterns

How to Play Fingerstyle Guitar - 20 Essential Fingerpicking Patterns
Facts about sewing and leathercraft for kids
🏹 Finger tabs reduce friction and pain and are used by many Olympic and competitive archers to protect fingers during repeated shots.
🧵 A simple running stitch or whipstitch is strong enough for fabric tabs and is one of the first sewing stitches kids learn.
🥇 Leather is extremely durable—well-cared-for leather gear can last for decades and was traditionally used for archery protection.
📏 Measuring your draw length and trimming the tab to fit helps make shooting more comfortable and improves accuracy.
✂️ Always use safety scissors for kids and have adults handle sharp tools like awls, leather punches, or heavy-duty scissors.
How do you make a finger tab for archery?
What materials and tools do I need to make a finger tab?
What ages is making a finger tab suitable for?
What safety tips should we follow when making and using a finger tab?
