Make pottery tools
Make simple pottery tools from household materials like wooden sticks, cardboard, sponges, and wire loops with adult help, then shape and smooth clay.


Step-by-step guide to make pottery tools
How to Make Pottery | Kids Pottery Term Lesson
Step 1
Cover your workspace with newspaper or a washable mat.
Step 2
Wash your hands so the clay stays clean.
Step 3
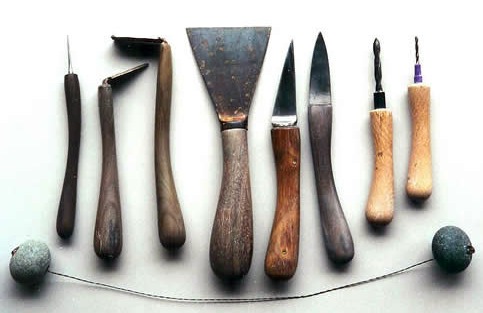
Smooth the edges of a wooden stick by rubbing it with sandpaper.
Step 4
Cut a curved shape from cardboard to make a cardboard rib tool using scissors.
Step 5
Cut a small square from the sponge to make a sponge pad.
Step 6
Tape the sponge square to the end of a wooden stick to make a sponge smoothing tool.
Step 7
Ask an adult to cut and bend the metal hanger into a small loop and tape the ends for safety.
Step 8
Roll a small ball of clay about the size of a tangerine.
Step 9
Press the clay ball flat with your palm to make a slab.
Step 10
Use the wooden stick rib to scrape and shape the clay edges.
Step 11
Use the cardboard rib to smooth and refine curved surfaces on the clay.
Step 12
Gently wipe the clay surface with the sponge tool to remove fingerprints and smooth it.
Step 13
Carve details or remove clay with the wire loop tool carefully.
Step 14
Let your piece dry or cure as the clay package says and then share your finished creation on DIY.org.
Help!?
What can we use if we can't find a metal hanger or wooden stick?
If you don't have a metal hanger for the loop tool (step 6), an adult can bend and tape a sturdy coat-hanger wire or a thick floral wire and you can use a chopstick or paint stirrer in place of the wooden stick (steps 3 and 5).
My cardboard rib keeps bending and makes rough marks — how can I fix that?
If the cardboard rib bends or tears while smoothing curved surfaces (step 10), reinforce its edge with clear tape or swap it for a thin plastic lid or folded craft foam for a firmer rib.
How can I adapt this so younger children can help safely while older kids stay challenged?
For toddlers, have an adult pre-sand the wooden stick and pre-bend and tape the metal loop then let them roll, press the slab, and sponge the surface (steps 3, 6, 8, 11), while older children can carve finer details with the wire loop and experiment with coils or added textures before drying (steps 12–13).
What are simple ways to personalize or take the project further once the basic piece is made?
Press textured items like leaves or bottle caps into the clay before it dries (after step 9), paint or glaze the cured piece following the clay package directions (step 13), and share photos of the finished creation on DIY.org.
Watch videos on how to make pottery tools
How to Use a Pottery Wheel for Kids | Pottery Lessons for Kids
4 Videos
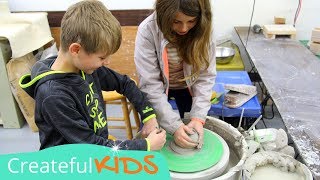
How to Use a Pottery Wheel for Kids | Pottery Lessons for Kids
Quick Clay Mug Tutorial | Easy Hand-Built Pottery for Beginners
5-Minute Pottery Bowl Tutorial
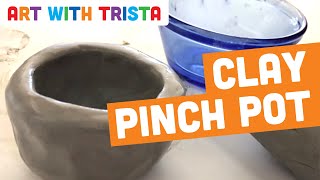
Pinch Pot Step By Step Clay Pottery Tutorial - Art With Trista
Facts about pottery and clay crafts
🏺 Pottery is one of the oldest human crafts—archaeologists have found pots that are over 20,000 years old.
🧽 Sponges (even ordinary kitchen sponges) are commonly used by potters to smooth, moisten, and finish clay surfaces.
🪵 Simple wooden sticks and modeling tools have been used for centuries to shape, score, and add details to clay.
🔗 Wire loop or ribbon tools let potters hollow and carve clay more easily—kids can make safe versions with adult help.
🔥 Kilns fire pottery at very high temperatures; a bisque firing (first firing) is done before glazing and a hotter glaze firing follows.
How do I make simple pottery tools at home and use them to shape clay?
What materials are needed to make pottery tools from household items?
What ages is making simple pottery tools at home suitable for?
What are the benefits, safety tips, and variations for making pottery tools and shaping clay?
