Make a microscope
Build a simple microscope using a smartphone and a small lens or water droplet, then observe onion cells, hairs, and pond water safely at home.

Step-by-step guide to make a smartphone microscope
Amazing Life under a MICROSCOPE for Kids 🔬 How Does a Microscope Work 🧪 Science Experiments
Step 1
Wash your hands and clear a clean flat workspace so your samples stay tidy.
Step 2
Decide whether you will use the small clear lens or a tiny water droplet as your magnifier.
Step 3
Make a lens holder by pressing the small clear lens into a little ball of modeling clay until the lens sits snug.
Step 4
Fit the clay holder over the phone camera and press or tape the clay so the lens lines up with the camera opening.
Step 5
If you chose the water-droplet method ask an adult to help you put a tiny droplet of clean water onto the phone camera glass using a pipette or your fingertip.
Step 6
With adult help peel off a thin transparent layer of onion skin and place it flat in the middle of your slide using tweezers or a toothpick.
Step 7
Put one small drop of pond water or clean water onto the onion skin to make it lie flat on the slide.
Step 8
Gently lower a cover slip or a small square of clear plastic over the sample to flatten it without air bubbles.
Step 9
Place the prepared slide on a flat surface like a table or book.
Step 10
Shine a lamp or bright light from the side of the slide to light up the sample.
Step 11
Hold or place your phone so the magnifying lens or water droplet sits directly above the sample and slowly move the phone until the cells come into focus on the screen.
Step 12
Make new slides with a hair and with a little pond water then repeat the same positioning to observe each sample.
Step 13
Take photos or draw what you see and write one sentence about something cool you discovered.
Step 14
Share a photo and your discovery of your homemade smartphone microscope on DIY.org
Help!?
What can we use if we can't find the small clear lens, pipette, or a glass cover slip?
Use a single lens from old reading glasses or a clear glass bead pressed into blu‑tack or play‑doh instead of the small clear lens, a clean straw or an eyedropper instead of a pipette, and a small square cut from clear plastic packaging in place of a glass cover slip when following the lens holder, droplet, and cover slip steps.
My phone image stays blurry or I see lots of air bubbles—what should I try?
Make sure the lens or water droplet is exactly centered over the camera (step fitting the clay holder or adding the droplet), tape or press the clay so it doesn't shift, lower the cover slip slowly at an angle to push out bubbles, and move the phone a millimeter at a time while adjusting side lighting until the cells focus.
How can we adapt this microscope activity for different ages?
For preschoolers have an adult do the lens/drip and cover slip steps while the child watches and draws, for school‑age kids (7–10) let them prepare slides with tweezers and observe with supervision, and for older kids (11+) encourage independent slide-making, photographing, and sharing on DIY.org as described in the final steps.
How can we extend or personalize the homemade microscope project to learn more?
Try comparing samples by making extra slides (onion skin, hair, pond water), use a tiny dot of food dye on the onion skin before adding the cover slip for better contrast, make lenses of different sizes or use both the small clear lens and water droplet to test magnification, and photograph your favorite views to share on DIY.org.
Watch videos on how to make a smartphone microscope
How Does a Microscope Work? 🔬🧬🦠 Fun Science Experiments for Kids! 🧪 #microscope #science
4 Videos
How Does a Microscope Work? 🔬🧬🦠 Fun Science Experiments for Kids! 🧪 #microscope #science
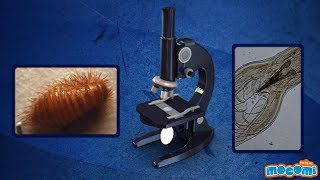
Microscopes for Beginners - Functions/Facts Part I - Science for Kids | Educational Videos by Mocomi

Microscopes and How to Use a Light Microscope

How Do Microscopes Work? MICROSCOPE Science!
Facts about microscopy for kids
🔬 Early microscopes opened up a new world — modern light microscopes can magnify around 1,000× while electron microscopes go much higher.
📱 You can turn a smartphone into a microscope with a tiny lens or even a water droplet to see cells and tiny critters up close.
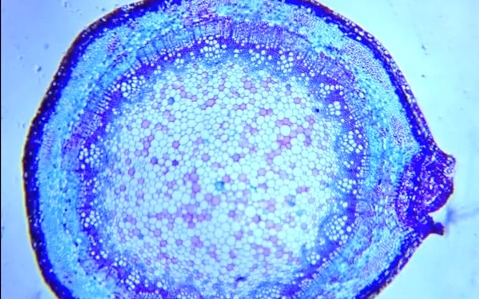
🧅 Onion epidermis is a favorite classroom specimen because its transparent cells clearly show cell walls and nuclei.
🌊 A single drop of pond water can contain algae, protozoa, and tiny crustaceans — a whole miniature ecosystem to explore!
⚠️ Safety tip: never taste samples, avoid touching your face while handling slides, and always wash your hands afterward.
How do I build a simple smartphone microscope to observe onion cells at home?
What materials do I need to make a smartphone microscope and prepare onion cells, hairs, and pond water?
What ages is a DIY smartphone microscope suitable for?
Is it safe for kids to observe onion cells, hairs, and pond water at home?
