Make a 3d model cell
Build a colorful 3D model of a plant or animal cell using clay, foam, or household materials, labeling parts to learn cell structure.


Step-by-step guide to make a 3D model of a plant or animal cell
How to Make 3D Cell Model
Step 1
Choose whether you will build a plant cell or an animal cell.
Step 2
Clear a flat workspace and place your paper plate or cardboard base on it.
Step 3
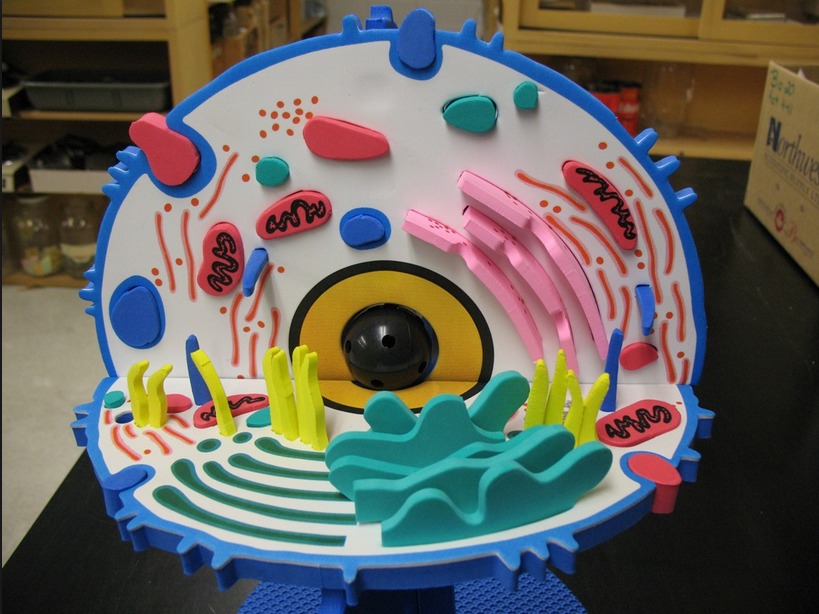
Look at a simple picture of the chosen cell to see the main organelles you need to make.
Step 4
Pick one color for each organelle and write each organelle name on a sticker or piece of tape.
Step 5
Make the outer boundary: for an animal cell roll a thin clay ring for the cell membrane or for a plant cell shape a thicker frame to show the cell wall and place it on the base.
Step 6
Press a thin layer of clay inside the outer boundary to make the cytoplasm and smooth it gently.
Step 7
Roll a ball of clay for the nucleus and press it gently onto the cytoplasm.
Step 8
Shape two small sausage pieces of clay to make mitochondria and press them onto the cytoplasm.
Step 9
If you chose a plant cell make three green oval chloroplasts and press them onto the cytoplasm; if you chose an animal cell make three small round lysosomes and press them onto the cytoplasm.
Step 10
Make the vacuole by forming one large oval and placing it in a plant cell or making a few small rounded vacuoles for an animal cell and pressing them onto the cytoplasm.
Step 11
Form the endoplasmic reticulum by rolling out a flat ribbon of clay and placing it next to the nucleus.
Step 12
Make the Golgi apparatus by flattening several small clay pieces and stacking them nearby.
Step 13
Add ribosomes by placing tiny beads or tiny dots of clay scattered around the cytoplasm.
Step 14
Stick the matching name labels next to each organelle using toothpicks or tape so each part is clearly named.
Step 15
Take a photo of your finished cell model and share it on DIY.org.
Help!?
What can we use instead of clay if we don't have any?
Use store-bought playdough, homemade salt dough (baked and cooled), or lightweight Model Magic as substitutes for rolling the membrane, cytoplasm, nucleus, mitochondria, and other organelles on your paper plate or cardboard base.
My organelles keep falling off the model—how can I fix that?
Press each organelle firmly into the clay cytoplasm, anchor larger pieces like the nucleus or vacuole with a toothpick, or add a small dab of white glue under fragile parts so the mitochondria, Golgi apparatus, and ribosomes stay attached.
How can I adapt this activity for younger or older kids?
For younger children, simplify by pre-rolling the outer membrane, nucleus, and three large organelles and using big stickers for labels, while older kids can add extra organelles (lysosomes/chloroplasts), scale organelle sizes more accurately, and write short function descriptions next to each part on the plate.
How can we make the model more creative or educational after finishing it?
Personalize and extend the project by adding textures (beads as ribosomes, corrugated cardboard for the Golgi), using Velcro or toothpick tabs so organelles are removable for quizzes, and photographing both plant and animal versions to compare on DIY.org.
Watch videos on how to make a 3D model of a plant or animal cell
Animal Cell Model (3D) model making | How to make Animal Cell Model for Science Project
4 Videos
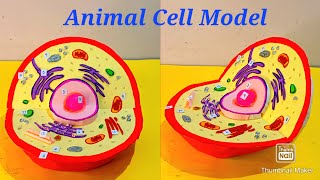
Animal Cell Model (3D) model making | How to make Animal Cell Model for Science Project
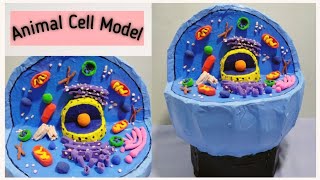
Animal Cell 3D Model | Using Cardboard | For School Projects | @simpleandeasyprojects9476
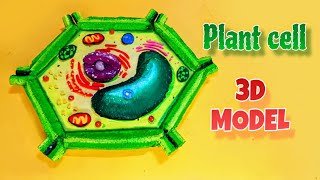
plant cell model making 3d - diy - simple and easy for science project exhibition
How To Make Animal Cell School Project | Animal Cell 3D Model
Facts about plant and animal cells
🧬 Cells are the basic units of life — the human body has roughly 30 trillion of them!
🌱 Plant cells have a stiff cell wall and chloroplasts so they can turn sunlight into food.
🐾 Animal cells lack cell walls and can join together to build tissues and organs.
⚡ Mitochondria are the cell's powerhouses and even carry their own tiny bits of DNA.
🥚 The largest single cell is an ostrich egg — it’s big enough to hold a tiny model!
How do I make a 3D model of a plant or animal cell with my child?
What materials do I need to build a colorful 3D cell model at home?
What ages is this 3D cell model activity suitable for?
What are the benefits of making a 3D cell model and what safety tips should I follow?
