Make living art with moss
Create a framed living moss picture using safe moss, soil, non-toxic glue, and a small frame; design patterns and learn plant care and observation.


Step-by-step guide to make living art with moss
DIY MOSS ART | DONE SIMPLY
Step 1
Gather all materials onto a clean workspace.
Step 2
Remove the backing board from the frame.
Step 3
Trim the backing board to fit inside the frame if it is too big.
Step 4
Use the paintbrush to spread a thin even layer of non-toxic glue on the front of the backing board where you want moss.
Step 5
Sprinkle a thin layer of potting soil over the glued area.
Step 6
Press the soil gently into the glue so it sticks to the board.
Step 7
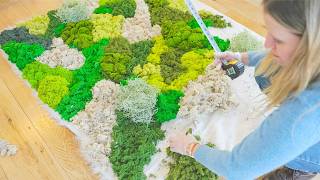
Arrange moss pieces on the soil to make your picture or pattern.
Step 8
Press each moss piece firmly so it adheres to the soil and glue.
Step 9
Press small twigs or pebbles into the soil to add decoration.
Step 10
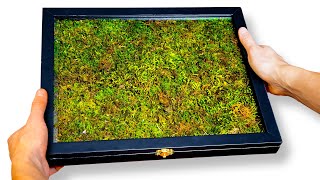
Put the moss-covered backing back into the frame leaving out the glass so the moss can breathe.
Step 11
Mist the moss lightly with the spray bottle until it feels just damp.
Step 12
Put your framed moss art in a spot with indirect light.
Step 13
Check your moss every day to see if the top feels dry.
Step 14
If the top feels dry mist the moss lightly to dampen it.
Step 15
Share your finished living moss picture on DIY.org
Help!?
What can we use if fresh moss or a frame/backing board are hard to find?
If fresh moss is unavailable, use preserved sheet moss or craft moss and, if you don't have a frame backing board, substitute sturdy cardboard or foam-core cut to size as in the 'Trim the backing board to fit inside the frame' step.
What should we do if the potting soil won't stick to the glue or the moss keeps falling off?
If soil won't stick after you 'Use the paintbrush to spread a thin even layer of non-toxic glue' and 'Sprinkle a thin layer of potting soil,' press the soil firmly into the glue longer, add a second thin glue coat, or slightly dampen the soil before pressing so 'Press the soil gently into the glue so it sticks to the board' works.
How can I adapt this moss frame activity for different ages?
For younger children have an adult 'Trim the backing board to fit' and apply the glue, give large moss pieces and oversized pebbles to 'Press each moss piece firmly,' while older kids can cut finer shapes, arrange detailed patterns, and complete the step 'Share your finished living moss picture on DIY.org' themselves.
How can we make the living moss art more personalized or long-lasting?
Before you 'Use the paintbrush to spread a thin even layer of non-toxic glue,' paint the backing board with acrylics for a colored background, add a thin strip of activated charcoal under the potting soil to reduce mold, and press decorative twigs or tiny labels into the soil when you 'Press small twigs or pebbles into the soil to add decoration.'
Watch videos on how to make living art with moss
DIY Moss Wall Art That Will Transform Your Space 🌿✨
3 Videos
DIY Moss Wall Art That Will Transform Your Space 🌿✨
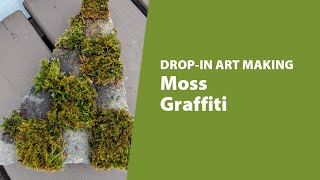
How to make moss collage & painting: 10 steps
DIY Living Moss Picture Frame (Relaxing Tutorial)
Facts about moss and plant care
🌿 Mosses are bryophytes — tiny plants that don’t have true roots but use rhizoids to anchor themselves.
💧 Moss absorbs water through its leaves, so gentle misting keeps it happy more than deep watering.
🧪 Some moss species can dry out completely and revive when they’re rehydrated — like plant superheroes!
🌎 Mosses are often the first plants to grow on bare rock and help create soil for other plants.
🖼️ Living moss art can improve humidity and soften sound, making rooms feel cozier and greener.
How do I make a framed living moss picture step-by-step?
What materials do I need to make a living moss picture?
What ages is a framed moss art activity suitable for?
What safety and plant-care tips should parents know for moss art?
