Construct a snow shelter
Build a small snow shelter (quinzee or snow cave) using shovels and adult supervision, learning teamwork, insulation, and winter safety.

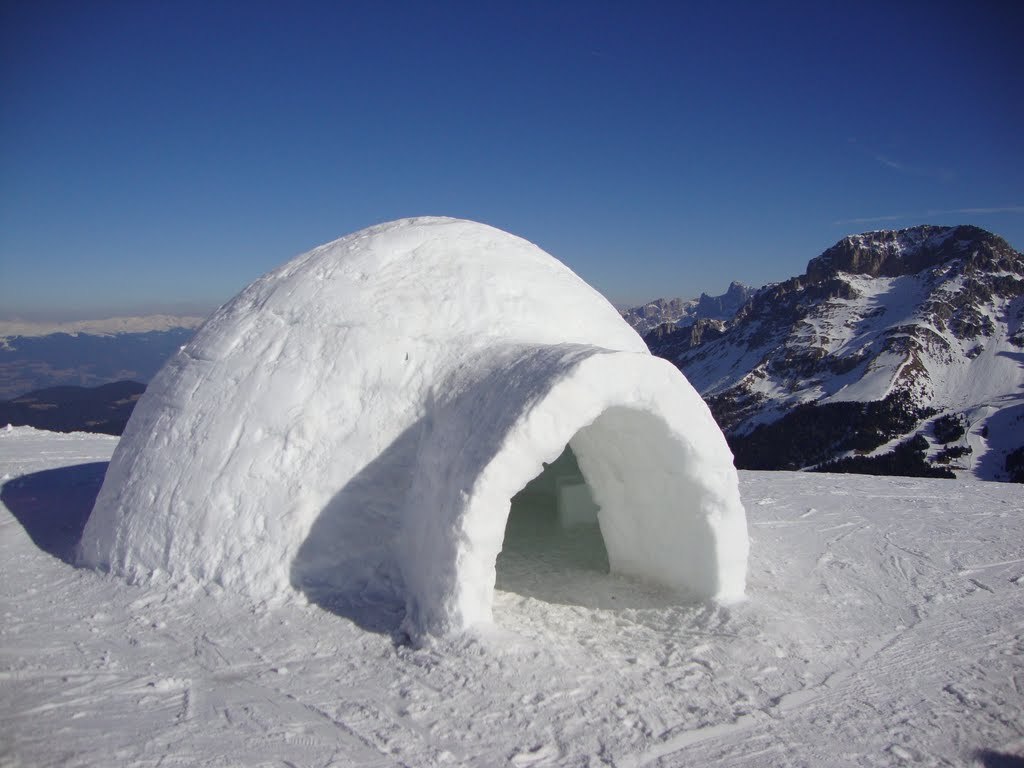

Step-by-step guide to build a small snow shelter (quinzee or snow cave)
Winter Survival Shelter Built From SCRATCH in Freezing Forest!
Step 1
Find a safe flat spot away from roads steep slopes and tree wells to build your snow shelter
Step 2
Put on warm clothes gloves and boots so you stay cozy while working
Step 3
Use the long stick to mark a circle about 1.5 to 2 meters across on the snow where your shelter will be
Step 4
Shovel snow from the circle’s edge toward the center to make a big dome-shaped pile about 1 to 1.2 meters tall
Step 5
Firmly compact the dome by patting and stomping the surface so the snow packs tightly
Step 6
Let the packed dome sit for 20 to 30 minutes so the snow hardens and becomes stronger
Step 7
Push the long stick straight down into the top center of the dome until it hits the ground to mark the correct wall thickness
Step 8
Cut a small entrance at the base and crawl in carefully to start hollowing from inside outward with your shovel leaving about 30 to 40 cm of packed snow for walls and roof
Step 9
Smooth the inside walls and roof with your shovel or gloved hands so the interior is even and won’t drip
Step 10
Use the stick to poke a small ventilation hole through the roof about the size of your fist so air can flow
Step 11
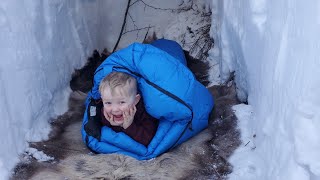
Lay a tarp sleeping pad or branches on the floor for insulation and build a low entrance tunnel or windbreak
Step 12
Have an adult check the roof stability and confirm it is safe before spending time inside
Step 13
Share a photo and story of your finished snow shelter on DIY.org
Help!?
What can we use if we don't have the long stick, tarp, or a sleeping pad?
Use a sturdy broom handle, ski pole, or long branch instead of the long stick, a heavy-duty trash bag or poncho in place of the tarp, and extra clothes or a layer of branches can substitute for a sleeping pad on the floor.
The dome keeps collapsing while we hollow it—what should we try?
If the dome is collapsing, repack and firmly compact the dome by patting and stomping, let it sit another 20–30 minutes to harden as instructed, then push the long stick down again to check you have about 30–40 cm wall thickness before cutting the entrance.
How can we adapt this activity for younger or older kids?
For younger children have an adult do the heavy shoveling and dome-building while the child helps mark the 1.5–2 m circle with the long stick and smooth the inside, whereas older kids can build the full 1–1.2 m dome, test wall thickness with the stick, dig the entrance tunnel, and add the ventilation hole themselves.
How can we personalize or improve our snow shelter once it's finished?
Enhance the shelter by laying a tarp or branches and a sleeping pad for insulation, carving a small bench or window in the interior walls, decorating inside, and then share a photo and story of your finished shelter on DIY.org as directed.
Watch videos on how to build a small snow shelter (quinzee or snow cave)
Bushcraft Bunkbed Winter Camping Trip (Building a Winter Survival Shelter)
4 Videos
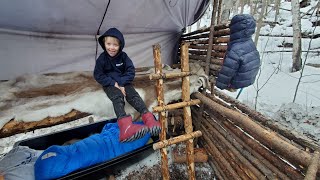
Bushcraft Bunkbed Winter Camping Trip (Building a Winter Survival Shelter)
Deep Snow Survival Camping in Alaska - Building a Winter Survival Shelter
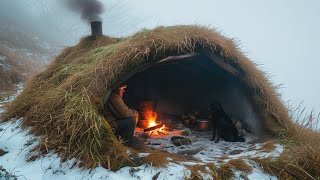
Build a simple warm winter shelter covered with ginger grass

Winter Survival - How To Build a Lifesaving Survival Shelter!
Facts about winter survival skills for kids
🛖 Quinzhees are made by piling snow, letting it settle (sinter) for about 1–2 hours, then hollowing out a cozy shelter.
❄️ Snow is mostly air — those trapped air pockets make snow a surprisingly good insulator for shelters.
🌡️ A well-built snow cave can stay near freezing (around 0°C / 32°F) inside, even when it’s much colder outside.
👥 Building a small quinzee is faster and safer with 2–4 people working together and an adult supervising.
🚨 Safety basics: always provide ventilation (an air hole), build a raised sleeping platform, keep shovels handy, and check avalanche risk.
How do you build a small snow shelter (quinzee or snow cave) with kids?
What materials and safety gear are needed to build a snow shelter with children?
What ages are suitable for building a snow shelter with children?
What are the benefits and safety tips for building a snow shelter with kids?
