Build a sled
Build a sturdy cardboard sled using corrugated cardboard, duct tape, rope, and wax. Test it safely on a small snowy hill with adult supervision.


Step-by-step guide to build a cardboard sled
Building a Sled | Alaska: The Next Generation
Step 1
Lay out all materials on a flat workspace so everything is easy to reach.
Step 2
Cut two identical rectangles of corrugated cardboard about 60 cm by 35 cm for the sled base.
Step 3
Cut two long strips of cardboard about 10 cm wide and the same length as the rectangles.
Step 4
Stack the two rectangles and tape all the edges together to make a thicker stronger base.
Step 5
Flip the base over and tape the two long strips to the bottom along the long edges to act as runners.
Step 6
Fold the front short edge up about 6 to 8 cm to make a nose and tape the fold securely.
Step 7
Add extra duct tape across the top and over the folded nose to reinforce the sled.
Step 8
Make two small holes near the folded nose and thread the rope through then tie knots under the sled to make a handle.
Step 9
Rub the wax block or candle firmly over the entire bottom surface until it looks evenly coated.
Step 10
Buff the waxed bottom with a cloth to smooth and spread the wax for better sliding.
Step 11
Go outside with an adult and inspect a small safe snowy hill checking that the path is clear of rocks trees and other obstacles.
Step 12
Sit on the sled with an adult holding it and have the adult give a gentle push to test the sled while they stay close for safety.
Step 13
Take photos or a short description of your sturdy cardboard sled and share your finished creation on DIY.org
Help!?
What can I use instead of corrugated cardboard or a wax block if I can't find them?
If corrugated cardboard isn't available, use two thin sheets of plywood or foam board cut to the same 60×35 cm size and taped together during the 'stack the two rectangles and tape all the edges' step, and if you can't find a wax block or candle, rub a paraffin candle or a bar of soap over the bottom during the 'Rub the wax block or candle' step to create a smooth, waxed surface.
What should I do if the runners come loose or the nose fold opens when we test the sled?
If the runners peel off or the folded nose opens during the gentle push test, reinforce both by pressing firmly and adding extra duct tape along the long edges and over the folded nose as described in the 'Flip the base over and tape the two long strips' and 'Add extra duct tape across the top and over the folded nose' steps.
How can I adapt this activity for younger children or older kids who want more challenge?
For younger children, have an adult handle the cutting and make a smaller base (about 40×25 cm) and follow the 'Sit on the sled with an adult holding it' safety step, while older kids can cut the full 60×35 cm pieces themselves, do the taping and wax application, and experiment with extra runners or decorations.
How can we improve or personalize the sled after finishing the basic build?
To enhance the sled, reinforce and waterproof the taped runners by covering them with an extra layer of duct tape before waxing, add a foam or taped seat and colorful duct-tape designs on top, and use a longer rope with a secure knot through the nose holes for easier pulling and safer sharing on DIY.org.
Watch videos on how to build a cardboard sled
Building a Homemade 3-Ski Sled | Alaska: The Last Frontier
4 Videos
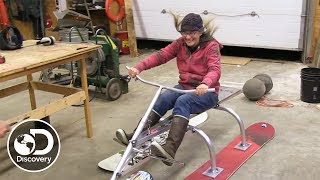
Building a Homemade 3-Ski Sled | Alaska: The Last Frontier

How to Draw a Christmas Sled Easy

How Dog Sleds and Athletic Shoes Are Made | How It's Made | Science Channel
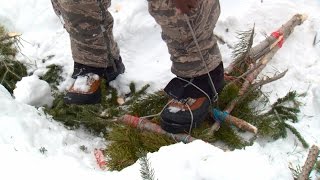
Survival Tip: How to Build Snowshoes
Facts about cardboard crafts for kids
🛷 Sleds and sled-like tools have been used for thousands of years to move people and goods across snow and ice.
📦 Corrugated fiberboard (cardboard) was adopted for shipping in the 19th century because its fluted layer adds surprising strength without much weight.
🧰 Duct tape began in WWII as waterproof 'duck' tape used to seal ammunition cases — now it’s a DIY essential for building sturdy sleds.
🕯️ Paraffin wax reduces friction — skiers wax skis to go faster, and a little wax rubbed on cardboard runners helps a sled glide smoother.
❄️ Snow type matters: packed or icy snow gives faster rides than fresh, fluffy powder — so pick a gentle slope and use adult supervision!
How do you build a sturdy cardboard sled step by step?
What materials and tools do I need to make a cardboard sled?
What ages is building and riding a cardboard sled suitable for?
What safety tips should families follow when testing a cardboard sled?
