Make waves
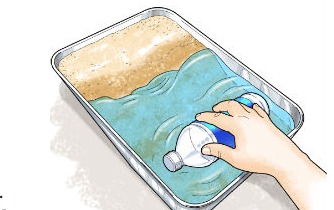
Build a simple wave tank using a shallow tray, water, and obstacles to create and observe ripples, reflections, and interference patterns.


Step-by-step guide to make waves
What Are Waves? | Science at the Beach! | SciShow Kids
Step 1
Put the shallow tray on a flat table or floor where it will not wobble.
Step 2
Pour water into the tray until the water is about 1 centimeter deep.
Step 3
Arrange a few small toys or building blocks in the tray to act as obstacles.
Step 4
Make a single quick tap on the water surface at one edge with your finger or spoon to create ripples.
Step 5
Look at how the ripples travel across the tray and how they hit an obstacle and bounce back.
Step 6
Hold the ruler upright and gently drag its edge across the water from one side to the other to make straight waves.
Step 7
Tap two opposite edges of the tray at the same time to make waves that meet and form interference patterns.
Step 8
Move the obstacles to new places and repeat taps to compare how waves change when they hit different shapes.
Step 9
If you have food coloring add one tiny drop near a wave source to watch how the water moves the color.
Step 10
Carefully pour the water from the tray into the sink and use paper towels to wipe up any spills.
Step 11
Share a photo or description of your wave tank and what you discovered on DIY.org
Help!?
What can we use if we don't have a shallow tray or a ruler?
If you don't have a shallow tray, use a baking sheet or large plastic storage lid filled to about 1 centimeter of water, and if you don't have a ruler drag the flat edge of a spatula or wooden spoon across the water to make straight waves as in the 'Hold the ruler upright...' step.
My ripples are tiny or the tray wobbles—what should I check or change?
Make sure the tray is on a flat table or floor, pour the water to about 1 centimeter deep, use a single quick tap at the edge with your finger or spoon, and move to smaller obstacles so waves can travel and bounce back clearly.
How can I adapt the activity for different ages?
For toddlers have an adult place the tray on the floor, use big blocks and gentle spoon taps, while older kids can hold the ruler to drag straight waves, tap opposite edges to create interference patterns, and add a tiny drop of food coloring to watch flow.
How can we extend or personalize the wave experiment once we finish the basic steps?
Try changing water depth and obstacle shapes to compare results (step 'Move the obstacles to new places'), record slow‑motion video of ripples and interference when you 'tap two opposite edges', or time ripple travel and share your photo and discoveries on DIY.org.
Watch videos on how to make waves
Waves Science Experiment | Water and Our World | The Good and the Beautiful
4 Videos
Waves Science Experiment | Water and Our World | The Good and the Beautiful
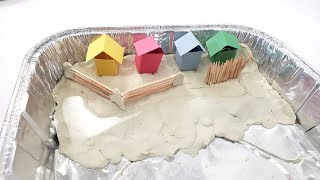
Storm Surge Activity - Protect Houses From Waves | STEM Lesson Plan
ASL Ocean Waves for Kids - INTERACTIVE
Waves for Kids | Wavelength & Amplitude | Science Lesson for Grades 3-5 | Mini-Clip
Facts about wave physics for kids
🌊 Ripple tanks are a classic physics teaching tool that let you watch waves, reflections, refraction, and interference in real time.
⚡ In shallow water, wave speed depends mostly on depth—deeper water makes waves travel faster (speed ≈ √(g·depth)).
🎯 When waves bounce off a straight barrier, the angle they arrive at equals the angle they leave—just like light reflecting in a mirror.
🔬 Two gap or two-point sources in a ripple tank produce interference patterns much like the famous double-slit experiment with light.
🌍 Surface water waves transfer energy across the water while individual water particles mostly move in little circular paths, not traveling long distances with the wave.
How do I build a simple wave tank to observe ripples, reflections, and interference?
What materials do I need to make a wave tank at home?
What ages is a wave tank activity suitable for and how much supervision is needed?
What learning benefits does building a wave tank offer my child?
