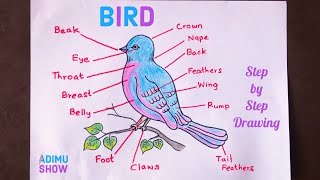
Draw and label a bird
Draw a bird using pencil and colored pencils, then label parts like beak, wings, tail, and feet to learn bird anatomy.

Drawing Apps
Step-by-step guide to draw and label a bird
How To Draw And Label A Bird | Body Parts of a Bird Drawing | Bird Labelled Diagram Easy | Bird
Step 1
Gather your materials and sit at a flat table where you can draw comfortably.
Step 2
Place the paper flat in front of you and choose which way you want the bird to face.
Step 3
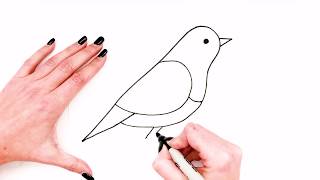
Lightly sketch the bird’s body with an oval for the body and a small circle for the head.
Step 4
Draw the beak at the front of the head.
Step 5
Draw the wings on the sides of the body.
Step 6
Draw the tail at the back of the body.
Step 7
Draw the feet under the body.
Step 8
Draw an eye on the head.
Step 9
Add short feather lines or little textures on the wings and body.
Step 10
Use the eraser to clean up any stray sketch lines you don’t want.
Step 11
Trace and darken the main outlines with your black pen or a darker pencil.
Step 12
Color your bird with colored pencils in the colors you like.
Step 13
Draw thin straight lines from each part to an empty space for labels.
Step 14
Write the correct name next to each line such as beak wings tail feet eye.
Step 15
Share your finished labeled bird on DIY.org.
Help!?
What can we use if we don't have colored pencils or a black pen?
If you don't have colored pencils use crayons, markers, or watercolor paints for the coloring step and substitute a dark ballpoint pen or fine-tip marker when tracing and darkening the main outlines.
My oval and circle don't look right—how can I fix proportions and avoid tearing when erasing?
Lightly sketch the oval and head circle with a soft pencil so you can erase stray sketch lines easily without tearing the paper, and adjust proportions before you trace and darken the main outlines.
How can we adapt this activity for younger or older kids?
For younger children, pre-draw the oval and head and use crayons and sticker labels to simplify steps like drawing feet and writing names, while older kids can add feather texture, accurate wing placement, and include scientific names when labeling.
How can we extend or personalize the finished labeled bird?
Extend the activity by drawing a habitat background, gluing real or paper feathers onto the wings, writing a short fact list on the back, or creating a series of different species to share on DIY.org.
Watch videos on how to draw and label a bird
How To Draw And Label A Bird | Parts of a bird | step by step tutorial
4 Videos
How To Draw And Label A Bird | Parts of a bird | step by step tutorial
Easy Bird Drawing Tutorial for Kids! 🐦✏️
How To Draw A Bird Step By Step 🐦| Bird Drawing EASY| Super Easy Drawings For Kids
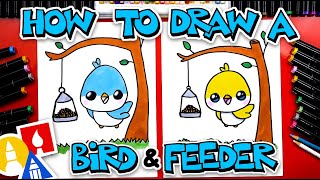
How To Draw A Bird And Feeder
Facts about bird anatomy for kids
🐦 There are about 10,000 known bird species — enough to draw a new bird friend every day for years!
🪶 Feathers are unique to birds and a single bird can have thousands of them for warmth and flight.
🌼 Beak shapes tell you what a bird eats — short, strong beaks for seeds; long, thin beaks for nectar.
🦴 Many bird bones are hollow, which helps keep them light so they can fly.
🎨 Some bright feather colors come from tiny structures that bend light (not just pigments), making feathers look iridescent.
How do you draw and label a bird?
What materials do I need to draw and label a bird?
What ages is this activity suitable for?
What are the benefits, safety tips, and variations for this bird drawing activity?
