Make an effects puppet
Make a puppet with moving parts, simple sound and glow effects using a sock or paper bag, strings, craft materials, and safe household items.


Step-by-step guide to make an effects puppet
How to Make Paper Puppets | 5 Easy Paper Puppets
Step 1
Pick a sock or a small paper bag and put your hand inside or open the bag so you can see where the face will go.
Step 2
Cut a rectangle of scrap cardboard then fold it in half to make a mouth flap.
Step 3
Slide the folded cardboard into the puppet where the mouth should be so you can see how it will open.
Step 4
Tape one edge of the folded cardboard inside the puppet to hold the mouth in place.
Step 5
Cut two arm or leg shapes from the cardboard for moving parts.
Step 6
Make a small hole at the top of each cardboard limb so you can attach a string.
Step 7
Cut two lengths of yarn about 30 centimetres long for the limb controls.
Step 8
Thread one yarn through each limb hole and tie a knot to fasten the yarn to each limb.
Step 9
Make tiny holes in the puppet and pull the yarn ends through so you can reach them from outside.
Step 10
Tape the free yarn ends to a straw or wooden craft stick to make a handle you can pull to move the limbs.
Step 11
Tape a small jingle bell to the puppet's chest so it makes a sound when it moves.
Step 12
Activate the glow stick until it lights and tape it safely to the puppet so it glows during play.
Step 13
Stick googly eyes or draw eyes and use colouring materials to finish decorating your puppet.
Step 14
Gently pull the straw handle to test the moving limbs and listen for the sound to make sure everything works.
Step 15
Share your finished effects puppet on DIY.org
Help!?
What can we use instead of a glow stick or jingle bell if we don't have them?
Tape a small battery-powered LED or Christmas light inside the puppet in place of the glow stick and replace the jingle bell by taping a crumpled piece of aluminum foil or a sealed paper-clip pouch to the puppet's chest to make noise.
The mouth flap won't open properly — what should we check?
Check that the folded cardboard mouth (step 2) is taped only along one edge inside the puppet (step 4) so it can pivot, trim any excess cardboard that catches, and make sure the cardboard sits where the face will go when you slide it in (step 3).
How can we adapt this activity for younger or older children?
For younger kids have an adult pre-cut the cardboard mouth and limb shapes, pre-make the holes and tie the yarn to a thicker straw or wooden craft stick for easier pulling, while older kids can add split pins, extra cardboard limbs, or a small LED and switch for more advanced effects.
What are simple ways to personalize or extend the puppet after finishing the basic steps?
Personalize it by adding fabric clothes or textured scraps with glue, extra limb controls (more yarn and straws) for additional movement, swapping the jingle bell for a taped sound clip, and decorating with googly eyes and colouring materials before sharing on DIY.org.
Watch videos on how to make an effects puppet
How to make a StopMotion Puppet, Matilda's secrets
3 Videos
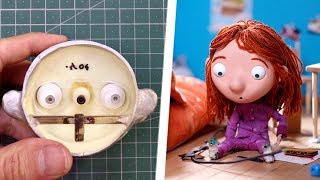
How to make a StopMotion Puppet, Matilda's secrets
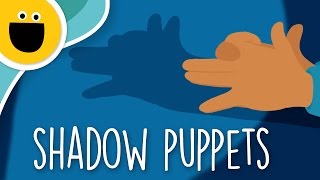
How to Make Shadow Puppets (Sesame Studios)
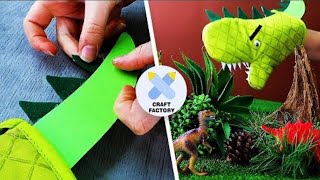
3 Easy Puppet Crafts For Kids To Make
Facts about puppet-making for kids
🎭 Puppetry has been practiced for over 3,000 years and appears in many ancient cultures around the world.
🧦 Sock puppets are one of the quickest DIY puppets — you can turn a single sock into a character in under 10 minutes.
📦 A paper bag puppet is a classic classroom craft because one lunch bag can become a whole character with simple decorations and folds.
🧵 Marionette controls use strings and a control bar so small hand movements can make big puppet actions — basic levers and pulleys at work.
✨ Phosphorescent (glow-in-the-dark) pigments store light and slowly release it, letting puppets glow for minutes to hours after a bright light.
How do you make an effects puppet with moving parts, sound and glow?
What materials do I need to make an effects puppet?
What ages is making an effects puppet suitable for?
What safety tips should I follow when making an effects puppet?
