Make junk into furniture
Turn household junk into simple furniture by building a small cardboard stool or shelf using tape, glue, scissors, and adult supervision.


Step-by-step guide to make junk into furniture
27 COOL DIY MINIATURE FURNITURE FROM RECYCLED ITEMS
Step 1
Decide to build a small cardboard stool and imagine how tall and wide you want it to be.
Step 2
Gather all materials and bring them to a clean flat work area with an adult.
Step 3
Use the ruler and pencil to draw two 20 cm by 20 cm squares and four 20 cm by 10 cm rectangles on the cardboard and add a 1.5 cm tab along one long edge of each rectangle for gluing.
Step 4
Cut out the two squares and the four rectangles carefully along your pencil lines.
Step 5
Put one 20 cm by 20 cm square flat on the table to be the stool base.
Step 6
Put craft glue on the 1.5 cm tab of one rectangle.
Step 7
Press that rectangle upright along one edge of the base so the tab sticks to the base and hold it in place with a strip of tape.
Step 8
Repeat Step 6 and Step 7 for the other three rectangles so all four sides are attached to the base and to each other forming a box.
Step 9
Put craft glue along the top edges of the four side panels.
Step 10
Place the second 20 cm by 20 cm square on top as the seat and tape the edges to hold it firmly while the glue dries.
Step 11
Let the glue dry for at least 30 minutes before touching the stool.
Step 12
Flip the stool right-side up with an adult and press gently to test stability and only place light items or sit gently with an adult nearby.
Step 13
Decorate your stool with colouring materials and let any extra glue or paint dry completely.
Step 14
Share a photo and a short description of your finished cardboard stool on DIY.org
Help!?
What can we use instead of craft glue or large cardboard sheets if they're hard to find?
If you don't have craft glue, use white PVA (school) glue for the 1.5 cm tabs in Step 6 or a hot glue gun with an adult, and if you lack big cardboard sheets, flatten and cut a corrugated shipping box into the two 20 cm by 20 cm squares and four 20 cm by 10 cm rectangles needed in Step 3.
The side panels wobble and the top doesn't sit flat — how do we fix that?
If the sides wobble after Step 9, remove the top square, add extra craft glue along the 1.5 cm tabs and inside seams, press panels squarely together and hold with extra tape or small binder clips while the glue dries, then reattach the seat in Step 10.
How can we change this activity for different ages?
For preschoolers (3–6) have them help draw and decorate while an adult measures, cuts, and glues in Steps 3–10; for ages 7–9 let them measure, draw, and cut with supervision in Steps 3–5; and for 10+ encourage independent building and additions like reinforcing the walls with extra cardboard in Step 8 or designing a taller stool.
How can we make the cardboard stool stronger or more fun after finishing it?
After Step 11 strengthen the stool by lining the inside with extra cardboard strips glued to the side panels, wrap external edges with duct or packing tape, glue a thin foam cushion to the top, or personalize it with paint and decoupage in Step 12 and add a cut-out storage cubby in one side panel.
Watch videos on how to make junk into furniture
Making Doll Furniture From Household Items | Mini Recycled Craft Challenge | Plastic Bottles
4 Videos
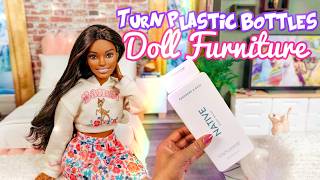
Making Doll Furniture From Household Items | Mini Recycled Craft Challenge | Plastic Bottles
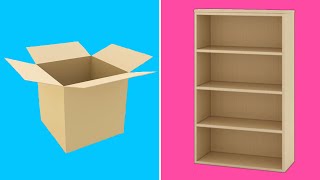
5 CARDBOARD FURNITURES IDEAS | BEST OUT OF WASTE CRAFT | EASY CARDBOARD DIY | WASTE MATERIAL CRAFT
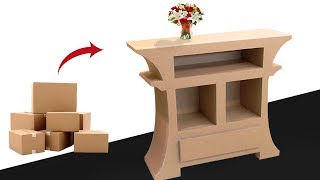
Amazing furniture DIY using cardboard Very simple and easy crafts |Cardboard furniture craft at home
EASY DIY Kids Desk With Storage And Chair - Beginner-friendly 1-Day Project!
Facts about upcycling and cardboard crafts for kids
🪑 Cardboard can be surprisingly strong — well-designed cardboard stools and chairs can hold the weight of an adult!
♻️ Upcycling turns trash into treasure by reusing materials so less waste goes to the landfill.
✂️ Simple shapes like triangles, boxes, and honeycomb patterns make cardboard structures much stronger.
🧰 DIY furniture projects teach measuring, cutting, planning, and problem-solving — awesome skills for young builders.
📦 Corrugated cardboard has a wavy (fluted) layer between flat liners, and that sandwich gives it extra strength and cushioning.
How do I turn household junk into a small cardboard stool or shelf?
What materials do I need to make furniture from junk cardboard?
What ages is cardboard junk-furniture making suitable for?
What are the benefits and safety tips for turning junk into furniture?
