Suture a laceration
Practice suturing a pretend laceration on orange, foam, or fabric using blunt plastic needles, shoelace, and tape to learn basic stitches and hand skills.


Step-by-step guide to suture a laceration
Step 1
Gather all your materials and put them on the towel or tray so everything is within reach.
Step 2
Lay the orange or foam or fabric flat on the towel or tray and smooth it so it does not move.
Step 3
Tape the corners or edges of your practice surface down so it stays steady while you work.
Step 4
Use the washable marker to draw a straight 2 to 3 centimeter laceration line on the practice surface.
Step 5
Cut the shoelace to about 25 centimeters long with the scissors so it is easy to handle.
Step 6
Thread one end of the shoelace through the eye of the blunt plastic needle and pull through so you have a long working end and a short tail.
Step 7
Insert the needle through the practice surface about 5 millimeters from one edge of the marked cut and push it across to come out about 5 millimeters from the opposite edge.
Step 8
Pull the shoelace through until the two edges of the laceration just come together without bunching or squeezing.
Step 9
Tie a secure square knot (two crossing throws) close to the skin to hold the edges together.
Step 10
Trim the shoelace ends with scissors leaving about 5 millimeters of tail so the knot stays secure.
Step 11
Move about 5 to 7 millimeters along the marked line and repeat Steps 7 to 10 to add more interrupted sutures if you want.
Step 12
Take a photo and share your finished practice suturing creation on DIY.org.
Help!?
What can I use instead of an orange, foam, or fabric if I can't find them?
Use a peeled banana, a kitchen sponge, or stacked felt as your practice surface and follow Steps 2–4 to tape it down and draw the 2–3 centimeter laceration.
The blunt plastic needle won't go through the practice surface or the shoelace slips out—what should I try?
If the needle won't pass in Step 7 or the shoelace won't stay in the eye, try a larger-eyed blunt needle or thinner lace/dental floss and carefully pre-poke a small hole with the scissors (with adult help) to ease insertion.
How do I adapt this activity for younger children or older kids learning more advanced skills?
For younger children have an adult pre-cut the shoelace to 25 cm, hold the surface, and guide the needle through Steps 5–7, while older kids can measure 5 mm spacing, tie independent square knots in Step 9, and add multiple interrupted sutures in Step 11.
How can we make the practice more realistic or challenging before taking the photo to share?
To enhance the activity, vary suture spacing in Step 11, practice tighter or looser square knots in Step 9, add washable red marker 'bruising' around the laceration for realism, or try a continuous stitch after mastering interrupted sutures before you take the photo in Step 12.
Watch videos on how to suture a laceration
Basic Suturing Skills - Anyone can do it!
4 Videos

Basic Suturing Skills - Anyone can do it!

Simple interrupted suture (wound suturing) - OSCE Guide | UKMLA | CPSA | PLAB 2

How To Suture: Intro To Suturing Like a Surgeon
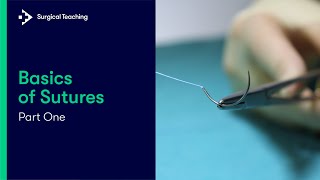
Basics of Sutures Part 1 | Learn the Different Sizes and Shapes of Suture Needles?
Facts about suturing and wound care
🟠 Oranges are a favorite practice tool because the peel and pith mimic the feel of human skin and tissue layers.
🪢 Mastering a square (reef) knot is a surgical must—it's simple but keeps stitches secure without pinching tissue.
🧵 Shoelaces or heavy thread make safe, low-cost suture substitutes for learning stitches with blunt needles.
⏱ Short, focused practice sessions (even 10–15 minutes) reliably boost fine motor suturing skills faster than rare long sessions.
🩹 The two basic stitch types you’ll learn are the simple interrupted stitch (great for control) and the running stitch (fast for long wounds).
How do I teach my child to practice suturing a pretend laceration?
What materials do I need to practice pretend suturing with my child?
What ages is practicing sutures on pretend materials suitable for?
What are the benefits and safety tips for practicing sutures with children?
