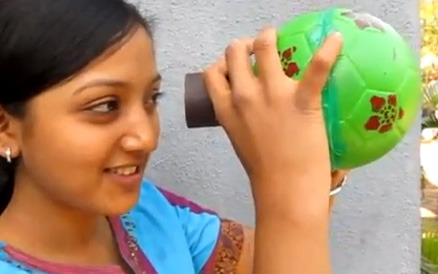
Construct a body part
Build a model human arm using cardboard, straws, string, and tape to learn about muscles, joints, and simple mechanics through hands on testing.


Step-by-step guide to build a model human arm
Body Parts | Science For Kids | STEM Home Learning
Step 1
Clear a flat workspace and lay out your materials so everything is easy to reach.
Step 2
Use the ruler and marker to draw one upper-arm rectangle about 20 cm by 8 cm one forearm rectangle about 20 cm by 8 cm one palm square about 8 cm by 8 cm and four finger strips about 9 cm by 2 cm each and mark two dividing lines on each finger strip to make three segments.
Step 3
Cut out all the cardboard pieces along your marker lines.
Step 4
Poke or punch a small hole near the ends of each finger segment where the pieces will join and a small hole at each fingertip.
Step 5
Join each finger's three segments together with paper fasteners so the finger can bend at each joint.
Step 6
Attach the four finished fingers to the palm using paper fasteners so they can move up and down.
Step 7
Connect the palm to the forearm with a paper fastener and connect the forearm to the upper arm with a paper fastener to make wrist and elbow joints.
Step 8
Cut the drinking straws into short 2 cm pieces and tape one straw piece along the top of each finger and line up more straw pieces in a straight path along the forearm.
Step 9
Thread a length of string from each fingertip up through the straw guides along the forearm toward the top of the upper arm and leave a long free end hanging.
Step 10
Secure the free end of each string to the top of the upper arm with tape or a knot so the string is held firmly.
Step 11
Pull the free ends of the strings to test that the fingers curl and adjust the string tension or straw guides if a finger sticks.
Step 12
Share a photo or video of your moving cardboard arm and what you learned about muscles and joints on DIY.org
Help!?
What can we use instead of paper fasteners or drinking straws if they're hard to find?
If you don't have paper fasteners for joining finger segments and attaching the palm (steps that say 'Join each finger's three segments' and 'Attach the four finished fingers to the palm'), substitute small brads/split pins, short bolts with washers, or fold-and-glue cardboard tabs for joints, and replace drinking straws used as guides with tightly rolled paper tubes or short wooden skewers taped along the fingers and forearm.
My fingers don't curl smoothly when I pull the strings—what should I check or fix?
Check that the holes near the finger joints and fingertips line up (step 'Poke or punch a small hole'), make the holes slightly larger if the string catches, loosen the paper fasteners so joints can bend freely, and adjust or add tape to the straw guides along the forearm if a finger sticks.
How can I adapt this cardboard arm activity for a 4-year-old or a 12-year-old?
For a 4-year-old, pre-cut the cardboard pieces (the 20×8 cm rectangles and 9×2 cm finger strips), use yarn and big plastic craft fasteners and supervise the joining steps, while for a 12-year-old, have them design more joints, add a working thumb, internal straw guides, and experiment with different string tensions to model muscle mechanics.
What are some fun ways to extend or personalize the moving cardboard arm after it's built?
You can personalize and extend the model by adding a thumb with an extra finger strip and paper fastener to the palm, decorating the arm with markers or fabric, attaching rubber-band 'muscles' along the forearm to demonstrate contraction, or mounting the free string ends to a simple control bar to make a remote puppet hand.
Watch videos on how to build a model human arm
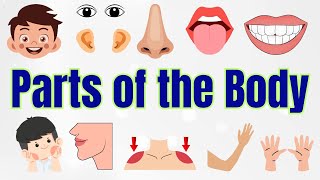
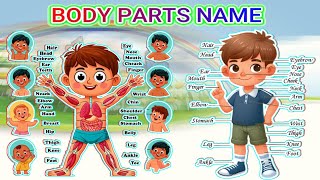
Parts of the Body for Kids | Learn Human Body Parts with Fun Animation
4 Videos
Parts of the Body for Kids | Learn Human Body Parts with Fun Animation
Parts of the Body | Parts of the Body for LKG Kids | Learn Body Parts & Sense Organs | Tiny Tutors
Learn Body Parts for Kids! 🧠🖐️🦶 Fun & Easy Way to Learn Human Body Parts | Educational Video
Educational Body Parts Video for Kids | Learn About the Human Body
Facts about human anatomy and simple mechanics for kids
🦴 The human arm has three main bones: the humerus (upper arm) and the radius and ulna (forearm).
💪 Muscles only pull — your biceps and triceps work as opposing pairs to bend and straighten the elbow.
🪢 Tendons are tough bands that connect muscle to bone and transmit the pulling force so joints can move.
🥤 A drinking straw can act like a tendon sheath in a model arm, letting strings slide smoothly like real tendons.
🤖 Engineers copy arm joints and muscle-lever tricks to build robots and prosthetic limbs that move like ours.
How do you build a model human arm with cardboard, straws, string, and tape?
What materials do I need to make a cardboard model arm?
What ages is this cardboard arm model activity suitable for?
What are the benefits and safety tips for building a model arm, and how can we vary the design?
