Dig for records
Set up a sandbox archaeological dig, uncover buried records like toy artifacts and notes, document finds in a field notebook, and practice careful recording.


Step-by-step guide to Dig for records
Creating Timelines to Better Understand Records and Families | Ancestry
Step 1
Gather all materials and set them beside your sandbox or tub so everything is within reach.
Step 2
Bury the toy artifacts and sealed paper notes in different spots and at different depths in the sand.
Step 3
Use masking tape to divide the sand surface into a simple grid and label the edges with letters or numbers.
Step 4
Choose one grid square to excavate first.
Step 5
Write the chosen grid square label and today's date in your field notebook.
Step 6
Use the small shovel or spoon to scoop away the top sand from the chosen square and place the removed sand on the tray.
Step 7
Use the paintbrush to gently brush the exposed area until you can see any buried objects.
Step 8
Carefully lift any found object and place it on the tray.
Step 9
Put the found object into a zip bag and label the bag with the grid square using masking tape.
Step 10
Measure how deep the object was with the ruler and write the depth in your field notebook.
Step 11
Draw the object in your field notebook and write one sentence about what you think it is or how it was used.
Step 12
Refill the excavated square with sand so the dig site is tidy.
Step 13
Share your finished creation on DIY.org.
Help!?
What can we use if we don’t have a small shovel, paintbrush, or zip bags?
Use a sturdy kitchen spoon or plastic cup instead of the small shovel, a clean makeup or toothbrush in place of the paintbrush, and small containers or folded sandwich bags labeled with masking tape to hold finds when you follow the bag-and-label step.
What should we do if the sand keeps collapsing or we can’t see buried objects clearly while excavating?
Press down the masking tape grid edges to stabilize the square, scoop gently with the shovel or spoon into the tray, then use the paintbrush slowly to brush away sand so toy artifacts or sealed paper notes are revealed without damage.
How can we adapt the dig for different ages?
For toddlers make larger, shallower grid squares and pre-bury only obvious toy artifacts for supervised scooping, for elementary kids have them record the grid label, measure depth with the ruler, and draw the find in the field notebook, and for older kids require detailed sketches, a written hypothesis about use, and a labeled photo before sharing on DIY.org.
How can we extend or personalize the activity after the dig is done?
Create a mini-museum by placing each labeled zip bag on a tray with a written card from the field notebook noting grid square and depth, photograph the display, and make a map or slideshow to upload to DIY.org as your final exhibit.
Watch videos on how to Dig for records
How do historians know about the past? (1/3)
4 Videos

How do historians know about the past? (1/3)

What is Archeology? (for kids) | Introduces students to the field of archeology | Lesson Boosters

Exploring Fossil Records, How Fossils Are Formed
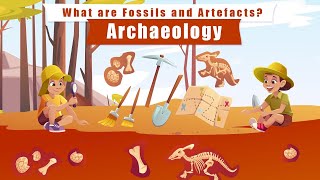
Archaeology for Kids | Learn All About Fossils and Artefacts | PIEX Education
Facts about archaeology for kids
🧭 Archaeologists map every find with a grid and compass — where something is found is as important as what it is.
📝 Field notebooks are like detective journals: archaeologists sketch, measure, and write notes for every discovery.
🧰 A small trowel is an archaeologist's favorite tool because it's gentle and great for careful digging.
⏳ Archaeology studies human-made objects and places — dinosaurs belong to paleontology, not archaeology!
🧩 Context is king: two toys found together can tell a whole story about how people lived or played.
How do you run a Dig for Records sandbox archaeological dig?
What materials do I need for a Dig for Records activity?
What ages is the Dig for Records sandbox activity suitable for?
What are the benefits of doing a Dig for Records archaeological dig?
