Make a mold
Make a simple plaster mold to cast a small toy or shape, measuring and mixing materials with adult help while learning about casting.


Step-by-step guide to make a simple plaster mold to cast a small toy
How To Make Your Own Silicone Mould
Step 1
Spread the wax paper on your table and put all materials on top so they are easy to reach.
Step 2
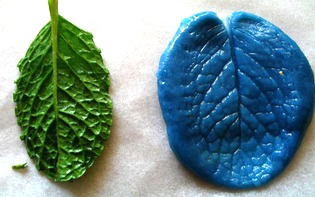
Flatten a piece of modeling clay into a disk about 1 centimeter thick on the wax paper.
Step 3
Press your small plastic toy gently halfway into the clay to make a clear impression.
Step 4
Carefully lift the toy straight up out of the clay so the cavity stays intact.
Step 5
Lightly brush a thin layer of vegetable oil into the clay cavity to help release the plaster later.
Step 6
Measure out plaster powder using the cup so you have two equal parts by volume.
Step 7
Measure out water using the cup so you have one part by volume matching the ratio two to one.
Step 8
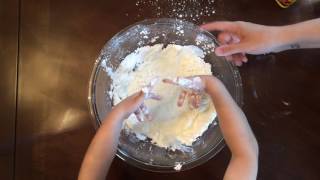
Ask an adult to pour the water into the mixing bowl and slowly add the plaster powder while stirring until the mix is smooth about one to two minutes.
Step 9
With the adult helping if needed pour the mixed plaster slowly into the clay cavity until it is filled.
Step 10
Gently tap the clay on the table a few times to help any trapped air bubbles rise to the surface.
Step 11
Let the plaster sit undisturbed for 20 to 30 minutes to fully set.
Step 12
Gently peel the clay away from the hardened plaster to reveal your cast shape.
Step 13
Smooth any rough edges carefully with fine sandpaper if needed.
Step 14
Paint or decorate your plaster shape using colouring materials if you like.
Step 15
Take a photo and share your finished creation on DIY.org.
Help!?
What can we use if we don't have plaster powder or modeling clay?
If you can't find plaster powder, use a quick-setting craft cement or a silicone mold kit, and if you don't have modeling clay, use firm playdough or air-dry clay flattened into the disk on the wax paper.
What should we do if the toy sticks to the clay or the cavity collapses when lifting the toy?
If the toy sticks when you lift it (step 4) or the cavity deforms, reflatten the clay (step 2), lightly brush vegetable oil into the cavity or onto the toy (step 5), press again and lift straight up slowly.
How can I adapt this mold-making activity for different age groups?
For toddlers have an adult do the measuring and mixing (steps 6–9) while the child presses the toy (step 3), for school-age kids let them measure the 2:1 plaster-to-water ratio and stir with supervision (steps 6–9), and for teens let them sand (step 11) and paint (step 12) independently.
How can we extend or personalize the finished plaster cast?
To personalize, stir powdered tempera or washable paint into the plaster before pouring (step 8), make several casts by pressing different toys into separate clay disks, and after sanding (step 11) glue on a magnet or hanger and then paint (step 12).
Watch videos on how to make a simple plaster mold to cast a small toy
DIY with Kids | Teach Kids to Make Cube-Shaped Bubbles | Amazing, Easy, Fun Activity at Home
4 Videos
DIY with Kids | Teach Kids to Make Cube-Shaped Bubbles | Amazing, Easy, Fun Activity at Home
Toxic House Mold Under the Microscope
What to Do If You Eat Mold by Accident
10 Easy No-Prep Science Experiments To Keep Kids Busy
Facts about casting and moldmaking for kids
🧱 Plaster of Paris often starts to set within 10–20 minutes once mixed, so it's good to work quickly!
🔥 Plaster gives off a little heat as it hardens (an exothermic reaction) — small molds can feel warm but that's normal.
♻️ One mold can be used to make many identical copies, which is why artists and toy makers love casting.
🧪 Measuring matters: too much water makes weak casts and too little makes lumpy mixes, so use cups or a scale.
🏺 Mold-making and casting go way back — ancient cultures used molds to reproduce statues, tools, and coins.
How do I make a simple plaster mold to cast a small toy at home?
What materials do I need to make a plaster mold and cast a toy?
What ages is plaster mold casting suitable for, and when should adults help?
What are the safety tips, benefits, and easy variations for a kids' plaster casting activity?
