Make a carving
Carve a simple soap sculpture using a bar of soap, child-safe carving tools, and sandpaper, learning shaping, smoothing, and safe technique with adult supervision.


Step-by-step guide to make a soap carving
How to Carve a PUMPKIN!! - (Easy for Kids!)
Step 1
Wash your hands with soap and water and dry them.
Step 2
Lay the towel on a flat table and put the bar of soap on the towel.
Step 3
Choose a simple shape to carve like a star heart or fish.
Step 4
Use the blunt end of a carving tool to lightly score the outline of your shape on the soap.
Step 5
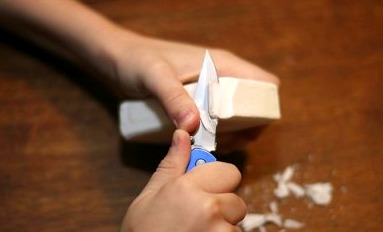
Hold the soap firmly in your non-dominant hand.
Step 6
Use a carving tool to make small gentle shavings away from your body to remove the excess soap around the outline; keep fingers well away from the blade path.
Step 7
Switch to a smaller tool and carefully carve the finer details inside your outline using short gentle strokes.
Step 8
Ask an adult to check your carving and help if a sharper tool or extra control is needed.
Step 9
Dampen a fingertip with a little water and gently rub the carved areas to blend and soften rough spots.
Step 10
Gently sand the soap with fine-grit sandpaper until the surfaces feel smooth.
Step 11
Wash your hands with soap and water to remove any soap dust.
Step 12
Share your finished creation on DIY.org.
Help!?
What can I use if I don't have the carving tool or fine-grit sandpaper?
If you don't have a carving tool, use a dull butter knife or wooden craft stick to shave away excess soap and a toothpick for finer lines, and replace fine-grit sandpaper with a nail file or emery board to smooth the soap.
My soap keeps cracking or the tool slips—what should I do?
If the soap cracks or the blade slips while making small gentle shavings, chill the bar briefly in the fridge to harden it, re-score the outline with the blunt end, and use short gentle strokes while keeping fingers well away from the blade path.
How can I adapt this activity for different ages?
For preschoolers, draw the simple shape on the soap and let them press the outline with the blunt end while an adult does the shavings and any sharp-tool work, and for older kids let them switch to the smaller tool and finish details and sanding with fine-grit sandpaper before sharing on DIY.org.
How can we extend or personalize the finished soap carving?
Personalize your carving by layering two colored bars before carving or carving a small hole and threading ribbon to make a hanging ornament, then use a damp fingertip and fine-grit sandpaper to blend and smooth surfaces for photos to post on DIY.org.
Watch videos on how to make a soap carving
How to Carve a Pumpkin with a Dremel - Beginners Guide #pumpkincarving
4 Videos
How to Carve a Pumpkin with a Dremel - Beginners Guide #pumpkincarving
Whittling Pumpkins with Personality - Easy Carving Tutorial, VERY BEGINNER FRIENDLY
Carve with Me! Mini Pumpkins, Simple Tutorial!
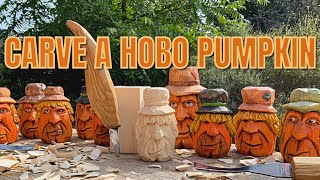
Carve a Hobo Pumpkin -Full Woodcarving Tutorial
Facts about sculpting and carving for kids
🧼 Soap is soft enough that kids can safely carve shapes with child-safe tools and sandpaper — perfect for a first sculpture.
✂️ Coarse sandpaper (around 80–120 grit) removes material quickly, while fine sandpaper (220+ grit) gives a silky smooth finish.
♻️ Leftover soap shavings can be melted and remolded into new bars or fun shapes, making soap carving great for upcycling.
🧠 Carving soap builds fine motor skills, hand-eye coordination, and spatial thinking as kids plan and shape their designs.
🪵 Soap carving is a beginner-friendly alternative to wood whittling because it needs less force and mistakes are easier to fix.
How do you carve a simple soap sculpture?
What materials do I need for soap carving?
What ages is soap carving suitable for?
What safety tips should we follow for soap carving?
