Make a glacier simulation
Build a simple glacier model using ice, clay, rocks, salt, and a tray to observe glacier movement, erosion, and deposition safely.


Step-by-step guide to make a glacier simulation
All About Glaciers for Kids: How Glaciers Form and Erode to Create Landforms - FreeSchool
Step 1
Put the tray on a flat surface.
Step 2
Place the paper towel under the tray to catch meltwater.
Step 3
Mold the modeling clay into a valley shape at one end of the tray to make the glacier bed.
Step 4
Scatter the small rocks and pebbles across the clay valley to act as bedrock and obstacles.
Step 5
Place the ice block or a pile of ice cubes at the top edge of the tray so it can move down the valley.
Step 6
Sprinkle a small pinch of table salt onto the top and front edge of the ice.
Step 7
Spoon a small amount of water in front of the ice to create a thin lubricating layer.
Step 8
Gently nudge the top of the ice once to encourage sliding if it does not move on its own.
Step 9
Watch the ice for two to three minutes and look for movement and rocks being pushed or carried.
Step 10
Add another small pinch of salt or one more spoonful of water to see how the movement or erosion changes.
Step 11
Use the spoon to gently press into the clay to look for grooves scraped by the ice.
Step 12
Look around the clay bed and point out where rocks were deposited after being carried by the ice.
Step 13
Pour the meltwater from the tray carefully into the sink with an adult's help.
Step 14
Wipe and dry the tray and the area with the paper towel.
Step 15
Share a photo and what you observed about glacier movement erosion and deposition on DIY.org.
Help!?
What can I use instead of modeling clay or an ice block if I don't have them?
If you don't have modeling clay, use play‑dough or tightly rolled aluminum foil to mold a valley at one end of the tray so an ice cube pile or smaller ice blocks placed at the top edge can still slide down.
My ice won't move—what should I try?
If the ice won't move, sprinkle another small pinch of table salt onto the top/front edge, spoon a thin layer of water in front of the ice, and give the top of the ice one gentle nudge to create lubrication and encourage sliding as in the instructions.
How can I change the activity for different ages?
For ages 3–5 remove small rocks and have an adult set up the tray and pour meltwater while the child watches, for 6–8 let kids scatter pebbles and nudge the ice with supervision, and for 9+ have them vary salt/water amounts, time movement, and use the spoon to examine grooves in the clay.
How can we make the experiment more challenging or unique?
To enhance the activity, add food coloring to the spooned water to trace meltwater paths, create two clay valleys with different slopes or rock sizes to compare erosion and deposition, and photograph each run to share observations on DIY.org.
Watch videos on how to make a glacier simulation
Using a Simulation to Understand how Glaciers Behave
4 Videos
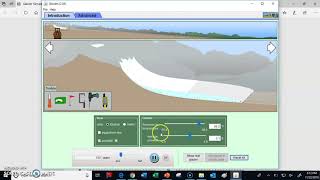
Using a Simulation to Understand how Glaciers Behave
How do glaciers shape the landscape? Animation from geog.1 Kerboodle.
What are Glaciers | Science for Kids

easy DIY model on glaciers | melting glacier: the shrinking snow
Facts about glaciers
🧊 Glaciers cover about 10% of Earth's land surface and store roughly 69% of the planet's freshwater.
🌍 Some glaciers creep only a few centimeters per year, while surge glaciers can advance meters or even tens of meters in a single day.
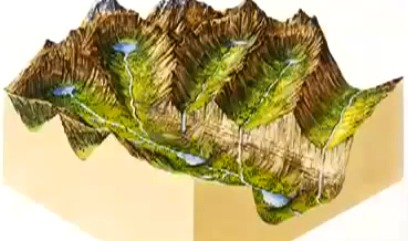
🪨 Rocks and debris carried by glaciers grind bedrock into grooves called striations and pile up as moraines when the ice melts.
🧂 Salt lowers ice's freezing point, so sprinkling a little salt makes ice melt faster—useful for classroom melting demos (use safely and sparingly).
🔬 Under huge pressure, glacier ice deforms and flows like a very slow, cold river, which is why glaciers move and reshape landscapes.
How do you make a glacier simulation?
What materials do I need for a glacier simulation?
What ages is this glacier activity suitable for?
What are the benefits and safety tips for a glacier model?
