Make a clinometer
Make a simple clinometer using a straw, protractor, string, and weight to measure tree and building heights by sighting angles and calculating distances.


Step-by-step guide to make a clinometer
Clinometer (How to make and use)
Step 1
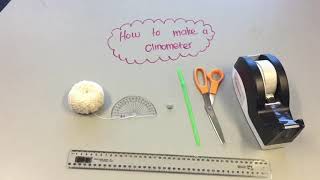
Gather all the materials on a flat table so everything is ready to build your clinometer.
Step 2
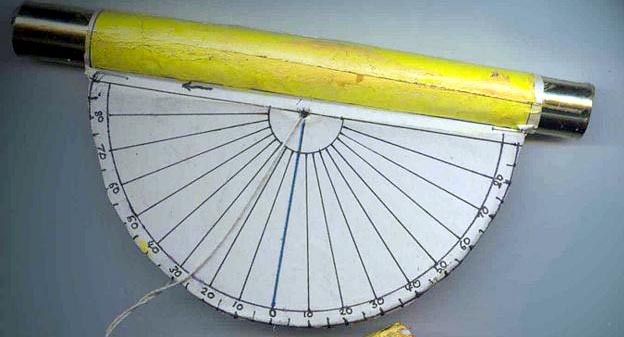
Tape the straw along the straight edge of the protractor so the straw points outward from the protractor center and lines up with the middle mark.
Step 3
Push the string through the protractor center hole and tie the washer or nut to the free end so the weight hangs below the protractor.
Step 4
Trim the string to about 10 to 15 centimeters from the center to the weight so the weight can swing freely past the degree marks.
Step 5
Hold the clinometer with the flat edge horizontal and note the protractor degree where the string rests to record your zero-angle offset.
Step 6
Measure a straight ground distance from where you will stand to the base of the tree or building and write down that distance in meters.
Step 7
Stand at the measured spot, hold the clinometer up to your eye, look through the straw at the top of the object, and read the angle where the string crosses the degree marks.
Step 8
Subtract the zero-angle offset from the read angle to get the corrected sighting angle and write down that corrected angle.
Step 9
Measure the height from the ground to your eye level and write down your eye height in meters.
Step 10
Use a calculator to compute the object's height by calculating height = distance × tan(corrected angle in degrees) and then add your eye height to that result.
Step 11
Share a photo and description of your finished clinometer and the height you measured on DIY.org
Help!?
What can I use instead of a protractor or washer if I can't find them?
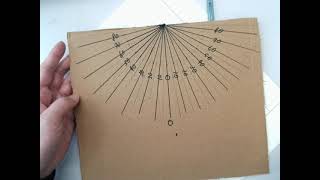
If you don't have a protractor print a protractor template or draw degree marks on stiff cardboard and if you lack a washer or nut tie a small coin or a bent paperclip to the string so the weight still hangs below the protractor while keeping the straw and tape from the instructions.
My string keeps getting stuck or the straw isn't aimed correctly—how do I fix the clinometer?
Retape the straw so it points outward from the protractor center and lines up with the middle mark, enlarge the center hole slightly and retie the string so the washer can swing freely past the degree marks, trim the string to about 10–15 cm if it's too long, and then re-check the zero-angle offset while holding the flat edge horizontal.
How should I change the steps or help for younger children or make the activity more challenging for older kids?
For younger children have an adult pre-tape the straw, push and tie the string and measure the ground distance and eye height, and help with the height = distance × tan(corrected angle) calculation, while older kids can assemble the protractor themselves, take multiple angle readings from different measured distances, and compute and compare results independently.
How can we improve accuracy or personalize the clinometer beyond the basic instructions?
Personalize your clinometer with colored tape and labeled degree marks, improve accuracy by measuring a longer ground distance and averaging several corrected sighting angles, or mount the protractor on a small tripod to keep the flat edge horizontal while sighting.
Watch videos on how to make a clinometer
Making a clinometer at home
4 Videos
Making a clinometer at home
How to make a Clinometer

How to make a Clinometer | Application Of Trigonometry | Letstute

Math - How to Make and Use a Clinometer?
Facts about surveying and measurement
🧭 Clinometers have been used for centuries—sailors and surveyors relied on them to measure slopes and heights long before lasers.
📐 A standard protractor reads 0–180°; your straw clinometer uses that same angle scale to spot how high things are from a distance.
🌳 With one angle and one horizontal distance, simple trig (tan θ × distance) gets you a good estimate of a tree or building height—don’t forget to subtract your eye height!
📏 Early surveyors could measure mountains and monuments accurately from the ground using just angles and geometry.
⚖️ A plumb bob (a weight on a string) shows true vertical and has been used since ancient Egypt to make straight walls and accurate measurements.
How do I build and use a simple straw clinometer to measure a tree or building height?
What materials do I need to make a straw and protractor clinometer?
What ages is making a clinometer suitable for?
What are the benefits and safety tips for using a homemade clinometer?
