Identify a rock
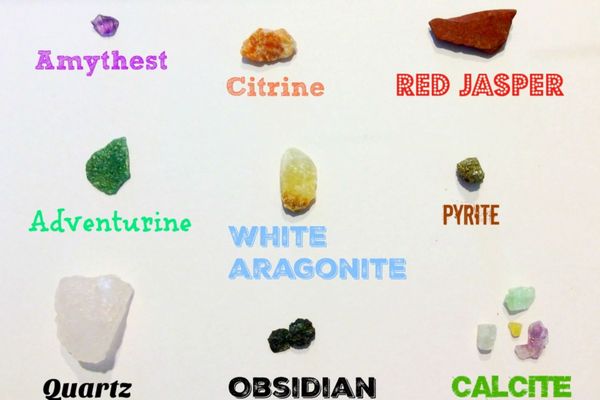
Collect rocks, observe color, texture, hardness, and streak; use simple tests and a field guide to identify different rock types safely outdoors.


Step-by-step guide to identify a rock
33. How to Identify Rocks
Step 1
Pick a safe outdoor spot to look for rocks.
Step 2
Bring your Materials to the spot.
Step 3
Collect three to five small rocks and put them in your bag.
Step 4
Choose one rock from your bag to study closely.
Step 5
Look at the rock and write its main color in your notebook.
Step 6
Feel the rock and write whether it is smooth rough or grainy.
Step 7
Use the magnifying glass to search the rock for tiny crystals or grains.
Step 8
Draw what you see through the magnifying glass in your notebook.
Step 9
Try to scratch the rock with your fingernail and write whether the nail made a scratch.
Step 10
Try to scratch the rock with a penny then with a steel nail and write which tool made a scratch.
Step 11
Rub the rock on the white tile to see the streak color and use your field guide to find the best match for color texture hardness and streak; write the rock name and where you found it.
Step 12
Share your finished rock report and pictures of your rock on DIY.org.
Help!?
What can we use if we don't have a magnifying glass, white tile, or a penny/steel nail?
Use a smartphone camera zoom or strong reading glasses instead of the magnifying glass, the unglazed bottom of a ceramic mug or a spare porcelain tile for the white tile streak test, and a copper coin or a house key in place of a penny or steel nail to try the scratch steps.
What should we do if the rock doesn't show crystals under the magnifying glass, won't scratch with the penny, or leaves no streak on the tile?
Gently clean and, if safe, wet the chosen rock before re-examining and redrawing it in your notebook, try the harder tool (steel nail or key) if the penny doesn't scratch, and rub a fresh, flat area of the rock on the white tile to test for streak color.
How can we adapt the activity for toddlers, elementary-aged kids, and older kids?
For toddlers simplify to collecting rocks, naming the main color and feeling, and drawing them in the notebook; for elementary kids follow all steps including the magnifying-glass observations and scratch tests; and for older kids add recording hardness with the penny/nail comparisons, using the field guide to name the rock and noting where it was found.
How can we extend or personalize the rock-identifying activity before sharing the report on DIY.org?
Create a small labeled display or scrapbook using the rocks from your bag with photos taken through the magnifying glass or smartphone, include the notebook drawings, field-guide identifications, and location notes, then upload the finished rock report and pictures to DIY.org.
Watch videos on how to identify a rock
ROCKS - Formation, Classification and Uses - Science for Kids
4 Videos
ROCKS - Formation, Classification and Uses - Science for Kids
Types of Rocks Quiz for Kids | Identifying Igneous, Sedimentary, and Metamorphic Rocks

Rocks for Kids | Learn all about geology and rocks

Identifying Rocks and Minerals - Using Physical Properties for Identification
Facts about geology for kids
🪨 Rocks are made of one or more minerals — like cookies made from different ingredients!
🔎 The streak test (rub a rock on unglazed porcelain) reveals a mineral's true color even if the outside looks different.
🧪 You can test hardness safely: fingernail ≈2.5, copper coin ≈3, steel nail ≈5, and glass ≈5.5 on the Mohs scale.
🌈 Iron minerals often make rocks red or brown, while copper minerals can turn them green or blue.
📚 Rocks belong to three families — igneous, sedimentary, and metamorphic — each with its own textures and stories.
How do I guide my child to identify a rock outdoors?
What materials do I need to identify rocks with my child?
What ages are rock identification activities suitable for?
What are the benefits and safety tips for a rock-identifying activity?
