Light an led with a homemade battery
Make a simple homemade battery using coins, zinc nails, and vinegar soaked cardboard, then light an LED to explore electricity safely with adult supervision.


Step-by-step guide to light an LED with a homemade battery
DIY How to Connect A Battery And Led Lights With an On-Off Switch | Science Project for Beginners
Step 1
Put on your safety goggles.
Step 2
Ask an adult to stay with you and help during the whole activity.
Step 3
Cut the cardboard into small squares about the size of a coin.
Step 4
Pour some white vinegar into the shallow dish.
Step 5
Soak one cardboard square in the vinegar for about 10 seconds.
Step 6
Place a penny flat on the table.
Step 7
Put the soaked cardboard square on top of the penny.
Step 8
Place a zinc nail on top of the soaked cardboard.
Step 9
Repeat soaking and layering to build a straight stack of 4 to 6 cells using the order coin then soaked cardboard then nail and finish with a coin on top.
Step 10
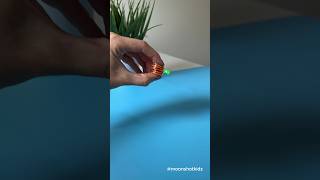
Attach a clip or tightly wrap a short piece of copper wire around the top coin so it makes a good connection.
Step 11
Attach a clip or tightly wrap a short piece of copper wire around the bottom zinc nail so it makes a good connection.
Step 12
Look at the LED legs and find the longer leg (positive anode) and the shorter leg (negative cathode).
Step 13
Connect the wire from the top coin to the LED's longer leg and connect the wire from the bottom nail to the LED's shorter leg.
Step 14
If the LED does not light, ask your adult helper to check the connections and add another cell or tighten the wires until the LED lights.
Step 15
Take a photo or write about your homemade battery and share your finished creation on DIY.org.
Help!?
What can we use if we don't have pennies or zinc nails?
If you can't find pennies, use a clean copper washer or scrap copper strip as the 'coin' and use a galvanized (zinc‑coated) nail or a zinc metal strip in place of the zinc nail, still soaking the cardboard squares in white vinegar (or lemon juice) as in step 4.
My LED doesn't light — what should I check first?
First confirm in step 11 that the LED's longer leg is connected to the top coin wire and the shorter leg to the bottom nail wire, then make sure the clips/wires from steps 8–9 are tight and the soaked cardboard from step 5 is still wet, and if needed add another cell as suggested in step 12.
How can we adapt this activity for younger or older kids?
For younger children have an adult pre-cut the cardboard squares (step 3) and pre-soak and assemble most of the coin‑cardboard‑nail stacks while the child connects the LED (steps 8–11), and for older kids let them build 4–6 cells (step 6), measure voltage, and experiment with adding more cells as in step 12.
How can we make the homemade battery stronger or more personal before sharing on DIY.org?
To strengthen and personalize the project, tape the stacked cells from step 6 into a sturdy holder, add more cells or wire extra LEDs in series/parallel using the wires from steps 8–12, and decorate the cardboard or coins before taking your photo.
Watch videos on how to light an LED with a homemade battery
DIY coin battery. Light up an LED using electricity from a homemade battery! Easy science experiment
4 Videos
DIY coin battery. Light up an LED using electricity from a homemade battery! Easy science experiment
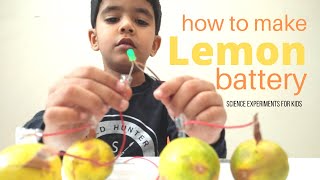
how to make a Lemon battery | DIY Lemon Battery LED Light up | Experiment for kids

DIY How To Connect LED with 3V Lithium Battery - Easy Science Project For Kids
LED Light and Battery Connection: How to Easily Connect Them for Beginners
Facts about batteries and basic electricity
⚡ Alessandro Volta invented the voltaic pile in 1800 — the first battery that inspired simple DIY cells.
🪙 U.S. pennies made after 1982 are mostly zinc with a thin copper coating, which matters for coin-and-nail batteries.
🧪 Household vinegar contains acetic acid that acts as an electrolyte, helping ions move between the metals to make electricity.
🔋 A single coin-and-nail vinegar cell often produces about 0.6–1.0 volts, so you stack several cells to reach an LED’s voltage.
💡 LEDs only light when hooked up the right way (they're polarized) and need very little current, making them great for safe demos.
How do I make a simple homemade battery with coins, zinc nails, and vinegar-soaked cardboard to light an LED?
What materials do I need to light an LED with a homemade coin-and-nail battery?
What ages is this homemade battery activity suitable for?
What safety precautions should I follow when making a homemade battery and lighting an LED?
