Experiment with comic layouts
Design and create short comic pages using different panel layouts, speech bubbles, and pacing to explore storytelling, composition, and visual flow.


Step-by-step guide to design and create short comic pages
How to Make Your Own Comic | Toontorial | @cartoonnetworkuk
Step 1
Think of a short story and write one clear sentence that explains what happens.
Step 2
Choose how many panels you want on your comic page (pick a number like 3 4 or 6).
Step 3
Draw small thumbnail boxes on a scrap sheet to show the panel shapes and sizes.
Step 4
Sketch tiny action thumbnails on sticky notes for each panel to show the main beats.
Step 5
Move the sticky-note thumbnails around to test different orders and pacing.
Step 6
Lightly draw the final panel borders on your clean paper with a pencil and ruler using your chosen layout.
Step 7
Sketch the characters and action inside each panel with pencil following your thumbnails.
Step 8
Add speech bubbles and captions in pencil placing them where readers will look first.
Step 9
Read the panels in order to check the story flow and make any small pencil changes if needed.
Step 10
Ink over your final lines and speech bubbles carefully with the black marker.
Step 11
Erase the remaining pencil marks so only the inked art and words remain.
Step 12
Add color and shading with your colouring materials to finish the page.
Step 13
Take a photo of your finished comic and share it on DIY.org
Help!?
What can I use if I don't have sticky notes, a ruler, or a black marker?
Use small squares of scrap paper or index-card thumbnails taped down in place of sticky notes, the edge of a book or a straight piece of cardboard as a ruler when lightly drawing final panel borders, and a dark fine-liner, felt-tip pen, or ballpoint pen to ink over your final lines instead of a black marker.
My panels look crowded or the story feels confusing—what should I do?
Go back to your scrap-sheet thumbnails and move the sticky-note thumbnails around to test different orders and pacing, then lightly redraw larger or fewer panel borders with your pencil and ruler and erase pencil changes before inking to fix composition and flow.
How can I adapt this comic layout activity for different ages?
For younger children choose 3 large panels, sketch simple thumbnail boxes and sticky-note stick figures and color with crayons, while older kids can pick 6+ panels, refine tiny action thumbnails, ink with a black marker, add detailed shading, and photograph to share on DIY.org.
How can we extend or personalize the finished comic page?
Add unique panel shapes and background details when sketching characters, experiment with different speech-bubble styles and onomatopoeia before inking, then create a short series of pages, add color and shading, and photograph the set to share on DIY.org.
Watch videos on how to design and create short comic pages
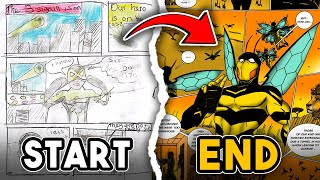
How I Make Mini Comics? (step by step) PART I
4 Videos
How I Make Mini Comics? (step by step) PART I
Easy Comic Strip Ideas: From Concept to Creation!
Making Comics Is Easy, Actually
How To Make A Comic from Start to Finish
Facts about comics and visual storytelling
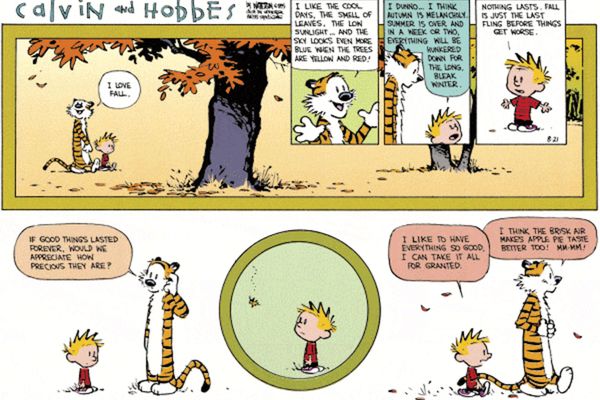
🗯️ Different speech balloons (pointed tails, jagged lines, dotted outlines) help readers hear a character’s voice without sound.
🧭 Panel shapes and placement guide the reader’s eye—long thin panels can speed action, large squares can slow it for emphasis.
📚 Scott McCloud popularized ideas about closure and how readers mentally fill gaps between panels to create meaning.
🕰️ Classic newspaper strips often used 3–4 panels to deliver a quick setup–payoff rhythm that teaches tight storytelling.
🎨 Sequential art is ancient — works like the Bayeux Tapestry show storytelling through ordered images long before printed comics.
How do I teach my child to design and create short comic pages with different panel layouts, speech bubbles, and pacing?
What materials do we need to experiment with comic layouts at home or in class?
What ages is this comic layout activity suitable for?
What are the benefits of experimenting with comic layouts for children's storytelling and visual skills?
