Make a habitat for creatures
Build a mini habitat for garden creatures using a recycled container, soil, plants, hiding spaces, water dish, and observe how animals behave safely outdoors.


Step-by-step guide to make a habitat for creatures
DIY Wild Habitat Diorama- Animal World Preschool Project- educational video for kids
Step 1
Gather all the materials from the list and bring them to your outdoor workspace.
Step 2
Choose a quiet outdoor spot near plants where garden creatures like to visit.
Step 3
Wash the recycled container with water and let it dry.
Step 4
With adult help use a tool to make 3 small drainage holes in the bottom of the container.
Step 5
With adult help cut or prop open a small entrance in the side or lid so creatures can get in and out.
Step 6
Put on your garden gloves and add 2 to 3 inches of potting soil into the container using the spoon or trowel.
Step 7
Plant the small plants or seedlings into the soil so they have room to grow.
Step 8
Place pieces of egg carton or small pots inside to make hiding spaces for creatures.
Step 9
Add small sticks leaves and stones around the plants to make the habitat feel natural.
Step 10
Set the small shallow dish into the soil so it sits level and can hold water.
Step 11
Lightly mist the soil and plants with the spray bottle to make the habitat damp but not soggy.
Step 12
Put the habitat in your chosen spot and make sure it sits safely and won’t tip over.
Step 13
Observe the habitat from a distance at different times of day and write down what creatures you see and how they behave.
Step 14
Take photos or notes of your finished habitat and share your creation and discoveries on DIY.org
Help!?
What can we use if we don't have potting soil, a recycled container, or a small shallow dish?
Use sifted garden soil mixed with a handful of compost instead of potting soil, a clean yogurt or milk carton in place of the recycled container (washed as the instructions say), and a sturdy bottle cap or plastic lid as the small shallow dish for water.
My habitat stays soggy or tips over — what should I check and fix?
If soil stays soggy or water pools in the shallow dish, be sure you made three small drainage holes in the container bottom, add a layer of stones before adding the potting soil to improve drainage, and set the habitat on a flat, sheltered spot so it won't tip over.
How can we adapt this activity for different ages?
For younger kids have an adult do the cutting and hole-making while the child adds 2 to 3 inches of potting soil, places egg carton hiding spots, and mists with the spray bottle, and let older kids plant seedlings, arrange sticks and stones, and keep detailed observation notes and photos to share on DIY.org.
How can we extend, improve, or personalize the habitat after building it?
Decorate the washed recycled container, add extra hiding spots like moss or small pots, attach a name label, and keep an observation journal with photos of the creatures you see to share on DIY.org.
Watch videos on how to make a habitat for creatures
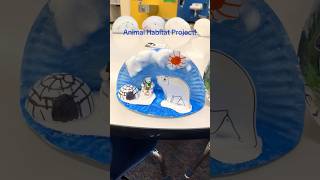
How to make polar bear habitat / Diy polar bear diaorma / Easy arctic region diaorma school project
4 Videos
How to make polar bear habitat / Diy polar bear diaorma / Easy arctic region diaorma school project
2nd Grade Science Diorama Project - Habitat of Animals #diorama #animals #habitat #science #project
Habitat | Science for Kids
DIY Animal Habitat Project!
Facts about garden wildlife and habitats
🐛 Worms can eat about half their body weight each day, turning scraps into rich soil.
🌿 Terrariums and mini-habitats recycle moisture — water evaporates, condenses, and returns to the soil.
♻️ Reusing a jar or container for a habitat saves resources and keeps plastic out of landfills.
🐞 Native plants usually support far more local insects than non-native species, giving tiny creatures food and shelter.
💧 A shallow water dish just a few tablespoons big can keep small garden animals hydrated on hot days.
How do I make a mini habitat for garden creatures using a recycled container?
What materials do I need to build a small habitat for garden animals?
What ages is building a mini habitat for garden creatures suitable for?
What safety tips and benefits should parents know when making a garden creature habitat?
