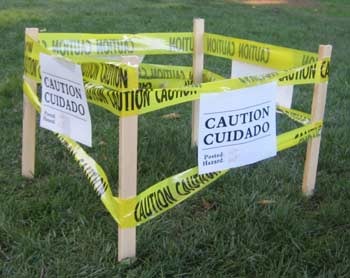
Make a fake sign
Make a fake sign using cardboard, markers, stencils, and tape. Design bold letters and symbols, learning clear visual communication for play and projects.

Step-by-step guide to make a fake sign
Learn to Sign with Mr Tumble | CBeebies
Step 1
Decide what short word or phrase your sign will say.
Step 2
Pick one simple symbol to add like a star arrow or smiley.
Step 3
Find a flat piece of cardboard to use for your sign.
Step 4
Put the cardboard flat on your work table.
Step 5
Use the ruler and pencil to draw and mark the size of your sign.
Step 6
Cut out the rectangle along your pencil lines with scissors while an adult helps.
Step 7
Lightly sketch where each letter will go with your pencil to plan spacing.
Step 8
Place the stencils over your pencil guides where each letter or symbol will be.
Step 9
Trace each letter and the symbol with your pencil using the stencils.
Step 10
Carefully outline the traced letters and symbol with a marker to make them bold.
Step 11
Fill in the letters and symbol with marker colors you chose.
Step 12
Let the ink dry completely so your sign won't smudge.
Step 13
Share your finished creation on DIY.org
Final steps
You're almost there! Complete all the steps, bring your creation to life, post it, and conquer the challenge!

Help!?
What can we use if we don't have letter stencils or a large flat piece of cardboard?
Use a cereal-box panel or shipping-box cardboard for step 3 and print or cut letter shapes from paper to trace over your pencil guides in step 8 if you don't have stencils.
My letters keep smudging or looking crooked—how can I fix that?
To prevent smudging and crooked letters, secure stencils with low-tack tape during step 7, use the light pencil spacing guides from step 6, trace carefully in step 8, and let the ink dry completely as directed in step 11.
How can I adapt the project for younger kids or make it more challenging for older kids?
For younger children, give a pre-cut large rectangle from step 5, chunky markers and stickers instead of stencils in steps 7–10, while older kids can design detailed fonts, use fine-tip markers or paint, and cut edges precisely with a craft knife under adult supervision in step 5.
What are simple ways to personalize or make the sign last longer after it's finished?
Add a painted border or glitter when filling in with markers in step 10, seal the sign with clear packing tape or laminate after step 11, and attach a popsicle-stick handle to the back before sharing your finished creation on DIY.org in step 12.
Watch videos on how to make a fake sign
Learn to sign the alphabet | Magic Hands | CBeebies
4 Videos
Learn to sign the alphabet | Magic Hands | CBeebies
Cool Math Lessons for Kids
CBeebies: Tree Fu Tom - Presenters Leaf Sign Make
Learn to Sign with Mr Tumble | Back to School | CBeebies
Facts about sign design and visual communication
♻️ Cardboard can be reused for several projects before recycling, so your sign can become a new craft later on.
✂️ Stencils are ancient: people used stencil-like techniques thousands of years ago to decorate pottery and walls.
🪧 Bold signs usually use only 2–3 high-contrast colors so people can read them quickly from far away — a great tip for kid-made signs!
🎨 Permanent markers often work well on cardboard without smudging, but some inks can bleed through thin corrugated fiberboard — always test a corner first!
📏 Simple, chunky letter shapes are easier and faster to read than fancy scripts, which is why signs use blocky fonts.
How do you make a fake sign using cardboard, markers, stencils, and tape?
What materials do I need to make a fake sign?
What ages is this fake sign activity suitable for?
What are the benefits, safety tips, and variations for making fake signs?


One subscription, many ways to play and learn.
Only $6.99 after trial. No credit card required