Manage soil
Learn to test and improve soil by collecting samples, observing texture, adding compost or sand, and planting seeds to compare growth and moisture.


Step-by-step guide to manage soil
🪴 Gardening for Kids | How to Start a Garden for Beginners | Twinkl USA
Step 1
Gather all your materials and bring them to a flat table or a spot near your garden.
Step 2
Choose a spot in the garden and scrape away leaves so you can dig a clean sample.
Step 3
Dig down about 3 inches and collect enough soil to fill the jar one-third full and to fill three small pots halfway.
Step 4
Put about one-third of the jar full of the soil you collected.
Step 5
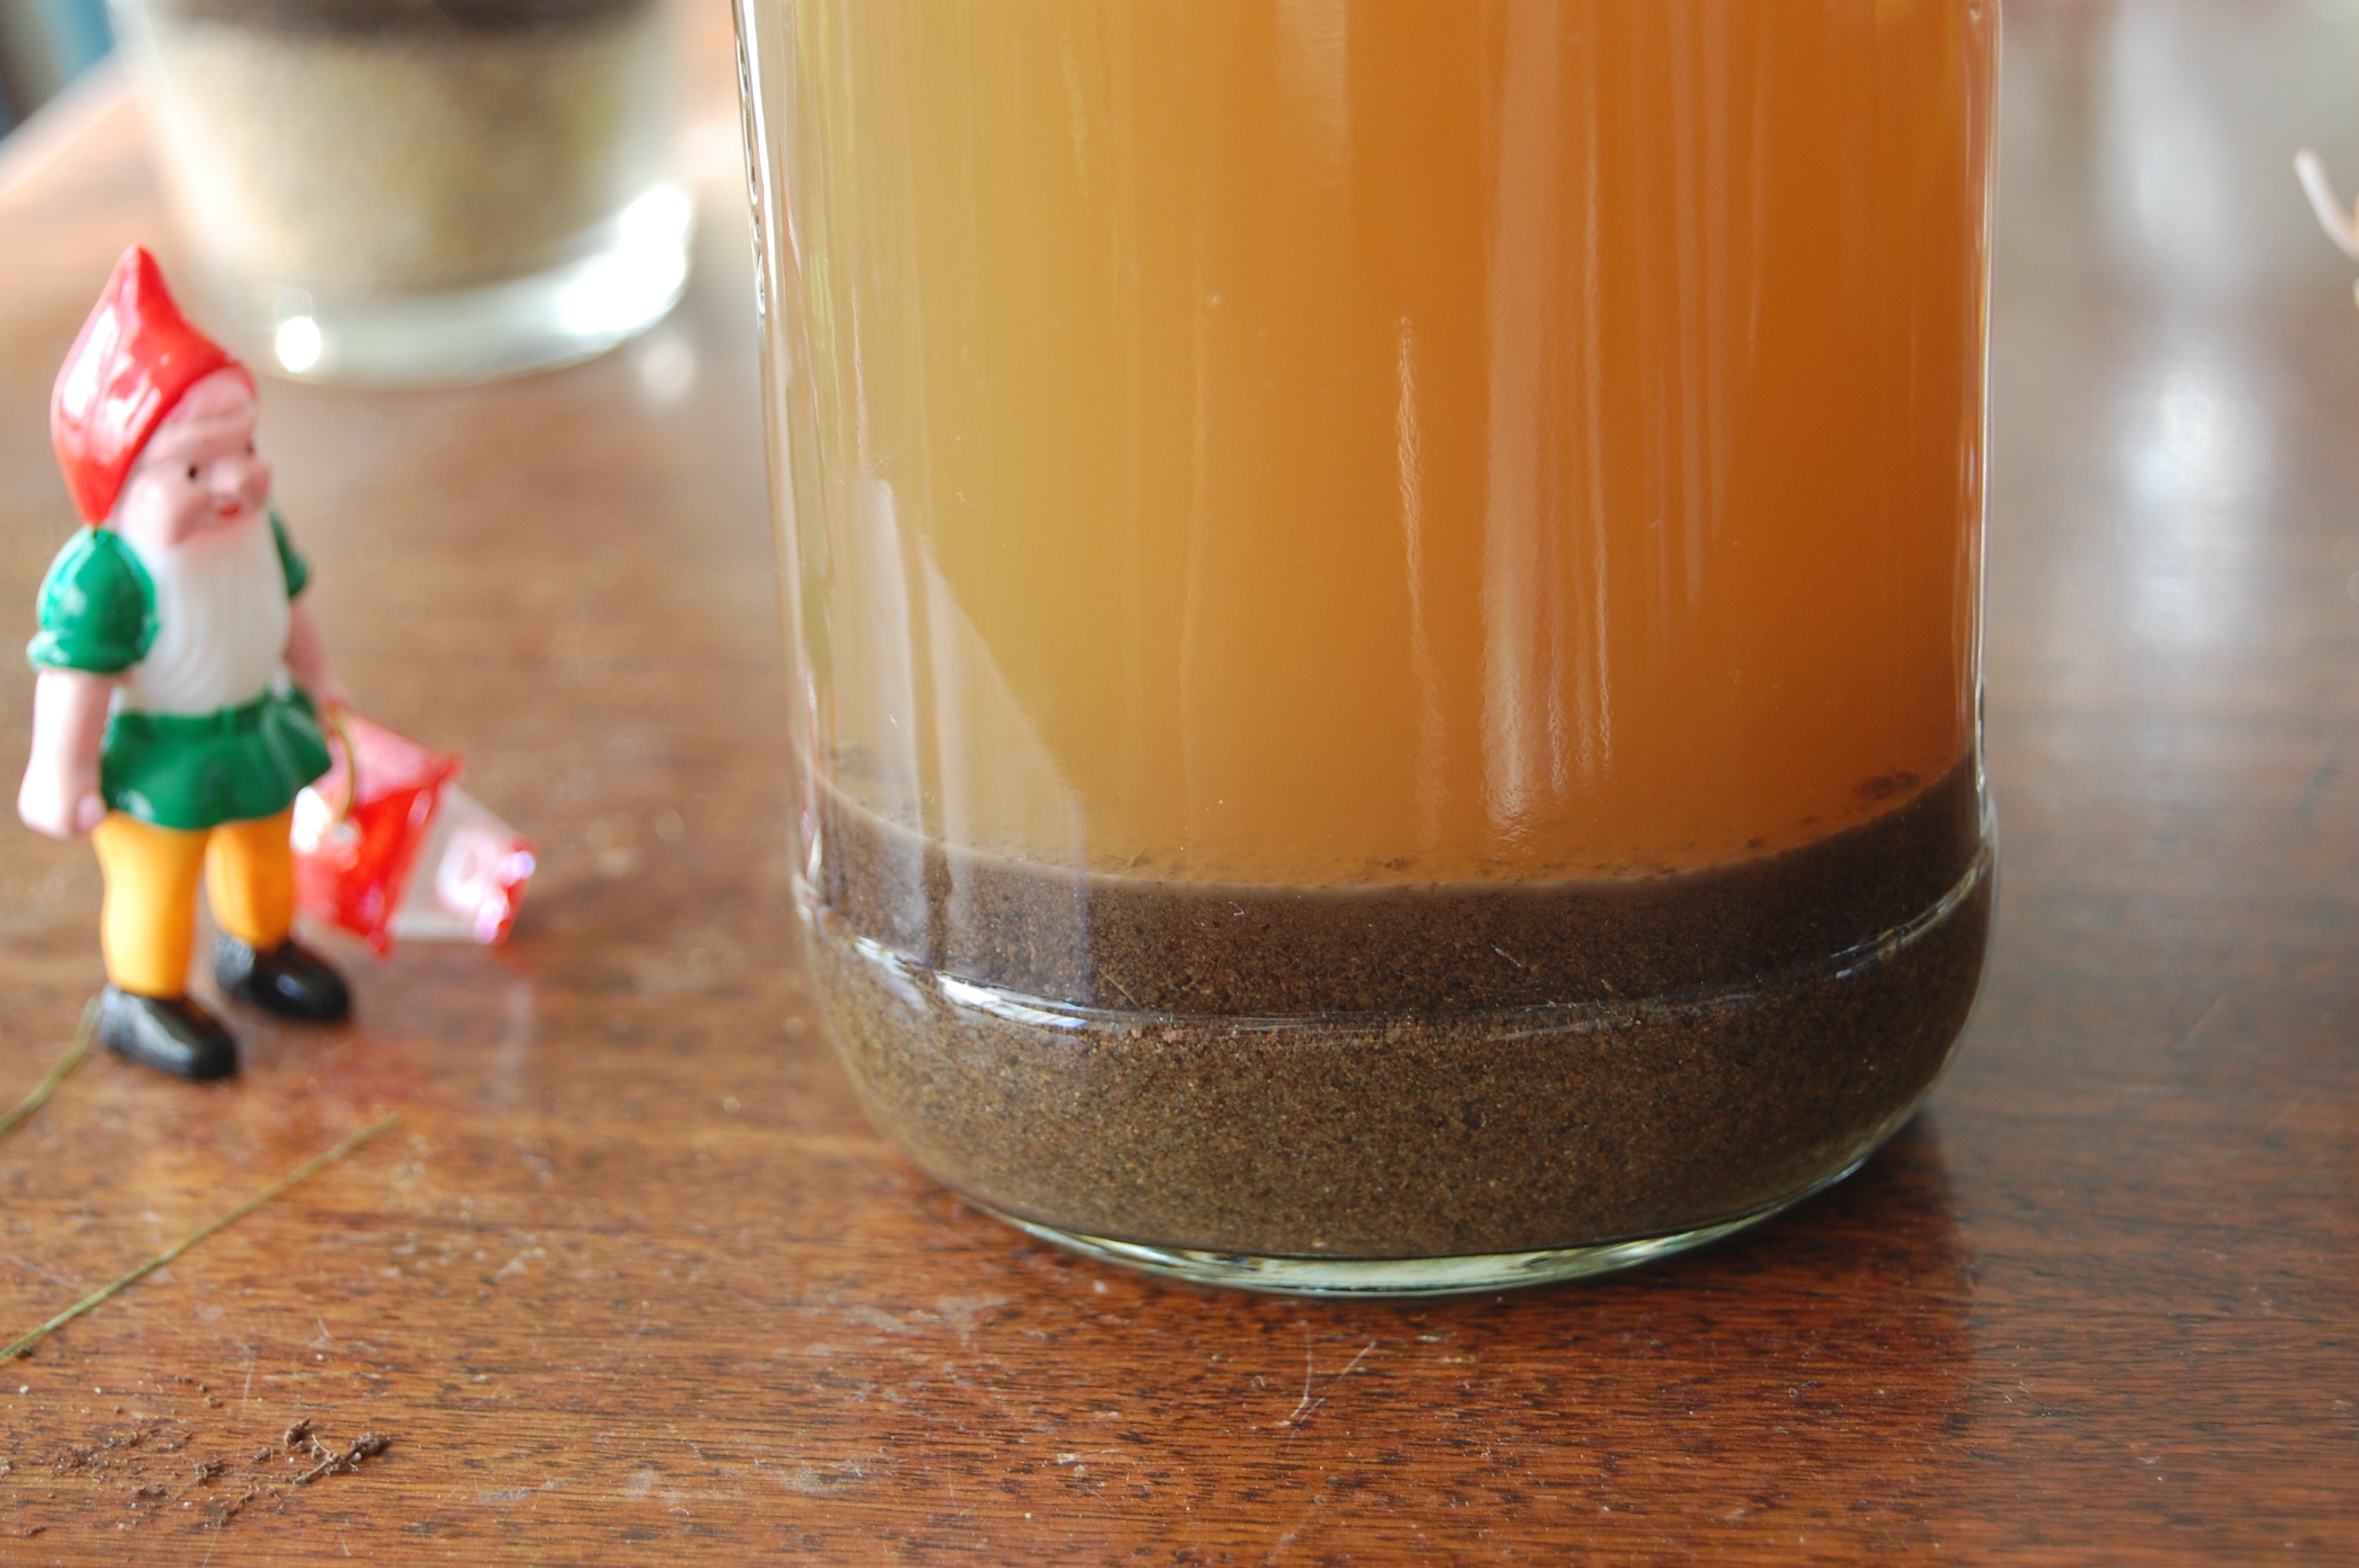
Add water to the jar until the water is about 1 inch from the top.
Step 6
Put the lid on the jar and shake the jar hard for 30 seconds.
Step 7
Set the jar on a flat surface and let it settle so the layers separate.
Step 8
After one hour look at the jar and write down how many layers you see and which layer is biggest.
Step 9
Label the three pots A B and C with your marker.
Step 10
Fill each pot to the same height with the rest of the soil so each pot has the same amount.
Step 11
Add one tablespoon of compost to pot B and mix it into the soil gently.
Step 12
Add one tablespoon of sand to pot C and mix it into the soil gently.
Step 13
Plant two seeds in each pot at about 1/2 inch deep and cover them lightly with soil.
Step 14
Water each pot with the same measured amount of water and put all three pots where they will get the same light.
Step 15
Every other day for two weeks feel the soil for moisture and measure any plant growth with your ruler and write your results in the notebook.
Step 16
Share your finished soil test and seed-growing results on DIY.org.
Help!?
What can we use if we don't have a clear jar or small pots?
If you don't have a clear jar use a clean clear plastic bottle with a tight screw lid for shaking and, for small pots, use disposable paper cups or yogurt containers with a few small drainage holes punched in the bottom.
My jar layers aren't separating well — what might be wrong and how do I fix it?
If the soil layers don't separate, make sure you added water to about 1 inch from the top, screwed the lid on tightly, shook the jar hard for 30 seconds as instructed, and then let it settle longer (several hours) so sand and silt can fully drop out beneath the organic layer.
How can we adapt the steps for younger or older children?
For younger kids have an adult dig the 3-inch sample, measure the one-tablespoon compost and sand additions, and help with planting while the child observes and draws results, and for older kids let them design new variables (different compost amounts or seed types), measure plant growth every other day with the ruler, and record numeric data in the notebook.
How can we extend or personalize the soil and seed experiment when it's finished?
You can extend the activity by adding extra pots with different compost or sand amounts, taking photos each measurement day, testing a different seed type in new pots, measuring soil pH, or compiling your photos and notes to share detailed results on DIY.org.
Watch videos on how to manage soil
Soil Is Alive! | SciShow Kids
4 Videos
Soil Is Alive! | SciShow Kids

What is Soil | Science for Kids
Gardening With Kids | Dinosaur Garden | Teaching Children The Joy Of Gardening
The Importance of Soil | Science for Kids | Types of soil for kids | #PantsBear
Facts about soil science for kids
🌱 A single teaspoon of healthy garden soil can contain billions of tiny microorganisms that help plants get nutrients and stay healthy.
🐛 Earthworms improve soil by making tunnels that let air and water move to plant roots and by turning dead leaves into rich material.
💧 Sandy soil drains water quickly while clay holds water tightly — mixing in compost helps both kinds keep the right moisture for seeds.
♻️ Composting recycles kitchen scraps and yard waste into dark, crumbly food for soil that improves plant growth and reduces trash.
🧪 Soil pH is like a plant's taste test: some plants prefer acidic soil, others like alkaline, and simple test kits tell you which is which.
How do I test and improve soil with my child?
What materials do I need to test and improve soil with my child?
What ages is this soil testing and improvement activity suitable for?
What safety tips should I follow when doing soil experiments with children?
