Collect and save seeds
Collect seeds from garden plants, label and dry them safely, then store in envelopes to plant next season and learn about plant life cycles.


Step-by-step guide to collect and save seeds
How to SAVE SEEDS: Seed saving TIPS and EXAMPLES
Step 1
Walk to your garden and find plants with dry seed pods or brown flower heads that look ready to release seeds.
Step 2
Gently pull one seed pod or seed head off the plant and place it into your tray or bowl.
Step 3
Repeat collecting several pods from different parts of the same plant so you have enough seeds.
Step 4
Bring your tray inside and spread a paper towel on a clean table.
Step 5
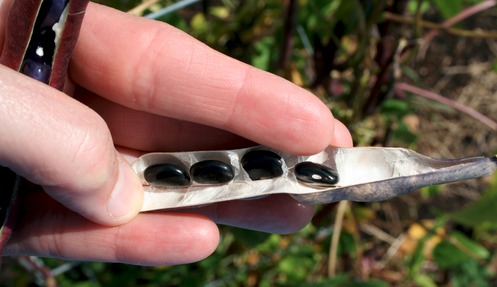
Carefully open each pod over the paper towel so the seeds fall out onto the towel.
Step 6
Remove any leaves or extra plant bits from the seeds using your fingers or tweezers.
Step 7
Make a small separate pile of seeds on the towel for each plant type you collected.
Step 8
Leave the seed piles on the paper towel in a warm dry spot for a few days to fully dry.
Step 9
Write the plant name and the date on a paper envelope using your marker.
Step 10
Put the dry seeds from each pile into the envelope with the matching name and date.
Step 11
Fold the top of each envelope closed.
Step 12
Seal the envelope with a small piece of tape if the flap does not stay down.
Step 13
Place all the sealed envelopes upright in the clean jar or box and store it in a cool dry place.
Step 14
Check your stored envelopes once a week to make sure the seeds stay dry and are not moldy.
Step 15
Share your finished seed collection and what you learned about plant life cycles on DIY.org.
Help!?
I don't have paper envelopes or tape — what can I use instead?
If you don't have paper envelopes, use small zip-top bags or clean folded paper tied with string and write the plant name and date on masking tape or with your marker before sealing, then place them upright in your jar or box as in the steps.
My seeds seem damp or moldy after a few days — what went wrong and how can I fix it?
If seeds feel damp or show mold after drying, spread them thinner on the paper towel, move the towel to a warmer dry spot away from humid areas, and wait until fully dry before placing them into envelopes and storing in the clean jar or box.
How can I adapt this activity for a 4-year-old versus a 10-year-old?
For a 4-year-old, have an adult collect pods and help open them over the paper towel while the child sorts seeds into a few big labeled piles and seals them in envelopes, and for a 10-year-old, let them collect from different plants, identify and write exact plant names and dates with the marker, and keep a record before storing the envelopes in the jar or box.
What are some ways to make the seed collection project more special or useful later on?
Personalize and improve your collection by decorating each paper envelope with a drawing of the plant and notes about location and planting tips, add a silica gel packet into the clean jar or box to keep seeds dry, and upload photos and what you learned to DIY.org as the final step.
Watch videos on how to collect and save seeds
How to Collect & Save Flower Seeds
4 Videos

How to Collect & Save Flower Seeds
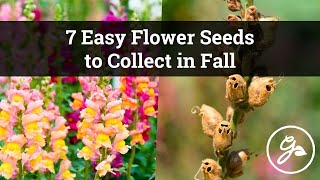
7 Easy Flower Seeds to Collect in Fall / Easy Garden Seed Saving Tips
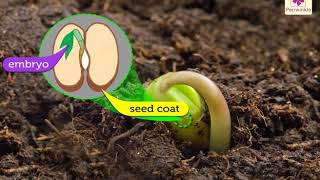
From Seeds To Plants | Environmental Studies for Kids | Grade 5 | Periwinkle

Collecting Asparagus Seeds | Saving Harvesting
Facts about seed saving and plant life cycles
🌻 A single sunflower head can hold up to about 2,000 seeds — that's a huge seed party!
⏳ Some seeds can remain viable for centuries; a 2,000-year-old date seed sprouted in 2005!
🗄️ The Svalbard Global Seed Vault stores over a million seed samples to protect crop diversity.
❄️ Seeds stay healthy longest when kept cool and dry — low humidity and cool temps are best for storage.
🏷️ Label each seed envelope with the plant name and collection date so you know when to plant them next season.
How do I collect and save seeds from garden plants?
What materials do we need to collect and store seeds?
What ages is seed collecting suitable for?
What are the benefits and safety tips for seed collecting with children?
