Construct a tape wallet
Make a simple tape wallet using colorful duct tape, safety scissors, and paper; measure, fold, and stick pieces to create pockets and decorate.


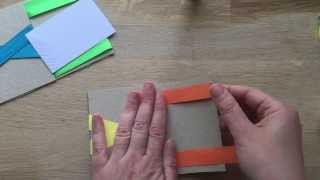
Step-by-step guide to make a tape wallet
How to Make a Duct Tape Wallet EASY
Step 1
Choose a clean flat table and lay one sheet of paper on it with the long side facing you.
Step 2
Use the ruler and pencil to draw a rectangle 8 inches wide by 6 inches tall on the paper.
Step 3
Cut out the rectangle carefully with safety scissors.
Step 4
Fold the rectangle in half widthwise and press the fold firmly to make the wallet base.
Step 5
Cut two pocket strips from another sheet of paper each 8 inches wide and about 3 inches tall.
Step 6
Place the first strip inside the folded wallet along the bottom so its top edge sits below the fold.
Step 7
Secure the bottom edge of the first strip to the wallet by pressing a strip of duct tape across the seam.
Step 8
Place the second strip inside the wallet above the first strip to make a card pocket.
Step 9
Secure the bottom edge of the second strip with a strip of duct tape.
Step 10
Seal the pocket sides by folding small pieces of duct tape over the left and right edges of each pocket.
Step 11
Trim any extra tape or paper hanging off the wallet edges with safety scissors.
Step 12
Decorate the outside and inside of your wallet with extra strips of colorful tape stickers and colouring materials.
Step 13
Test your wallet by sliding in cards or paper money to make sure the pockets hold them.
Step 14
Share a photo and description of your finished tape wallet on DIY.org
Help!?
What can we use instead of duct tape if we don't have any?
If you don't have duct tape, use clear packing tape, wide masking tape reinforced with craft glue, or double up strips of regular tape to secure the pocket seams where duct tape is used in steps 6, 8, and 9.
The tape keeps peeling off the paper — how can we stop that?
Press each strip of tape firmly with a ruler, fold small pieces of tape over the pocket edges as in step 9 to anchor the sides, and reinforce weak spots by adding an extra strip of tape across the seam (steps 6 and 8) or backing the paper pockets with a scrap of cardstock before taping.
How can I adapt this project for younger or older kids?
For preschoolers have an adult pre-measure and cut the 8×6 rectangle and 3×8 pocket strips (steps 2–4) and let the child fold, tape, and decorate (steps 5–11), while older kids can use cardstock, add more pockets, a snap or magnetic closure, and trim precisely (steps 4, 10, 12).
How can we make the wallet more personalized or durable?
Personalize and strengthen the wallet by covering the outside with overlapping colorful tape or clear packing tape (step 10), add a clear ID window by taping a small plastic rectangle inside a pocket before sealing the sides (steps 6–9), and test its fit with cards or play money (step 12).
Watch videos on how to make a tape wallet
How To Make A Wallet Out Of Fabric
4 Videos

How To Make A Wallet Out Of Fabric
How to Wrap Without Tape | Christmas Hack | Gift Wrapping for Kids

Patriot Craft for Kids -- Easy Note Card
How To Make a Magic Wallet Tutorial
Facts about duct tape crafts for kids
🛠️ Duct tape was developed during World War II to help seal ammunition cases and later became a go-to repair tool.
🎒 Wallets are ancient—people in ancient Greece used small pouches to carry coins and tiny tools.
✂️ Safety scissors have rounded tips and smaller grips so kids can cut paper more safely.
📏 Measuring and smart folding can make paper pockets surprisingly strong without glue or sewing.
🎨 Duct tape is made in hundreds of colors and patterns, perfect for decorating a one-of-a-kind wallet.
How do you make a tape wallet?
What materials do I need for a tape wallet?
What ages is this activity suitable for?
What are some fun variations for a tape wallet?
