Draft a perspective view
Draw a one point perspective room or street using pencil, ruler, and eraser to learn vanishing point, depth, proportions, and basic shading.

Drawing Apps
Step-by-step guide to draw a one-point perspective room or street
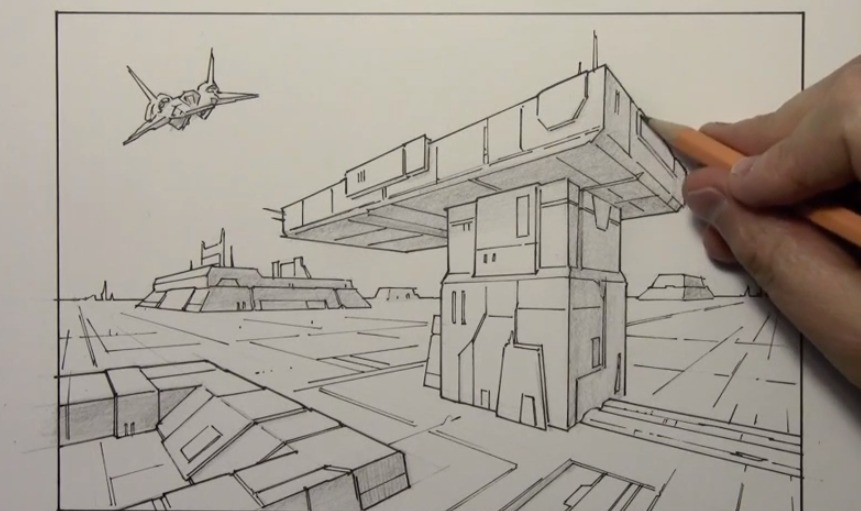
How to draw Perspective | Beginner Tutorial | DrawlikeaSir
Step 1
Gather your materials and get ready to draw.
Step 2
Place your paper in portrait for a room or landscape for a street.
Step 3
Use your pencil to draw a light straight horizontal line across the page as the horizon line.
Step 4
Put one dot on the horizon line to mark the vanishing point.
Step 5
Draw a light rectangle near the horizon to be the back wall of the room or the far building face on the street.
Step 6
Use your ruler to draw straight lines from each corner of that rectangle to the vanishing point.
Step 7
Draw vertical lines across the receding lines where you want walls or objects to stop so the shapes close up.
Step 8
Draw doors windows or simple street objects as rectangles on the front faces with your ruler.
Step 9
From the outer edges of each door window or object draw lines back to the vanishing point to give them depth.
Step 10
Erase extra construction lines and darken the final outlines you want to keep.
Step 11
Draw a small arrow on the page to show where the light is coming from.
Step 12
Shade each face with your pencil making surfaces facing away from the arrow darker and smoother strokes for lighter areas.
Step 13
Share your finished drawing on DIY.org
Help!?
What can we use if we don't have a ruler or the right paper for the activity?
Use the straight edge of a hardcover book, the flap of a cereal box, or a smartphone edge as a ruler and fold or cut printer/notebook paper into portrait or landscape as the instructions require.
My receding lines don't meet at the vanishing point and the perspective looks wrong — how can I fix it?
Lightly extend the lines from each corner of the back rectangle with your straight edge until they meet the vanishing point, adjust the rectangle's corners if needed, then erase extra construction lines as directed.
How can I change the activity to suit younger kids or make it more challenging for older kids?
For younger kids simplify by using a large back rectangle and only a few receding lines with pre-drawn front rectangles to trace, while older kids can add more objects, tighter proportions, or experiment with an extra vanishing point for complexity.
What are easy ways to enhance or personalize the finished perspective drawing?
Add furniture or street details on the front faces, draw the small arrow to place a clear light source and shade faces accordingly, experiment with colored pencils or textured shading for depth, then share the finished drawing on DIY.org.
Watch videos on how to draw a one-point perspective room or street
How To Draw Scenery With ViewFinders | DIY Course
4 Videos

How To Draw Scenery With ViewFinders | DIY Course
How To Draw A Kid Reading A Book

The Secret Behind Five Point Perspective Drawings | Tutorial

How to draw Eyes from ANY perspective | Tutorial | Drawlikeasir
Facts about perspective drawing for kids
🧭 One-point perspective uses a single vanishing point on the horizon where parallel lines appear to meet—perfect for drawing rooms and streets.
🕰️ Filippo Brunelleschi demonstrated linear perspective with experiments in Florence around 1420, changing how artists showed depth.
📚 Leon Battista Alberti published a how-to for perspective in his 1435 book De Pictura, giving artists a step-by-step guide.
📏 Renaissance painters often used rulers, string, or small peepholes to line up sightlines and keep perspective accurate.
🏠 When you draw floorboards or a row of windows toward the vanishing point, the scene instantly looks deeper and more realistic.
How do you draw a one-point perspective room or street?
What materials do I need to draw a one-point perspective scene?
What ages is a one-point perspective drawing suitable for?
What are the benefits of practicing one-point perspective drawing?
