Learn to knit
Learn basic knitting by making a simple scarf using chunky yarn and large needles, practicing casting on, the knit stitch, and binding off.


Step-by-step guide to make a simple knitted scarf
How to Knit // The Knit Stitch for Kids // Right-handed Tutorial
Step 1
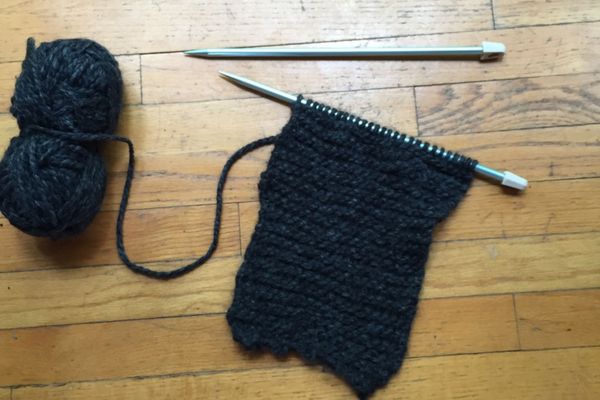
Gather the materials listed.
Step 2
Make a slipknot with the yarn and place it on one knitting needle.
Step 3
Cast on 20 stitches using the long tail cast-on method.
Step 4
Hold the needle with the cast-on stitches in your left hand and the empty needle in your right hand.
Step 5
Make the first knit stitch by inserting the right needle through the front of the first stitch on the left needle then wrap the working yarn around the right needle and pull a new loop through and slip the old stitch off.
Step 6
Repeat the knit stitch across the row until all stitches are on the right needle.
Step 7
Turn your work so the needle with the stitches is in your left hand and the empty needle is in your right hand.
Step 8
Knit every row the same way to make garter stitch fabric by repeating Steps 5 and 6.
Step 9
Keep knitting rows until the scarf measures about 24 inches 60 cm or reaches the length you want.
Step 10
Bind off by knitting two stitches then lifting the first knitted stitch over the second and continuing this until one stitch remains.
Step 11
Cut the yarn leaving a 6 inch 15 cm tail.
Step 12
Pull the tail through the final loop to secure the end.
Step 13
Thread the tail into a tapestry needle and weave the loose ends into the edges of the scarf to hide and secure them.
Step 14
Take a picture and share your finished scarf on DIY.org
Help!?
What can we use if we don't have knitting needles, tapestry needle, or the yarn called for?
Use two smooth pencils or blunt chopsticks as temporary knitting needles, a blunt sewing needle or small crochet hook instead of the tapestry needle for Step 12, and any medium-weight (worsted) yarn for the long-tail cast-on of 20 stitches in Step 3.
My stitches keep slipping off or the long-tail cast-on tail wasn't long enough — how can I fix that?
If stitches slip off during Steps 3–6, stop and put a stitch marker or rubber band on the needle tip to hold them, and if the tail in Step 3 is too short, restart with a longer tail or use a simple backward loop cast-on to reach 20 stitches.
How can I change the activity for younger kids or make it more challenging for older kids?
For younger children cast on 8–12 stitches and use chunky yarn with large needles so each knit stitch in Steps 5–6 is easier, while older kids can cast on 30–40 stitches and knit more rows in Step 8 for a wider, longer scarf.
What are simple ways to personalize or extend the scarf once we've followed the pattern?
Personalize the scarf by switching yarn colors every few rows during Step 6 to make stripes, add fringe after binding off in Step 11 using extra 6-inch tails from Step 10, or attach a pom-pom and sew it on after weaving ends in Step 12.
Watch videos on how to make a simple knitted scarf
How to Start Knitting (Step-by-Step Beginner Guide) 🧶
4 Videos

How to Start Knitting (Step-by-Step Beginner Guide) 🧶
HOW TO KNIT for TOTAL BEGINNERS: STEP-BY-STEP Tutorial (SLOW REPEATS & common MISTAKES)

How to Knit - for absolute BEGINNERS!
Learn to Knit: The Basic Techniques in a Quick Tutorial
Facts about knitting and yarn crafts for kids
🧶 Knitting has been practiced for centuries—some of the oldest known knitted pieces come from medieval times.
✋ Nearly all knitted fabrics are built from just two basic stitches: the knit and the purl.
🪢 Using chunky yarn and large needles makes a scarf grow quickly, so beginners see results fast!
🧵 Garter stitch (knitting every row) creates a squishy, reversible fabric that's perfect for first scarves.
🧠 Knitting helps fine motor skills and focus, and many people find it calming and meditative.
How do I teach my child to knit a simple scarf?
What materials do I need to teach knitting to a child?
What ages is learning to knit suitable for?
What are the benefits and safety tips for kids learning to knit?
