Learn to crochet
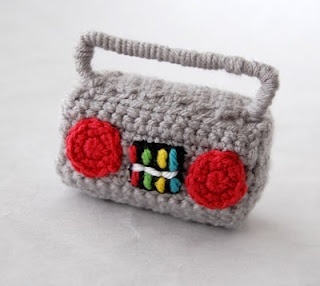
Learn basic crochet stitches to make a small coaster or wristband using yarn and a safe plastic hook, practicing counting and patience.


Step-by-step guide to learn to crochet
CROCHET FOR BEGINNERS LESSON 1 / CROCHET FOR KIDS
Step 1
Gather your materials and choose whether you will make a round coaster or a wristband.
Step 2
Make a slip knot and put it on the crochet hook.
Step 3
Make a foundation chain: if you chose a coaster chain 4; if you chose a wristband chain until it fits snugly around your wrist (about 30 to 40 chains).
Step 4
Join the last chain to the first chain with a slip stitch to form a ring and make sure the ring is not twisted.
Step 5
Work single crochet stitches into the ring: if coaster make 12 single crochets evenly; if wristband make one single crochet in each chain around until you reach the starting point.
Step 6
For a coaster make the next round by placing 2 single crochets in every stitch to double the stitch count; for a wristband keep working single crochet rounds without increasing until the band is the height you want.
Step 7
For a bigger coaster add another round by repeating: 1 single crochet in the first stitch then 2 single crochets in the next stitch around until the coaster is the right size.
Step 8
Finish your last stitch and leave a tail of yarn about 6 inches long.
Step 9
Cut the yarn with scissors leaving the tail you made.
Step 10
Thread the yarn tail onto the blunt yarn needle.
Step 11
Weave the tail through several stitches to hide it and pull tight so the end is secure.
Step 12
Trim any extra yarn after weaving and gently reshape your coaster or check the wristband fit.
Step 13
Share your finished creation on DIY.org
Help!?
What can we use if we don't have a crochet hook, blunt yarn needle, or special yarn?
Use a size-appropriate plastic or aluminum hook from another set or a smooth pencil taped with a hook temporarily for making your slip knot and chains, weave tails with a large darning/tapestry or blunt sewing needle instead of the blunt yarn needle, and substitute any medium-weight acrylic or even T‑shirt yarn for the original yarn when following the chain and single‑crochet steps.
My ring came out twisted or my coaster isn't flat—what should I check and fix?
Unfasten the joining slip stitch and rejoin the last chain to the first chain making sure the ring is not twisted, use a stitch marker and recount so you have 12 single crochets evenly for the coaster, and tighten the starting slip knot to close the center if the hole is too large.
How can I adapt the instructions for different age groups?
For younger children simplify by using bulky yarn and an extra‑large hook and stick to the coaster option (chain 4, 12 sc) for a quick win, while older kids can chain 30–40 for the wristband, keep working single crochet rounds, and practice increases to make larger coasters.
How can we personalize or extend the finished coaster or wristband?
Personalize by changing yarn colors between rounds to create stripes, sew on a button or beads to the wristband before weaving the tail with the blunt yarn needle, or add another increase round (1 sc then 2 sc) to make the coaster bigger.
Watch videos on how to learn to crochet
LESSONS 1-4 CROCHET FOR BEGINNERS / CROCHET FOR KIDS / For teachers and students!
4 Videos
LESSONS 1-4 CROCHET FOR BEGINNERS / CROCHET FOR KIDS / For teachers and students!
How to Teach Children to Crochet - a Beginner Tutorial
CROCHET FOR BEGINNERS LESSON 1 / CROCHET FOR KIDS / Designed for teachers to use in the classroom!
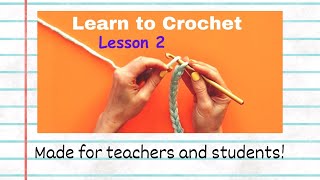
CROCHET FOR BEGINNERS LESSON 2 / CROCHET FOR KIDS / Designed for teachers to use in the classroom!
Facts about crochet for kids
🧶 The word "crochet" comes from the French word for "small hook" — a perfect name for this hooked craft!
🪝 Plastic crochet hooks are popular for kids because they're lightweight, smooth, inexpensive, and less likely to snag yarn or scratch hands.
🔢 Crochet patterns use short abbreviations and stitch counts (like "ch" for chain and "sc" for single crochet), so following them helps build counting skills.
⏳ A tiny project like a coaster or wristband can often be finished in 15–60 minutes, great for practicing focus in short bursts.
🧠 Studies on crafting show activities like crochet can reduce stress, improve mood, and help develop patience and concentration.
How do I teach my child to crochet a small coaster or wristband?
What materials do I need to learn crochet with my child?
What ages are suitable for a child to learn basic crochet stitches?
What are the benefits, safety tips, and easy variations for kids learning crochet?
