Make a necklace
Make a beaded necklace using string, beads, and clasps. Practice pattern design, measuring length, and safe knotting while personalizing your jewelry.


Step-by-step guide to make a beaded necklace
Easy Seed Bead Necklace Tutorial: Beads Jewelry Making for Beginners at Home
Step 1
Use a ruler or measuring tape to measure how long you want the necklace to be against your neck.
Step 2
Cut a length of beading string that is 2 inches longer than your measured length using scissors.
Step 3
Wrap a small piece of clear tape around one tip of the string to stiffen it for threading.
Step 4
Slide one half of the clasp onto the taped end of the string.
Step 5
Arrange your beads on a flat surface to create a pattern you like.
Step 6
Thread the beads onto the string following the pattern you arranged.
Step 7
Slide the other half of the clasp onto the free end of the string.
Step 8
Tie a tight double knot around the clasp on the first end to secure it.
Step 9
Tie a tight double knot around the clasp on the other end to secure it.
Step 10
Trim the extra string tails close to each knot with scissors leaving a tiny tail so the knot does not slip.
Step 11
Fasten the clasp and try on the necklace to check that it fits comfortably.
Step 12
Share your finished necklace on DIY.org.
Help!?
What can I use instead of beading string or a metal clasp if I can't find them?
If you can't find beading string or a clasp, use strong nylon fishing line or embroidery floss and fasten the ends by tying your double knots around a small button or bead instead of sliding on a metal clasp.
My beads won't thread or knots keep slipping—what should I try?
If beads are hard to thread because the taped tip is too bulky or the string frays, trim the tape so the tip is slimmer or use a plastic beading needle and re-tape the end, and ensure you pull each tight double knot firmly before trimming the tails.
How can I adapt this necklace activity for different age groups?
For younger children (3–5) use large wooden beads, pre-cut the string and help with wrapping the clear tape and tying the double knots, while older kids can measure their own neck, arrange intricate patterns on a flat surface, and finish the clasp independently.
How can we extend or personalize the necklace beyond the basic instructions?
To personalize the necklace, paint or write on wooden beads before threading, add a charm near the clasp, or create a layered look by cutting extra lengths of string and arranging multiple matching patterns on the flat surface before threading.
Watch videos on how to make a beaded necklace
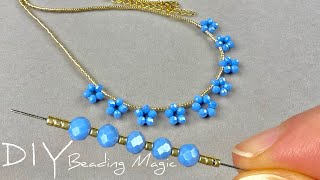
Making simple necklace with beads for beginners | 9 very easy tutorial
4 Videos

Making simple necklace with beads for beginners | 9 very easy tutorial
EASY Beaded Necklace Tutorial: Master Beads Jewelry Making with this Simple Beading Tutorials
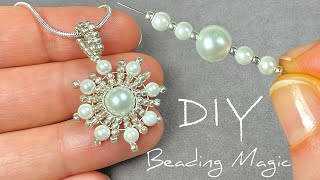
Easy Beaded Necklace Tutorial: How to Make Pendant with Beads | Beading for Beginners
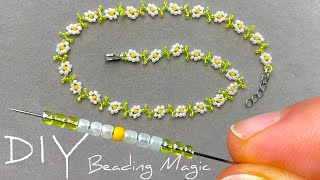
Easy Tutorial: Beaded Flower Necklace | How to Make a Seed Bead Necklace
Facts about jewelry making for kids
🐚 Beads are one of the oldest forms of personal decoration — archaeologists have found shell beads over 40,000 years old.
📏 Common necklace lengths to remember: choker 14–16 in, princess 18 in, matinee 20–24 in — measure before you cut your string!
🧠 Designing repeating bead patterns is a fun way to practice math skills like counting, sequencing, and symmetry.
🔗 Clasps like lobster or toggle types and secure knots (double or surgeon's knot) help keep necklaces from coming undone.
🏺 Beads can be made from plastic, glass, gemstones, wood, or clay — the material changes the necklace's weight and style.
How do I make a beaded necklace with my child?
What materials are needed to make a beaded necklace?
What ages is beaded necklace making suitable for?
What are the benefits and safety tips for making beaded necklaces?
