Make a hammock
Build a simple fabric hammock using strong cloth, rope, and knots; measure, tie safe tree attachments with adult help, and test gently for balance.


Step-by-step guide to make a fabric hammock
How to Make a Hammock - Step by Step Instructions
Step 1
Gather all materials and lay them out on a flat clean surface so everything is easy to reach.
Step 2
Find two healthy trees that look strong and steady and ask an adult to inspect them for safety.
Step 3
Measure the distance between the two trees with the measuring tape and write the number down.
Step 4
Lay the cloth flat and fold over 6 inches (15 cm) at each short end; mark and hold the folds in place with pins or clips.
Step 5
With adult help sew the folded ends to make a strong tube channel for the rope or secure the folds tightly with safety pins.
Step 6
Thread one rope through one fabric channel until equal rope length sits on both sides and tie a large overhand knot at the fabric end to stop slipping.
Step 7
Thread the second rope through the other fabric channel until equal rope length sits on both sides and tie a large overhand knot at that fabric end.
Step 8
Wrap a tree-friendly strap or wide cloth strip around the first tree at the height you want the hammock and secure the strap while an adult holds it.
Step 9
With adult help tie a secure bowline knot to attach the hammock rope to the tree strap so the rope will not slip.
Step 10
Repeat Step 8 and Step 9 on the other tree and adjust both knots so the hammock hangs with a gentle sag.
Step 11
With an adult nearby press the center of the hammock with your hand to check the tension and look for slipping or fraying.
Step 12
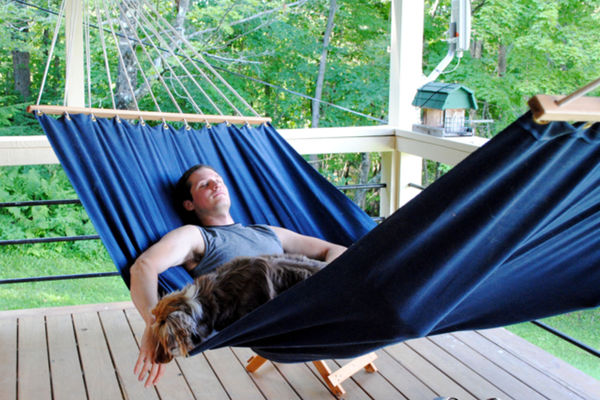
With adult help sit into the hammock slowly and gently to test balance and stability and tighten knots if the hammock feels loose; repeat until it feels safe.
Step 13
Take a photo and share your finished hammock on DIY.org.
Help!?
If I don't have a sewing needle, thread, or safety pins, what can I use to make the folded 6-inch (15 cm) fabric channels secure for the rope?
With adult help, reinforce each folded end (Step 4) by wrapping strong duct tape around the 6-inch (15 cm) fold and adding heavy-duty zip ties or fabric glue so the rope in the channel (Steps 6–7) won't slip.
What should I do if the hammock sags too much or the knots start slipping during the tension check in Step 11?
If the hammock sags or knots slip during the center press (Step 11), have an adult retie the bowline and overhand knots (Steps 9–10), tighten the rope inside the sewn channels (Step 5), and replace any frayed rope before re-testing in Step 12.
How can I adapt this hammock activity for different ages of children?
For toddlers, set the hammock lower to the ground and use wide tree straps with an adult holding the strap during Step 8–13, while older kids can take the lead on measuring (Step 3), sewing the channels (Step 5), and decorating the cloth in Step 14.
What are simple ways to improve or personalize the finished hammock after Step 13?
To enhance comfort and style, sew a small pocket or pillow to the center of the cloth before Step 5, add fabric paint or tassels after Step 13, and swap the tied overhand knots (Steps 6–7) for carabiners clipped to the tree-friendly straps (Steps 8–9).
Watch videos on how to make a fabric hammock
👉 DIY Canvas Hammock | How I Made My Own Relax Spot
4 Videos
👉 DIY Canvas Hammock | How I Made My Own Relax Spot
DIY Bamboo Swing: Build Your Own Relaxing Holiday Hammock | Step-by-Step Tutorial

How To Make Hammock At Home - DIY - (EASY HAMMOCK)
3 Easy Knots You Must Learn | How To Set Up A Hammock | Bushcraft Essentials
Facts about knot-tying and outdoor safety
🏝️ Hammocks were first used by indigenous peoples of the Caribbean and Central America and reached Europe in the 1500s.
🪢 The bowline knot makes a strong, non-slipping loop that's easy to untie, so it's a classic choice for hammock ends.
🌳 Wide tree straps spread the load and protect bark — never wrap thin rope tightly around a living tree.
🧵 Canvas and parachute nylon are popular hammock fabrics because they're strong, breathable, and comfy.
⚖️ A well-built hammock can hold several hundred pounds, but always test gently and follow safety limits.
How do I build a simple fabric hammock with my child?
What materials do I need to make a kid-friendly hammock?
What ages is building and using a hammock suitable for?
What safety tips should I follow when making and using a hammock?
