Make digital papercraft
Use simple computer templates to design and print papercraft models, then cut, fold, and glue paper shapes to build 3D characters.

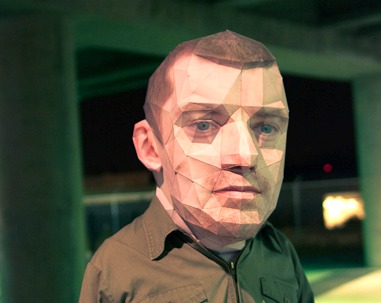

Step-by-step guide to make digital papercraft models
How To Make Paper House - Easy paper toys
Step 1
Find a simple papercraft character template you like on a website or template app.
Step 2
Use the template editor to change the colors or add simple patterns to your character.
Step 3
Set the print size to fit on one sheet of printer paper and choose 100 percent scale.
Step 4
Print the customized template onto the printer paper.
Step 5
Cut out each paper shape carefully along the solid outer lines.
Step 6
Score each fold line by running the ruler along the line and pressing with the blunt back of the scissors.
Step 7
Fold each scored line neatly so the edges are crisp.
Step 8
Put glue on one tab at a time following the template marks.
Step 9
Press each glued tab to the matching edge and hold for a few seconds until it sticks.
Step 10
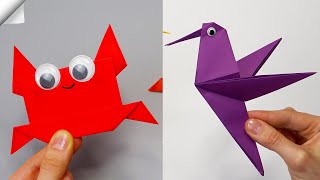
Decorate your finished 3D character with colouring materials to add details like eyes or clothes.
Step 11
Reinforce any weak seams with a small strip of clear tape if needed.
Step 12
Share a photo and a short description of your finished creation on DIY.org
Help!?
What can I use instead of a home printer or printer paper if I can't print the template at home?
Use a local copy shop or library to print the file from the template editor at 100 percent scale onto printer paper, or print on heavier cardstock at the same 100 percent scale for sturdier shapes.
My tabs won't stick or the edges come apart—what should I check or do?
Be sure you scored each fold line with a ruler and the blunt back of the scissors, apply glue to one tab at a time following the template marks, press the glued tab to the matching edge and hold for a few seconds, and reinforce any weak seams with a small strip of clear tape if needed.
How can I adapt the activity for younger children or challenge older kids?
For younger kids, pre-cut and pre-score the printed template on thicker cardstock so they only fold and glue, while older kids can use the template editor to add complex patterns and assemble multi-part models using a craft knife under supervision.
How can we enhance or personalize the finished papercraft beyond basic coloring?
Customize the template editor with photos or patterns, add glued-on details like googly eyes and fabric scraps with coloring materials for clothing, create a cardboard diorama base, or print multiple sizes to make a family set before sharing a photo and description on DIY.org.
Watch videos on how to make digital papercraft models
How To Make Paper in Minecraft
4 Videos
How To Make Paper in Minecraft
How to make paper toys - 6 Easy paper crafts
How To Make Easy Paper House - DIY paper toys
6 Easy paper crafts | How to make paper toys
Facts about papercraft and digital design for kids
🧩 Papercraft templates are flat "nets" that fold along edges to become 3D shapes — the same idea behind making a cardboard box.
✂️ Kirigami (cutting paper) is a close cousin to origami and lets makers add tabs, windows, and moving parts without complicated glue work.
🖨️ Many hobbyists design templates on a computer and print them at home using free tools like Inkscape or hobby software like Pepakura.
🎨 Thicker paper or cardstock makes papercraft models sturdier — some artists even build large-scale paper sculptures for galleries and events.
🖱️ Digital templates are easy to resize and duplicate, so one saved file can produce dozens of characters in different sizes with a few clicks.
How do I make digital papercraft models using computer templates?
What materials and software do I need for digital papercraft at home?
What ages is digital papercraft suitable for and when should kids have help?
What are the benefits, safety tips, and fun variations for digital papercraft?
