Do nails
Decorate and paint safe, non-toxic nail art using polish, stickers, and simple tools, practicing fine motor skills and creative pattern design.


Step-by-step guide to decorate and paint safe nail art
Easy, Safe & Cute Nail Art for Active Kids! 💅🏻 #wowcube
Step 1
Wash your hands with soap and water and dry them completely.
Step 2
Lay a paper towel on the table and place all your materials within easy reach.
Step 3
Gently file each nail into the shape you like.
Step 4
Apply a thin layer of base coat to each nail.
Step 5
Wait 2 minutes for the base coat to dry.
Step 6
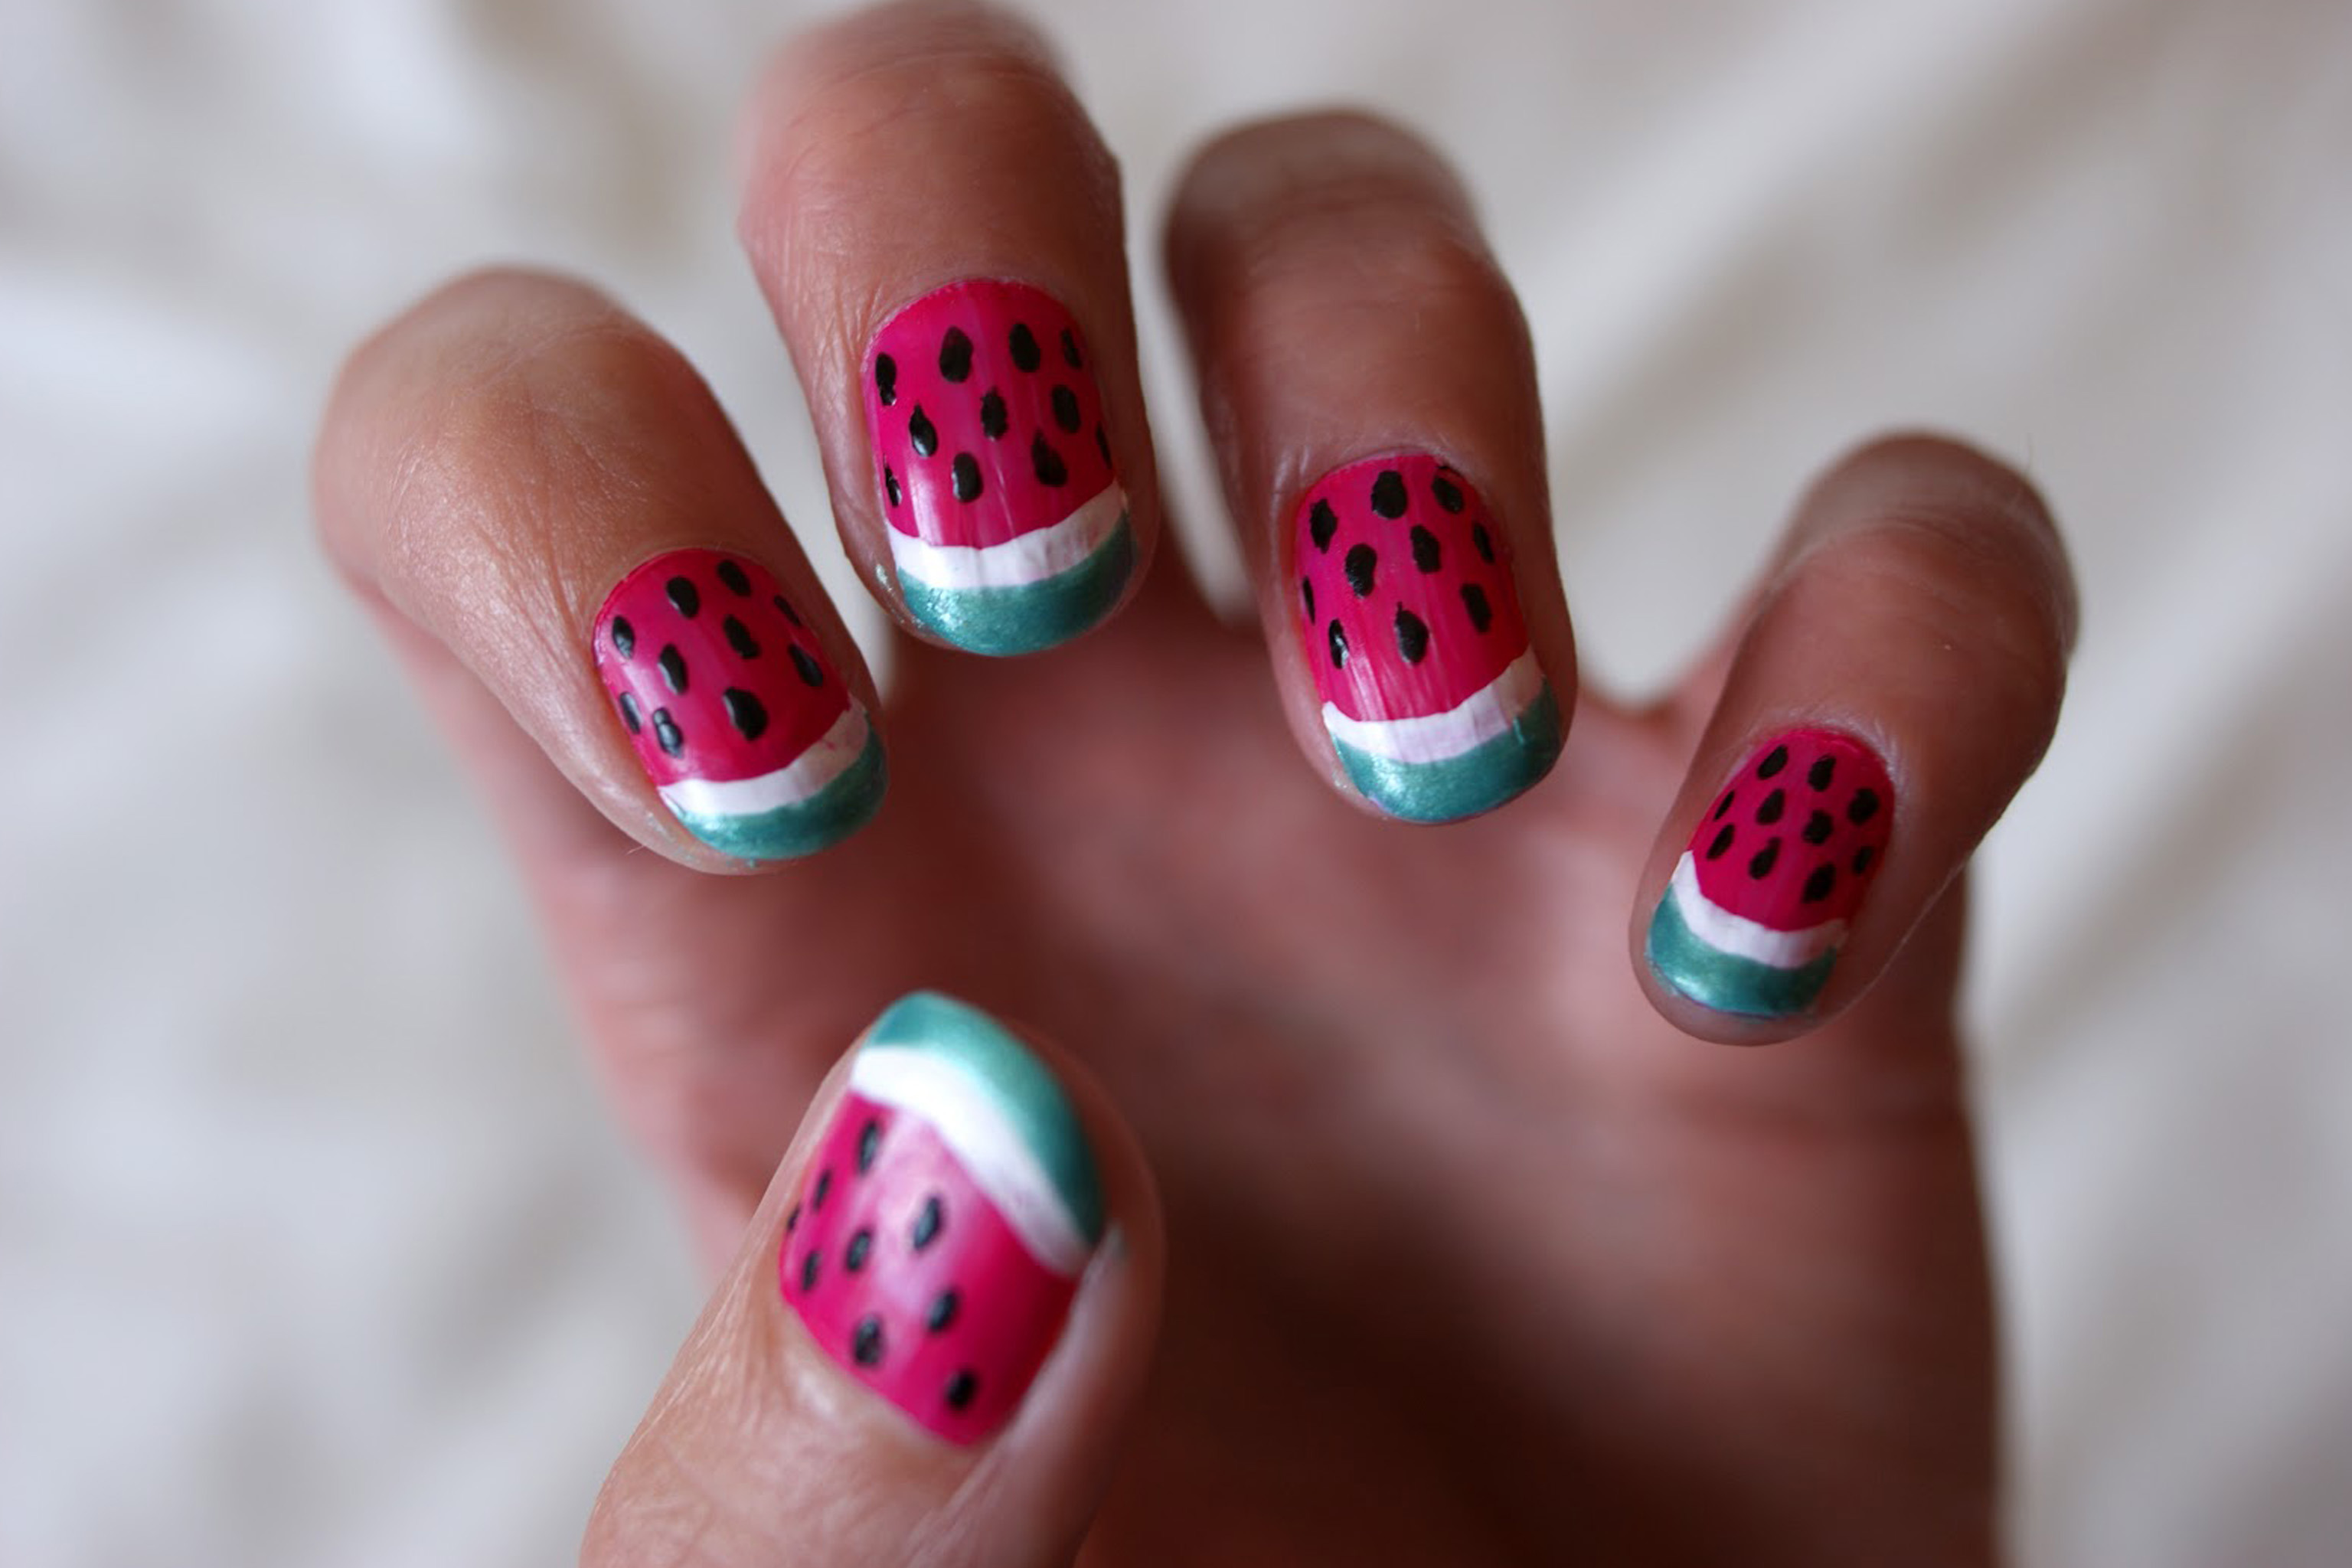
Paint one thin coat of your chosen polish color on each nail.
Step 7
Wait 3 minutes for that coat to dry until it feels slightly tacky.
Step 8
Practice dots and lines on the paper towel with the dotting tool or toothpick.
Step 9
Carefully press nail stickers onto the nails where you want them.
Step 10
Use the dotting tool or toothpick to add dots lines or small shapes with a second polish color.
Step 11
Apply a thin layer of top coat to each nail to seal your design.
Step 12
Wait 10 minutes for your nails to dry completely and avoid touching them.
Step 13
Take a photo and share your finished nail art creation on DIY.org.
Help!?
What can we use if we can't find a dotting tool, base coat, or nail stickers?
Use a toothpick or the rounded end of a bobby pin for dotting (Step 8 and Step 10), substitute a clear regular polish as the base coat in Step 4 and as a top coat in Step 11, and replace nail stickers in Step 9 with small pieces of tape or hand-painted shapes.
My polish keeps smudging or peeling—what should I check or change?
Apply thinner coats as instructed in Step 4 and Step 6, wait the recommended times in Step 5, Step 7, and Step 12 before touching or adding layers, press stickers firmly along the edges in Step 9, and seal with the thin top coat in Step 11 or a quick-dry top coat to reduce smudging and peeling.
How can I adapt this activity for younger or older kids?
For toddlers skip filing (Step 3) and let them stick stickers (Step 9) with close supervision, for school-age kids practice dots on the paper towel (Step 8) and try simple patterns in Step 10, and for teens attempt more intricate designs in Step 10 and share their photos on DIY.org (Step 13).
How can we make the nail art more creative or longer-lasting?
Practice designs on the paper towel in Step 8, add glitter or a second color for dots and shapes in Step 10 or create an ombré with a sponge before Step 10, press sticker edges and apply two thin layers of top coat in Step 11, then photograph different angles to share on DIY.org in Step 13.
Watch videos on how to decorate and paint safe nail art
30+ Easy Nail Art Designs For Beginners Compilation! 💅🏼
4 Videos

30+ Easy Nail Art Designs For Beginners Compilation! 💅🏼
8 Easy nail art designs for beginners || Simple Nail art at home
10 Easy and simple nail art designs for beginners || Nail art at home 2025

Easy nail art designs for beginners without tools | Nail art tutorial for beginners step-by-step
Facts about child-safe nail art and fine motor activities
💅 Nail art goes way back — ancient China and Egypt decorated nails as a sign of style and status.
🎨 Nail stickers and decals let kids create complex designs in seconds, great for tiny hands.
🧠 Painting small details on nails helps build fine motor skills, hand–eye coordination, and focus.
🌱 There are kid-friendly, water-based or 'non-toxic' polishes that avoid harsh solvents — always check labels.
⏱️ Using a quick-dry top coat or gentle cool air speeds drying and helps prevent smudges and smears.
How do you do a safe, kid-friendly nail art activity?
What materials are needed for kid-friendly nail art?
What ages is this nail art activity suitable for?
What safety tips should parents follow for kids' nail art?
