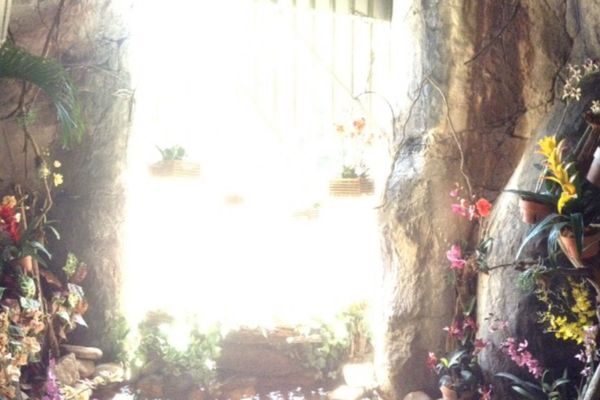
Stage and photograph a fantasy world
Create a miniature fantasy scene using toys, craft materials, and lighting, then stage and photograph it to tell a magical story through images.


Step-by-step guide to stage and photograph a fantasy world
How to MAKE and DESIGN a fantasy world map
Step 1
Pick a fantasy theme for your scene such as a dragon cave enchanted forest or fairy castle.
Step 2
Gather the toys and craft materials that match your chosen theme and put them on your workspace.
Step 3
Choose a flat base like a shoebox lid or tray and place it on a table or the floor.
Step 4
Cut a piece of colored paper to make a background that fits the size of your base.
Step 5
Tape or glue the background to the back edge of the base so it stands up behind your scene.
Step 6
Place the main toy that tells the story in the center or at a focal point on your base.
Step 7
Arrange smaller toys and craft props around the main toy to build the scene and add details.
Step 8
Add cotton balls stuffing or glitter to create clouds smoke or magic effects in the scene.
Step 9
Position small lights or a flashlight to shine where you want highlights or shadows.
Step 10
Turn off room lights so you can see how the small lights change the mood of your scene.
Step 11
Put your camera or phone at the same level as the scene to choose a good angle and framing.
Step 12
Take a test photo to check the lighting composition and how the story reads in the picture.
Step 13
Make one small change like moving a light or nudging a prop to improve the test photo.
Step 14
Take several final photos from different angles and pick your favorite image.
Step 15
Share your finished fantasy scene photo and story on DIY.org
Final steps
You're almost there! Complete all the steps, bring your creation to life, post it, and conquer the challenge!

Help!?
What can I use instead of hard-to-find items like a shoebox lid, cotton balls, or small lights?
If you don't have a shoebox lid or tray, use a hardcover book or baking sheet as your flat base, and if you lack cotton balls or small lights try pillow stuffing for clouds and your phone's flashlight for highlights.
My scene looks flat or toys keep falling over—what should I do during setup and testing?
If toys keep toppling or your test photo shows harsh shadows, anchor figures with a bit of tape or play‑dough, soften the flashlight by covering it with tissue paper, and retake the test photo as the instructions say.
How can I adapt the activity for different ages?
For ages 3–5 let them choose the fantasy theme and arrange big toys while an adult cuts the background and handles the camera, for 6–8 give them scissors and glue to make props, and for 9+ encourage experimenting with lighting, angles, and multiple final photos.
What are simple ways to improve or personalize the finished fantasy scene?
To extend the activity make a moving diorama or stop‑motion short by taking many tiny changes between photos, add personalized props or a hand‑written story caption, and use glitter or LED string lights for extra magic before you share the final image on DIY.org.
Watch videos on how to stage and photograph a fantasy world
12 Fantasy Writing Prompts (Part 1): Original Fantasy Story Ideas! 🧙
4 Videos
12 Fantasy Writing Prompts (Part 1): Original Fantasy Story Ideas! 🧙
Photography Tips For Kids

Making a magic school in a fantasy world

☀️ fantasy worldbuilding 101 - pt. 1: the absolute basics
Facts about diorama making and miniature photography
📐 Common miniature scales are 1:12 for dollhouses and 1:6 for action figures—keeping scale consistent makes scenes believable.
🧚 Filming tricks like forced perspective were used in movies such as The Lord of the Rings to make tiny characters look huge in a big world.
🌿 Real textures—like sand, moss, fabric scraps, or gravel—help sell scale because our eyes read detail to judge size.
🔦 Tiny LEDs and fairy lights can create dramatic, safe lighting effects that make a miniature scene feel magical after dark.
📷 Using a shallow depth of field (wide aperture) in macro or close-up shots makes mini scenes look cinematic and more realistic.
How do I stage and photograph a miniature fantasy scene with my child?
What materials and tools do I need to create a miniature fantasy scene?
What ages is staging and photographing a miniature fantasy scene suitable for?
What are the benefits and safety tips for this miniature storytelling and photography activity?


One subscription, many ways to play and learn.
Only $6.99 after trial. No credit card required