Make a camera obscura
Build a simple camera obscura using a shoebox, pinhole, and tracing paper to project and trace upside down images while exploring light.


Step-by-step guide to make a camera obscura
How to make your own CAMERA OBSCURA | AT HOME science project & photography project
Step 1
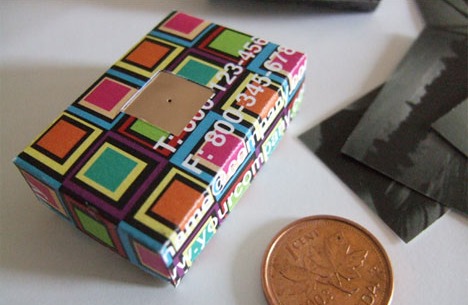
Gather all the materials and bring them to a table or flat workspace.
Step 2
Put the shoebox on the table and close the lid so you can work on the sides.
Step 3
Decide which opposite sides will be the pinhole side and the screen side.
Step 4
Mark the center of the screen side with your pencil.
Step 5
Cut a square window about 6 cm by 6 cm in the center of the screen side.
Step 6
Tape the tracing paper over the window and smooth out any wrinkles so it is flat.
Step 7
Mark the center of the pinhole side with your pencil.
Step 8
Cut a small square of aluminum foil about 3 cm by 3 cm and tape it over the center mark on the pinhole side.
Step 9
With adult supervision use the pin to poke a very tiny hole in the middle of the foil.
Step 10
Darken the inside of the box by coloring it with a black marker or lining it with black paper so stray light is reduced.
Step 11
Seal any gaps with tape and close the box so it is as light-tight as possible.
Step 12
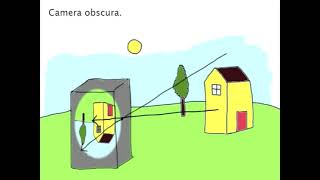
Go outside and point the pinhole toward a bright scene like trees or a building.
Step 13
Look at the tracing paper inside the box and use your pencil to trace the upside-down image you see.
Step 14
Share your finished camera obscura and your traced pictures on DIY.org
Help!?
What can I use if I don't have a shoebox, tracing paper, or aluminum foil?
Use any light-tight container like a cereal or pizza box instead of a shoebox, tape a piece of thin white paper or wax paper over the 6×6 cm window in place of tracing paper, and substitute a piece of thin metal from a soda can or extra-baking foil for the 3×3 cm aluminum foil.
My projected image is blurry or too faint — what should I check or fix?
Make sure the pinhole in the foil is a very tiny, single hole (re-poke with the pin if it's jagged or too large), smooth any wrinkles when you tape the tracing paper over the 6×6 cm window, darken the interior with the black marker or black paper, and seal gaps with tape so stray light is minimized.
How can I adapt the steps for younger children or challenge older kids?
For younger children have an adult pre-cut the square windows and pre-poke the foil pinhole and let the child do taping and tracing, while older kids can experiment by changing the box length, trying different pinhole sizes, or replacing the foil pinhole with a small magnifying lens to sharpen the image.
What are some ways to enhance or personalize our camera obscura project?
Decorate the outside of the shoebox before sealing, try adding a magnifying glass over the taped 3×3 cm foil instead of a pinhole, trace multiple upside-down scenes from different viewpoints, and photograph your traced pictures to share on DIY.org.
Watch videos on how to make a camera obscura
Make Your Own Camera Obscura! (UCR ARTS for kids)
4 Videos

Make Your Own Camera Obscura! (UCR ARTS for kids)
how a camera obscura works
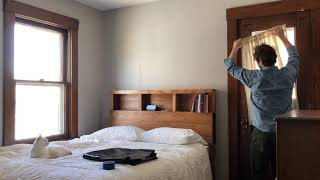
How to Turn a Room into a Camera Obscura
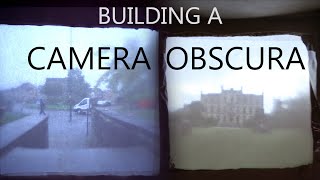
How To Build a Cardboard Camera Obscura
Facts about light and optics for kids
🔦 A camera obscura projects a real, upside-down image because light travels in straight lines through the pinhole.
🕳️ A tiny pinhole acts like a lens — make it smaller for a sharper image but the picture will get dimmer.
🧑🔬 Ibn al-Haytham (Alhazen) described camera obscura experiments in his Book of Optics around 1000 AD.
🎨 Some art historians think painters like Johannes Vermeer used camera obscuras to help trace realistic scenes.
☀️ You can safely view the sun during an eclipse by projecting its image with a shoebox camera — never look directly at the Sun.
How do I make a camera obscura with a shoebox?
What materials do I need to build a shoebox camera obscura?
What ages is this camera obscura activity suitable for?
What are the benefits of building a camera obscura?
