Take a macro photo
Use a camera or smartphone to take close up macro photos of small objects, learning focus, lighting, and composition through hands on exploration.

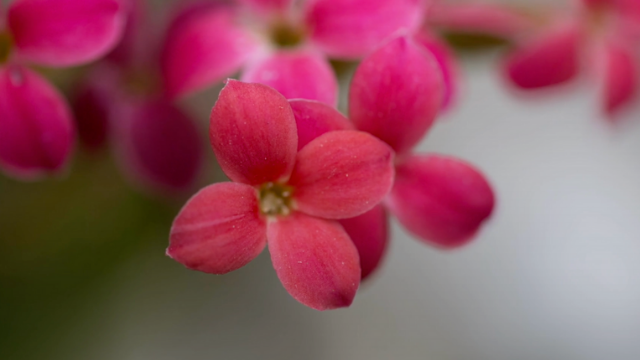

Step-by-step guide to take a macro photo
Step 1
Choose one small object you think looks interesting up close.
Step 2
Gently wipe the object with the cloth or tissue to remove dust or fingerprints.
Step 3
Place the object on the stable surface or on top of the stack of books.
Step 4
Put the lamp nearby or move your setup to the sunny window so the object is well lit.
Step 5
Open your camera app on the smartphone or camera.
Step 6
Switch to macro or close-up mode if your camera has that option.
Step 7
Slowly move the camera closer until the object fills most of the screen.
Step 8
Tap the object on the screen to lock the focus where you want it.
Step 9
Tilt or move the camera a little to try different angles and compositions.
Step 10
Take five photos from slightly different distances and angles to get lots of choices.
Step 11
Open your photos and pick your favorite close-up shot.
Step 12
Use the phone editing tools to crop or brighten the photo if you want to make it pop.
Step 13
Share your finished photo on DIY.org
Help!?
What can I use instead of a lamp, cloth, or stack of books if I don't have them?
If you don't have a lamp, cloth, or stack of books, use a phone flashlight or desk lamp for lighting, a paper towel to gently wipe the object, and a sturdy table, box, or hardcover book as a stable surface.
My close-up photos keep coming out blurry—what step might I be missing and how do I fix it?
If your photos are blurry when you slowly move the camera closer, steady the phone against the stack of books or a surface, tap the object on the screen to lock focus, and take the five photos from slightly different distances to get a sharp shot.
How can I change this activity for younger or older kids?
For younger children, have an adult or older sibling hold the camera, help wipe the object with the cloth, and place it on a low stable surface, while older kids can switch to macro mode, experiment with tilting the camera for different compositions, and use the phone editing tools to crop and brighten before sharing on DIY.org.
What are some ways to extend or personalize the macro photo project after taking the pictures?
To extend the project, place the object on colored paper or fabric on the stable surface, take the five photos from varied angles, use the phone editing tools to crop and brighten your favorites, and create a themed series to share on DIY.org.
Watch videos on how to take a macro photo
Focus Stacking in Macro Photography - Beginner Tutorial
4 Videos
Focus Stacking in Macro Photography - Beginner Tutorial
How to Master Settings in Macro Photography

Beginner's guide to Macro Photography - Everything you need to know to get started!
Mastering Macro Photography: The Complete Shooting and Editing Tutorial
Facts about photography for kids
📷 Macro photography is often defined as life-size or greater magnification — 1:1 means the subject is recorded at the same size as real life on the camera sensor.
🔍 When you shoot extremely close, depth of field can shrink to less than a millimeter, so tiny adjustments change what's in focus.
✨ The word 'bokeh' comes from the Japanese 'boke' (blur) and photographers prize it for creating smooth, dreamy backgrounds.
📱 Many modern camera phones offer a macro mode or use computational techniques like focus stacking to make tiny subjects sharper.
💡 Soft, diffused light (like cloudy daylight or a DIY diffuser) helps reveal texture without harsh shadows in macro photos.
How do I take macro photos with my child?
What materials do I need for a kid-friendly macro photography session?
What ages is macro photography suitable for?
What are the benefits of macro photography for children?
