Take a landscape photo
Take a landscape photo by choosing a safe outdoor scene, frame horizon, include foreground, wait for good light, and practice steady camera handling.


Step-by-step guide to take a landscape photo
Learn Landscape Photography in 3 Hours | Full Beginners Guide
Step 1
Ask an adult for permission and help to go outside.
Step 2
Put on your comfortable shoes.
Step 3
Put on your sun hat or apply sunscreen.
Step 4
Walk with your adult to a safe outdoor spot where you can see a wide scene.
Step 5
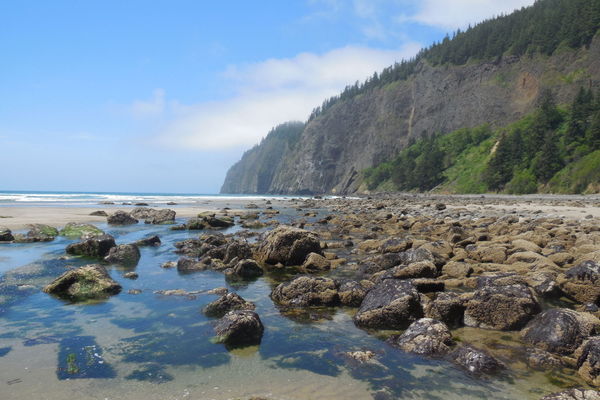
Choose a scene that has a clear horizon and something interesting to look at.
Step 6
Pick a nearby object like a rock tree or flower to include in the foreground.
Step 7
Position your camera so the horizon sits on the top third or bottom third of the screen.
Step 8
Look for soft even light or wait for morning or evening golden light before you shoot.
Step 9
Steady your camera by tucking your elbows in and holding it with both hands or using a stable surface.
Step 10
Take three photos of the scene from slightly different angles or heights.
Step 11
Review your photos and choose the one you like best.
Step 12
Share your finished creation on DIY.org.
Help!?
If we don't have a camera, sun hat, or a stable surface, what can we substitute so kids can still do the activity?
Use a smartphone or tablet instead of a camera, wear a wide-brimmed hat, long sleeves, or apply sunscreen from the list of sun protections, and steady the device on a backpack, wall, picnic table, or a rock as the stable surface.
My photos keep coming out blurry or the horizon looks wrong—what should we try?
Tuck your elbows in and hold the camera with both hands or rest it on a stable surface, turn on the on-screen grid to place the horizon on the top or bottom third, and take the three photos from slightly different angles so you can pick the sharpest when you review them.
How can this photo-walk be adjusted for younger toddlers versus older children?
For toddlers, ask an adult to accompany them closely, keep the walk short, let the adult help pick a nearby foreground like a flower or rock and hold the camera, while older children can follow all steps themselves, experiment with golden-hour light, and take their own three angled shots before choosing one to share.
What are simple ways to extend or personalize the landscape photo activity before sharing on DIY.org?
Try different foreground objects, shoot at morning or evening golden light as the instructions suggest, experiment placing the horizon on the top or bottom third, lightly crop or edit the chosen photo, or make a themed series or collage to upload to DIY.org.
Watch videos on how to take a landscape photo
Learn Landscape Photography in 10 Minutes! Absolute Beginner's Guide
4 Videos
Learn Landscape Photography in 10 Minutes! Absolute Beginner's Guide

Photography Tips For Kids
How to Draw Simple Landscape Picture🏘️ | Easy Drawing And Coloring for Kids | HooplaKidz How To

How to Capture Stunning Landscape Photos: A Beginner's Guide
Facts about outdoor photography for kids
📸 Most smartphones have a grid and level tool — use them to keep horizons straight!
🌅 The 'golden hour' (shortly after sunrise or before sunset) gives softer, warmer light that makes landscapes look magical.
🪨 Adding a foreground object (rock, flower, or person) creates depth and leads the viewer into the scene.
🤳 Simple steadying tricks — tucking elbows in, holding your breath, or leaning on a wall — can cut camera shake a lot.
🦺 Safety first: avoid cliff edges and slippery rocks, and always tell an adult where you're going on outdoor shoots.
How do you take a landscape photo outdoors with a child?
What materials do I need to take a landscape photo with my child?
What ages is taking landscape photos suitable for?
What are the benefits and safety tips for kids taking landscape photos?
