Create a trap in minecraft
Build a simple Minecraft trap using redstone, pressure plates, pistons, and blocks to capture mobs or items while learning about circuits and timing.


Step-by-step guide to build a simple Minecraft trap
50 Minecraft Traps
Step 1
Find and clear a flat area about 7 blocks long and 5 blocks wide to build your trap.
Step 2
Build a straight corridor 5 blocks long that is 2 blocks wide and 3 blocks high using your building blocks.
Step 3
Place two sticky pistons on opposite walls inside the corridor facing each other two blocks from the entrance.
Step 4
Put a solid block in front of each sticky piston so those blocks will act as a gate when the pistons extend.
Step 5
Place a pressure plate on the floor centered between the two pistons two blocks from the entrance.
Step 6
Lay a line of redstone dust from the pressure plate toward the left piston so the plate can send power to it.
Step 7
Lay a line of redstone dust from the pressure plate toward the right piston so the plate can send power to it.
Step 8
Place a redstone repeater in the left dust line between the plate and the left piston.
Step 9
Place a redstone repeater in the right dust line between the plate and the right piston.
Step 10
Click the left repeater until it shows a 2-tick delay to add timing to that side.
Step 11
Click the right repeater until it shows a 2-tick delay to add timing to the other side.
Step 12
Step on the pressure plate yourself to test the circuit and watch the pistons extend to block the corridor.
Step 13
Adjust the repeater delays by clicking them one click at a time until the pistons close after a mob steps on the plate.
Step 14
Lure a mob into the corridor and let it step on the pressure plate to be trapped by the extending pistons.
Step 15
Share a screenshot or video of your finished Minecraft trap on DIY.org.
Help!?
What can we use if sticky pistons or redstone repeaters are hard to find?
If sticky pistons are hard to get, use regular pistons placed on the opposite walls as in step 2 with your solid gate blocks in front, and if you lack repeaters move the pressure plate closer or add extra redstone dust so the signal still reaches each piston.
Why don't the pistons extend when I step on the pressure plate, and how do I fix it?
Make sure the redstone dust lines actually connect from the pressure plate to each piston, each repeater is oriented facing the piston (not backwards), and the solid blocks are positioned two blocks from the entrance so the pistons have something to push in front of them as described in the steps.
How can I adapt this trap for different age or skill levels?
For younger kids simplify by building a 3x2 corridor and skipping the repeaters so they only place pistons, pressure plate, and redstone dust, while older kids can add extra repeaters for timing, hide wiring behind walls, or add dispensers for more advanced trap behavior.
How can we extend or personalize the finished trap?
Personalize the trap by decorating the 7x5 build area, hiding the redstone under slabs or carpets, adding a lever reset or a repeater-based clock to reopen the gate, or connecting the pressure plate output to dispensers for extra effects.
Watch videos on how to build a simple Minecraft trap
Minecraft's Most Dangerous Traps!
4 Videos
Minecraft's Most Dangerous Traps!

Make a Homemade Fly Trap | Science Project
20 Traps To Prank Your Friends in Minecraft
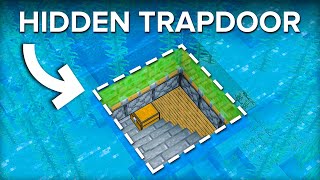
How To Build a Minecraft Underwater Trapdoor
Facts about Minecraft redstone and circuits
⚡ Redstone power reaches up to 15 blocks from its source, losing strength by 1 each block.
🧱 Pistons can push up to 12 blocks (the piston push limit) and are key for moving trap components.
🦶 Wooden pressure plates detect items and arrows, while stone pressure plates detect only players and mobs.
⏱️ Repeaters add 1–4 ticks of delay so you can precisely control timing in redstone circuits.
🌊 Water streams and trapdoors are commonly used to funnel mobs or items into collection points.
How do I build a simple Minecraft trap using redstone, pressure plates, pistons, and blocks to capture mobs or items?
What materials do I need to build a Minecraft mob/item trap with redstone and pistons?
What ages is building a redstone trap in Minecraft suitable for, and when should parents help?
What safety tips should parents follow when children build traps in Minecraft?
