Create a minecraft skin
Design and create your own Minecraft character skin using a simple editor, choose colors and patterns, then test it in the game to personalize gameplay.

Step-by-step guide to create a Minecraft skin
How To Make A Minecraft Skin - Full Guide
Step 1
Open your skin editor and start a new skin using a blank template (choose Steve or Alex).
Step 2
Pick base colors for skin hair and clothes using the color picker so you have a palette to use.
Step 3
Paint the head area with the skin tone color to create the face base.
Step 4
Paint the hair section using your chosen hair color to give your character a hairstyle.
Step 5
Paint the torso arms and legs with your chosen clothing colors to make the outfit.
Step 6
Add details like eyes mouth stripes buttons or patterns using a smaller brush or darker/lighter shades.
Step 7
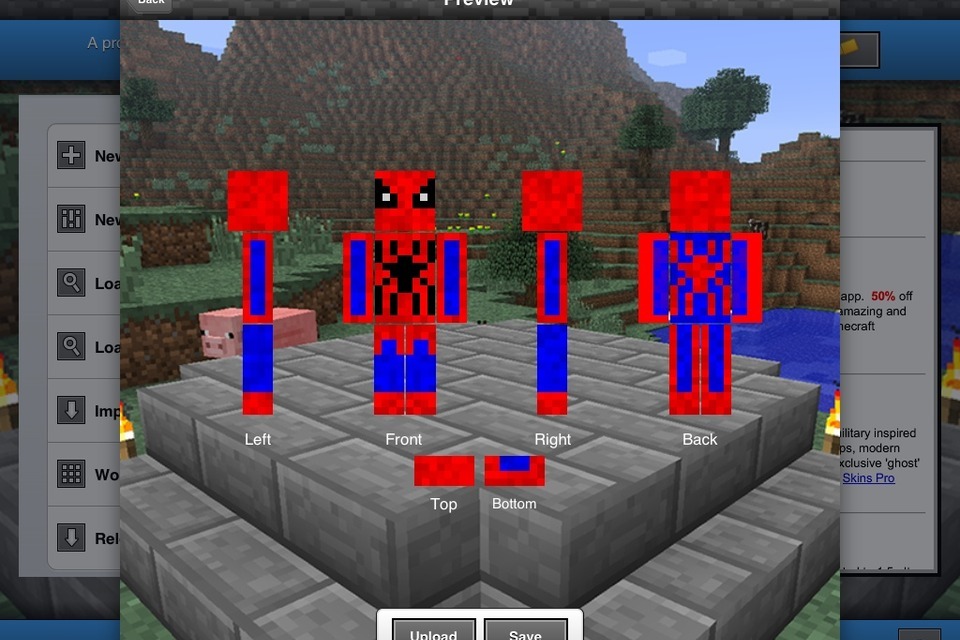
Use the 3D preview to rotate your character and check how each side looks.
Step 8
Make any small edits you spot in the preview by painting directly on the parts that need fixing.
Step 9
Click the download or save button to save your skin as a PNG file to your computer.
Step 10
Open Minecraft go to Profile or Skins select “Upload” and choose the PNG skin file you downloaded.
Step 11
Enter a world switch to third-person view and look at your character to test how the skin appears in-game.
Step 12
If you want to change something go back to the editor edit and repeat saving and uploading until you’re happy.
Step 13
Take a screenshot or short clip of your character and share your finished Minecraft skin creation on DIY.org
Help!?
What can we use if we can't access the online skin editor or specific tools like the color picker or smaller brush?
If you can't reach the online editor, use a simple pixel editor such as MS Paint or a mobile app like Skinseed/Skindex to open a blank Steve or Alex template, use the color picker and brushes there, then save/export the file as a PNG to follow the 'download or save' and 'Upload' steps.
My skin looks distorted or won't upload — what common mistakes should I check and fix?
Make sure you started with the correct Steve or Alex blank template, painted corresponding head/torso/arms/legs faces and hair areas, saved the skin at Minecraft's PNG dimensions (64x64), used the 3D preview to fix seams, and then re-uploaded that exact PNG in Profile → Skins.
How can I adapt this activity for different ages and skill levels?
For younger kids have them pick base colors and fill large areas with the color picker and a big brush, for elementary kids let them add simple eyes or patterns with the smaller brush, and for older kids introduce shading, detailed patterns, repeated save/download iterations, and 3D preview checks.
What are easy ways to extend or personalize the finished skin beyond the basic painting steps?
Add custom details like striped shirts, buttons, unique hairstyles on the head and torso sections, create alternate outfits by editing and saving multiple PNGs, record a timelapse of your painting, then take a screenshot or short clip and share the finished skin on DIY.org.
Watch videos on how to create a Minecraft skin
How To Create A Custom Minecraft Skin [EASY]
3 Videos
![How To Create A Custom Minecraft Skin [EASY]](https://img.youtube.com/vi/Zkcd5qAwv3w/mqdefault.jpg)
How To Create A Custom Minecraft Skin [EASY]
🎨 9-Year-Old Draws RON9IE Minecraft Skin! (Easy Step-by-Step for Kids) | Minecraft Art Tutorial
How to Make Your Own Minecraft Skin (Step-by-Step Guide) #Minecraft #MinecraftSkin #GamingTutorial
Facts about pixel art and character design
🎮 Minecraft has sold over 200 million copies worldwide, making it one of the best-selling video games ever.
🧩 Minecraft skins are tiny pixel images — modern skins use 64×64 pixels (older skins used 64×32).
🎨 Designing a skin is a form of pixel art: every single pixel you color changes how your character looks in-game.
🌐 There are millions of community-made skins online, so you can share, remix, and download new character looks.
🔐 Skins are tied to your Mojang/Microsoft account and appear to other players when you join multiplayer servers.
How do you design and create your own Minecraft character skin?
What materials and tools do I need to make a Minecraft skin?
What ages is creating Minecraft skins suitable for?
What are the benefits and safety tips for this activity?
