Stitch a creature
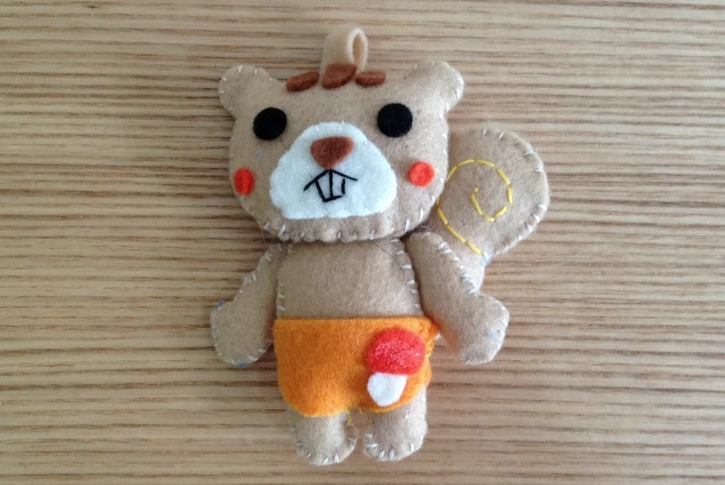
Sew a small stuffed creature from felt using simple stitches, with adult supervision, safe needles, stuffing, and decorations to learn hand-sewing skills.


Step-by-step guide to stitch a creature
How to Sew an Elephant : Adorable | Sewing Tutorial Beginners Plushie Stuffed Animal
Step 1
Clear a flat workspace and lay out all your materials so everything is easy to reach.
Step 2
Use a fabric marker to draw a simple creature shape like a circle blob or heart on one piece of felt and trace the same shape on a second piece.
Step 3
Cut out both felt shapes carefully along the lines.
Step 4
Arrange decorations on one felt piece and attach them by sewing or using glue so your creature has a face and details.
Step 5
Thread a needle with a length of embroidery thread about as long as your arm.
Step 6
Tie a small knot at the end of the thread so the stitches will not pull through the felt.
Step 7
Place the two felt pieces together with decorated side facing out and pin or clip the edges leaving a 2 inch gap unpinned for stuffing.
Step 8
Sew around the edge using a running stitch or blanket stitch and stop before the gap so the creature stays open for stuffing.
Step 9
Push small amounts of polyester stuffing into the gap until the creature is puffy and shaped the way you like.
Step 10
Finish by sewing the remaining gap closed with neat small stitches to keep the stuffing inside.
Step 11
Trim any extra thread and smooth the felt so your creature looks tidy and ready to play.
Step 12
Share your finished creature on DIY.org
Help!?
What can we use instead of felt, a fabric marker, embroidery thread, or polyester stuffing if they're hard to find?
If felt or polyester stuffing are hard to find, use fleece or an old cotton t-shirt for the body and pillow stuffing or clean scrap fabric for the filling, substitute embroidery thread with yarn and a plastic yarn needle, and mark shapes with chalk or a washable marker instead of a fabric marker.
My stitches keep pulling through or the knot slips while sewing the edges—what should I try?
If stitches pull through or the knot comes loose while sewing around the edge, reinforce the seam by switching to a backstitch or blanket stitch, tie a double knot at the start as in the 'Tie a small knot' step, and use thicker thread or yarn for stronger seams.
How can I adapt this stitching activity for younger or older kids?
For younger children have an adult pre-cut the felt shapes, use fabric glue, large stickers, or a plastic needle with yarn for the 'Arrange decorations' and sewing steps, while older kids can practice small blanket stitches, add embroidered details, or create more complex creature shapes.
How can we extend or personalize the creature after finishing the basic stitches and stuffing?
To personalize and extend the project, sew on a small pocket or keyring loop before closing the 2 inch gap, embroider a name or pattern on the felt, add buttons or sequins during the 'Arrange decorations' step, or make a family of creatures in different sizes to share on DIY.org.
Watch videos on how to stitch a creature
How to stitch a plush toy for your kid | hand sew a stuffed animal repair DIY | Dad Basics EP. 001
4 Videos
How to stitch a plush toy for your kid | hand sew a stuffed animal repair DIY | Dad Basics EP. 001
Sew a Sheep Toy: A Sewing Guide to Making Stuffed Toys

How to make plushies, a beginner tutorial, YOU CAN DO IT

Sew Together Tuesday: How to Make a Teddy Bear Stuffed Animal with Cuddle®
Facts about hand-sewing for kids
🪡 Felt is one of the oldest textiles—people have used felt for thousands of years, especially in Central Asia.
🧵 Blunt tapestry or embroidery needles are kid-friendlier than sharp needles and are great for sewing felt safely.
✂️ Many cute stuffed creatures can be made with just two felt pattern pieces, a whipstitch around the edge, and some stuffing.
🧸 The modern teddy bear became popular in the early 1900s and helped start the worldwide love for plush toys.
♻️ Polyester fiberfill is a common stuffing—it's lightweight, washable, and keeps toys fluffy and cuddly.
How do you stitch a small felt creature with a child?
What materials do I need to sew a small stuffed felt creature?
What ages is hand-sewing a felt creature suitable for?
What safety tips and benefits does sewing a felt creature offer?
