Draw upside down
Draw an upside down picture by turning your paper and copying shapes from a reference, practicing observation, proportions, and hand eye coordination.


Drawing Apps
Step-by-step guide to draw an upside-down picture
Drawing Exercise 2 - Upside Down Drawing
Step 1
Put your paper pencil eraser and coloring materials on a flat table.
Step 2
Place the reference picture upright in front of you where you can see it clearly.
Step 3
Turn your drawing paper 180 degrees so it is upside down compared to the reference.
Step 4
Choose one small simple shape in the reference to start copying.
Step 5
Look carefully at that shape and notice its edges angles and how big it is.
Step 6
Lightly draw that shape onto your upside-down paper with your pencil.
Step 7
Select the next shape that touches or is near the first shape in the reference.
Step 8
Look at how the new shape sits beside the first shape and notice the distance between them.
Step 9
Draw the new shape in the same position on your upside-down paper.
Step 10
Keep repeating Steps 4 to 9 to copy neighboring shapes until the whole picture is sketched.
Step 11
Look at your whole sketch and erase or adjust any lines that don’t match the reference.
Step 12
Flip your paper right-side-up to see how the picture looks the right way around.
Step 13
Color your drawing using your coloring materials to make it bright and fun.
Step 14
Write your name and the date on your artwork so everyone knows you made it.
Step 15
Share your finished creation on DIY.org.
Help!?
What can we use instead of the 'coloring materials' or specific pencils listed in step 1 if they're hard to find?
If you don't have the coloring materials from step 1, use crayons, watercolor paints, colored construction-paper cutouts glued on before step 13, or shade with a regular pencil as a substitute.
My drawing looks distorted when I flip it in step 12—what should I do?
If the image looks distorted when you flip it in step 12, follow step 11 to lightly erase and adjust the wrong shapes by re-checking the edges, angles, and relative sizes in step 5 before redrawing them in steps 6–9.
How can I adapt the upside-down drawing steps for younger kids or older kids?
For younger children, simplify steps 4–9 by choosing very large, simple shapes and using thick crayons or markers, while older kids can add fine detail, shading, and accurate angles after flipping in step 12.
How can we make the finished artwork more unique before sharing it on DIY.org in step 15?
To personalize and enhance the artwork before sharing on DIY.org in step 15, add a patterned background or texture during step 13, write a short title with your name and date in step 14, and take a photo-series showing the upside-down process.
Watch videos on how to draw an upside-down picture
How to Do The Upside-Down Drawing Exercise
4 Videos

How to Do The Upside-Down Drawing Exercise
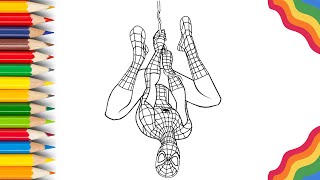
Learn How to Draw Spiderman Handing Upside Down | Step By Step Drawing Tutorial For Kids

How to draw Upside Down (My version)
Drawing Upside Down Faces (Trick to Draw Better!)
Facts about observational drawing for kids
🎨 Betty Edwards popularized the upside-down drawing trick in her book "Drawing on the Right Side of the Brain."
🔁 Turning a picture upside down helps your brain see raw shapes instead of labels — a neat trick to boost observation.
🧠 Upside-down and contour drawing exercises engage visual perception skills often linked to right-brain processing.
✍️ Regular observational drawing practice improves hand–eye coordination and makes judging proportions easier.
🖼️ Artists from Leonardo da Vinci to modern illustrators study proportions closely; copying references is a time-tested learning shortcut.
How do you do the upside-down drawing activity with a child?
What materials do I need for an upside-down drawing activity?
What ages is the upside-down drawing activity suitable for?
What are the benefits and variations of upside-down drawing?
