Draw with dots
Create pictures by drawing with dots using markers, paint, or cotton swabs to explore pointillism, color blending, and repeating patterns.


Step-by-step guide to draw with dots
How to Draw Pictures Connecting Dots/ Easy Tricks for Kids
Step 1
Decide what picture you will make and pick a simple idea like a sun flower fish or house.
Step 2
Gather your art tools and choose whether you will use markers OR paint with cotton swabs.
Step 3
Protect your table by covering it with paper towel.
Step 4
Put your paper flat on the protected table in front of you.
Step 5
Lightly sketch a simple outline of your picture with your pencil.
Step 6
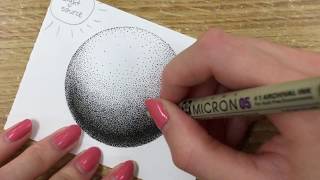
Practice making big and small dots on a scrap piece of paper until you like the dot sizes.
Step 7
Start filling the largest area of your drawing with evenly spaced dots using your chosen tool.
Step 8
Add dots of a second color close to the first color to make the colors look blended.
Step 9
Create repeating patterns by repeating the same dot sizes and colors across sections of your picture.
Step 10
Use tiny dots to add small details like eyes lines or texture.
Step 11
Let paint dry completely or wait a minute if you used markers before touching the paper.
Step 12
Clean up your tools and toss used cotton swabs into the trash.
Step 13
Sign your name on your artwork and give it a title.
Step 14
Share your finished creation on DIY.org
Help!?
What can we use if we don't have cotton swabs or markers?
If you don't have cotton swabs use a pencil eraser tip, rounded toothpick, small pom-pom, or the end of a paintbrush for dots, and if you lack markers try watered-down paint and practice dot sizes on a scrap piece of paper first.
My dots are smudging or bleeding — how can I fix that?
Blot excess paint from each cotton swab onto the paper towel before dotting, work in small sections and let paint dry completely (or wait a minute for markers) before touching or adding a second color close to the first.
How can I adapt this dot-painting activity for different ages?
For toddlers pre-sketch the simple outline and use markers or large cotton balls for big dots with close supervision, while older kids can use paint with cotton swabs to practice tiny dot sizes, create repeating patterns, and add detailed textures.
How can we extend or personalize the finished artwork?
Build on the activity by adding blended spots using a second color close to the first, repeating dot patterns across sections, gluing on small collage pieces, then sign your name, give it a title, and share on DIY.org.
Watch videos on how to draw with dots
How to Draw Using Dots (Stippling Tutorial) - for Beginners
4 Videos
How to Draw Using Dots (Stippling Tutorial) - for Beginners
"Easy Dot Drawing Step by Step ✍️Fun Drawing for Beginners Viral Satisfying Drawing 🌀✨
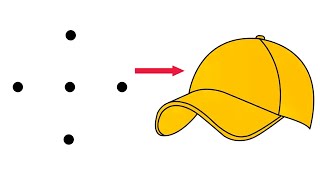
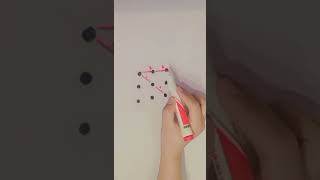
How to Draw a Cap Using 5 Dots | Easy Drawing Trick for Beginners
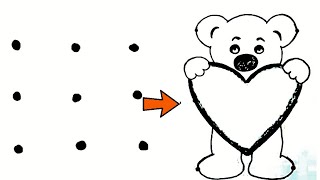
Easy pencil drawing | How to draw a cute Teddy bear from 9 dots | Teddy bear Dots Drawing| Drawing
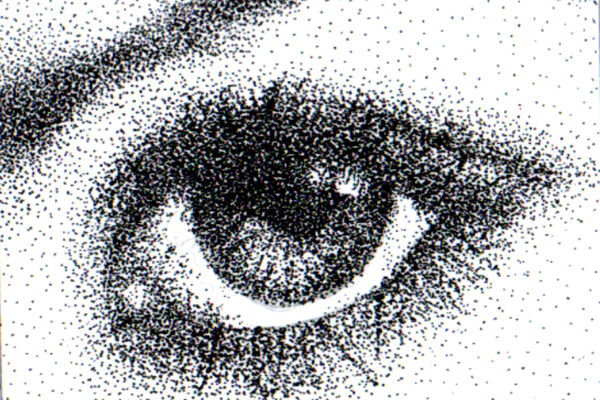
Facts about pointillism and dot painting
🎨 Pointillism started in the 1880s and creates pictures from thousands of tiny dots so your eye mixes the colors.
🖼️ Georges Seurat spent years refining his dot technique for "A Sunday Afternoon on the Island of La Grande Jatte."
🧠 Optical mixing means your brain blends nearby dots of different colors into a new color — no palette needed!
🖊️ Household tools like cotton swabs, marker tips, and the ends of brushes make great dotting tools for different sizes.
🌈 Dot patterns can make vibrant color blends and shimmering effects, similar to how pixels form images on screens.
How do you create pictures by drawing with dots (pointillism) with markers, paint, or cotton swabs?
What materials do I need to draw pictures with dots using markers, paint, or cotton swabs?
What ages is drawing with dots (pointillism) suitable for?
What are the benefits, safety tips, or variations for dot drawing activities?
