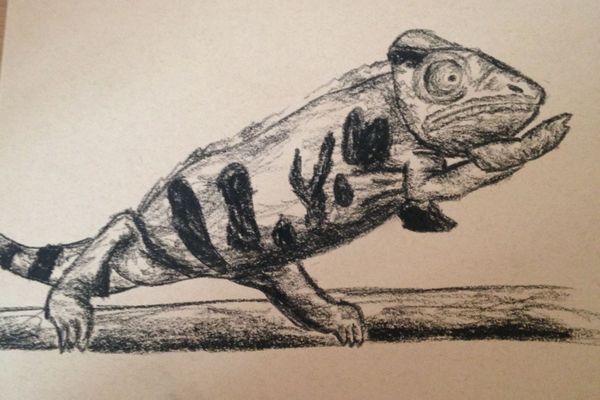
Draw a real animal
Observe a real animal or photo, then draw it focusing on proportions, texture, and habitat details while practicing shading and accurate colors.

Drawing Apps
Step-by-step guide to draw a real animal
How to Draw Animals for Kids 🐋🐯🦈🐘🐬🦏🐢🦁 | Easy Step-by-Step Drawing Tutorial
Step 1
Gather all your materials and put them on a clean flat surface.
Step 2
Pick one real animal to watch or select one clear photo to use as your reference.
Step 3
Study the animal for 3 to 5 minutes like a detective noticing big shapes and how the head body legs and tail relate.
Step 4
Lightly draw simple shapes to block in the animal’s main parts using one pencil.
Step 5
Hold your pencil up to the reference to measure and compare lengths then gently adjust your shapes to match the proportions.
Step 6
Refine the simple shapes into a smooth outline that shows the animal’s true contours.
Step 7
Draw the main habitat elements around the animal to show where it lives and to place it correctly in space.
Step 8
Add texture marks such as short strokes for fur feather lines or small scales following the animal’s form.
Step 9
Apply light shading with your lighter pencil to show where the light hits and where gentle shadows fall.
Step 10
Darken the deepest shadow areas to increase contrast and make the animal look three-dimensional.
Step 11
Test color choices on a scrap of paper to match the reference before coloring your drawing.
Step 12
Lay down base colors lightly across each area of the animal using your colored pencils or markers.
Step 13
Layer additional colors and add tiny colored strokes to build accurate markings and texture.
Step 14
Add final small details and sign your name on the drawing.
Step 15
Share your finished creation on DIY.org.
Help!?
I don't have colored pencils—what can I use instead?
Use crayons, washable markers, or watercolor paints as substitutes for colored pencils and always test your color choices on the scrap of paper (step 11) before applying them.
My animal still looks flat after drawing—what should I try?
Follow steps 8–9 by applying light shading with your lighter pencil where the light hits and then darkening the deepest shadow areas to increase contrast and make the animal look three-dimensional.
How can I adapt this activity for younger or older kids?
For younger children shorten the detective observation to 1–2 minutes and focus on blocking in big simple shapes with one pencil (steps 3–4) while older kids should spend more time measuring proportions (step 5), refining contours (step 6), and layering textures and colors (steps 11–12).
How can we extend or personalize the finished drawing?
Add and detail the main habitat elements around the animal (step 7), experiment with mixed-color layers on your scrap of paper (step 11) before applying them (step 12), then sign your name and share the finished creation on DIY.org.
Watch videos on how to draw a real animal
How to Draw Wild Animals for Kids | Easy Step-by-Step Drawing Tutorial! 🦛🦏🐅🐘🐆
4 Videos
How to Draw Wild Animals for Kids | Easy Step-by-Step Drawing Tutorial! 🦛🦏🐅🐘🐆
How to Draw Wild Animals for Kids 🦕🦖🐉🐋🦈🐊 | Easy Step-by-Step Drawing Tutorial
How To Draw A Realistic Wolf
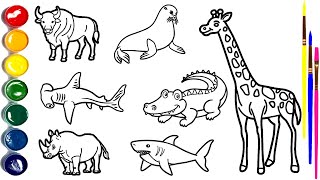
How to Draw Animals for Kids 🦏🦈🐊🦒 | Easy Step-by-Step Drawing Tutorial
Facts about observational drawing for kids
🦅 John James Audubon produced 435 life-size bird prints in his famous book 'The Birds of America' (1827–1838).
✏️ Artists often begin observational drawings with light gesture lines to lock in proportions before adding details.
🎨 Human eyes have three types of color-sensitive cones (roughly red, green, and blue), which is why these primaries are key for mixing colors.
🐾 Many animals use texture and pattern—like a tiger's stripes or a leaf insect's body—to camouflage in their habitat.
🌓 Chiaroscuro, a dramatic use of light and shadow used by masters like Caravaggio and Rembrandt, helps make flat drawings look three-dimensional.
How do I teach a child to draw a real animal from observation?
What materials are needed to draw a real animal accurately?
What ages is drawing a real animal from life or photo suitable for?
What are the benefits and safe variations of animal observation drawing?
