Share a time-lapse of a drawing from start to finish
Record and share a time lapse video of creating a drawing from blank paper to finished artwork, experimenting with speed, composition, and color choices.

Drawing Apps
Step-by-step guide to record and share a time-lapse video of a drawing
How to draw a banana - Time Lapse (Long Version)
Step 1
Clear your table so you have plenty of room to work.
Step 2
Lay your blank paper flat in the middle of the table.
Step 3
Tape the corners of the paper down so it will not move while you draw.
Step 4
Make a small thumbnail sketch on scrap paper to plan where things will go.
Step 5
Turn on a lamp or move your paper near a bright window so the paper is evenly lit.
Step 6
Put a tripod or a stack of books near your paper to hold your device steady.
Step 7
Place your device on the tripod or books so it will not fall.
Step 8
Move the device until the whole paper fills the screen and looks straight.
Step 9
Open your camera app and switch it to time-lapse or interval mode.
Step 10
Pick a recording speed or interval that you want to try.
Step 11
Record a short 10-second test clip to check your setup.
Step 12
Play back the test clip and look for good framing and brightness.
Step 13
Adjust the light or device position now if the test clip needs fixing.
Step 14
Start the full time-lapse recording and create your drawing from a light pencil sketch to finished colors and details.
Step 15
Share your finished time-lapse video of the drawing on DIY.org.
Help!?
What can I use instead of a tripod if I don't have one?
Use a stack of books or a sturdy box as described in the instructions to hold your device steady and secure it with elastic bands or tape while you also tape the paper corners down.
My test clip looks shaky or too dark—what should I check before recording the full time-lapse?
Follow the step to record a short 10-second test clip, then re-tape the paper corners, tighten or reposition the tripod/books, and move the lamp or paper nearer a bright window to improve steadiness and brightness before retrying.
How can I adapt this activity for younger or older kids?
For younger children have an adult set up the taped paper, tripod/books, and camera and let them draw simple shapes from a thumbnail sketch, while older kids can plan a detailed thumbnail, use interval mode with longer sessions, and add layers of color and fine details.
How can we improve or personalize the time-lapse before sharing it on DIY.org?
Enhance the final time-lapse by trying different recording speeds or intervals, adding a title card or background music, and including close-up shots by moving the device on the tripod/books for variety before you share on DIY.org.
Watch videos on how to create a time-lapse video of a drawing
Adobe Fresco Time Lapse Drawing Tutorial
3 Videos
Adobe Fresco Time Lapse Drawing Tutorial
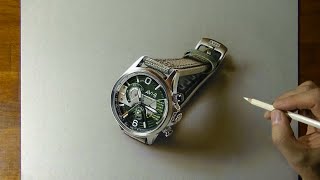
How to draw a wristwatch - Time Lapse (Long Version)
How to create a timelapse with Krita 5.0
Facts about drawing and time-lapse video techniques
🎥 Time-lapse cameras capture frames at much lower rates than normal video, turning hours of work into seconds of action.
⏱️ You can turn a 60-minute drawing session into a 1-minute, 30 fps time-lapse by snapping one photo every 2 seconds.
🖌️ Speed painting is a fun challenge where artists finish full artworks in short time limits like 10, 30, or 60 minutes.
🎨 Many time-lapse artists begin with quick thumbnail sketches to experiment with composition before adding color and details.
📱 Most smartphones have a built-in time-lapse mode or apps that stabilize and compress footage, so you don't need fancy gear to start!
How do I record a time-lapse drawing video with my child from start to finish?
What materials do I need to record and share a drawing time-lapse?
What ages are suitable for making a time-lapse drawing video?
What are the benefits of recording and sharing a time-lapse drawing?
